
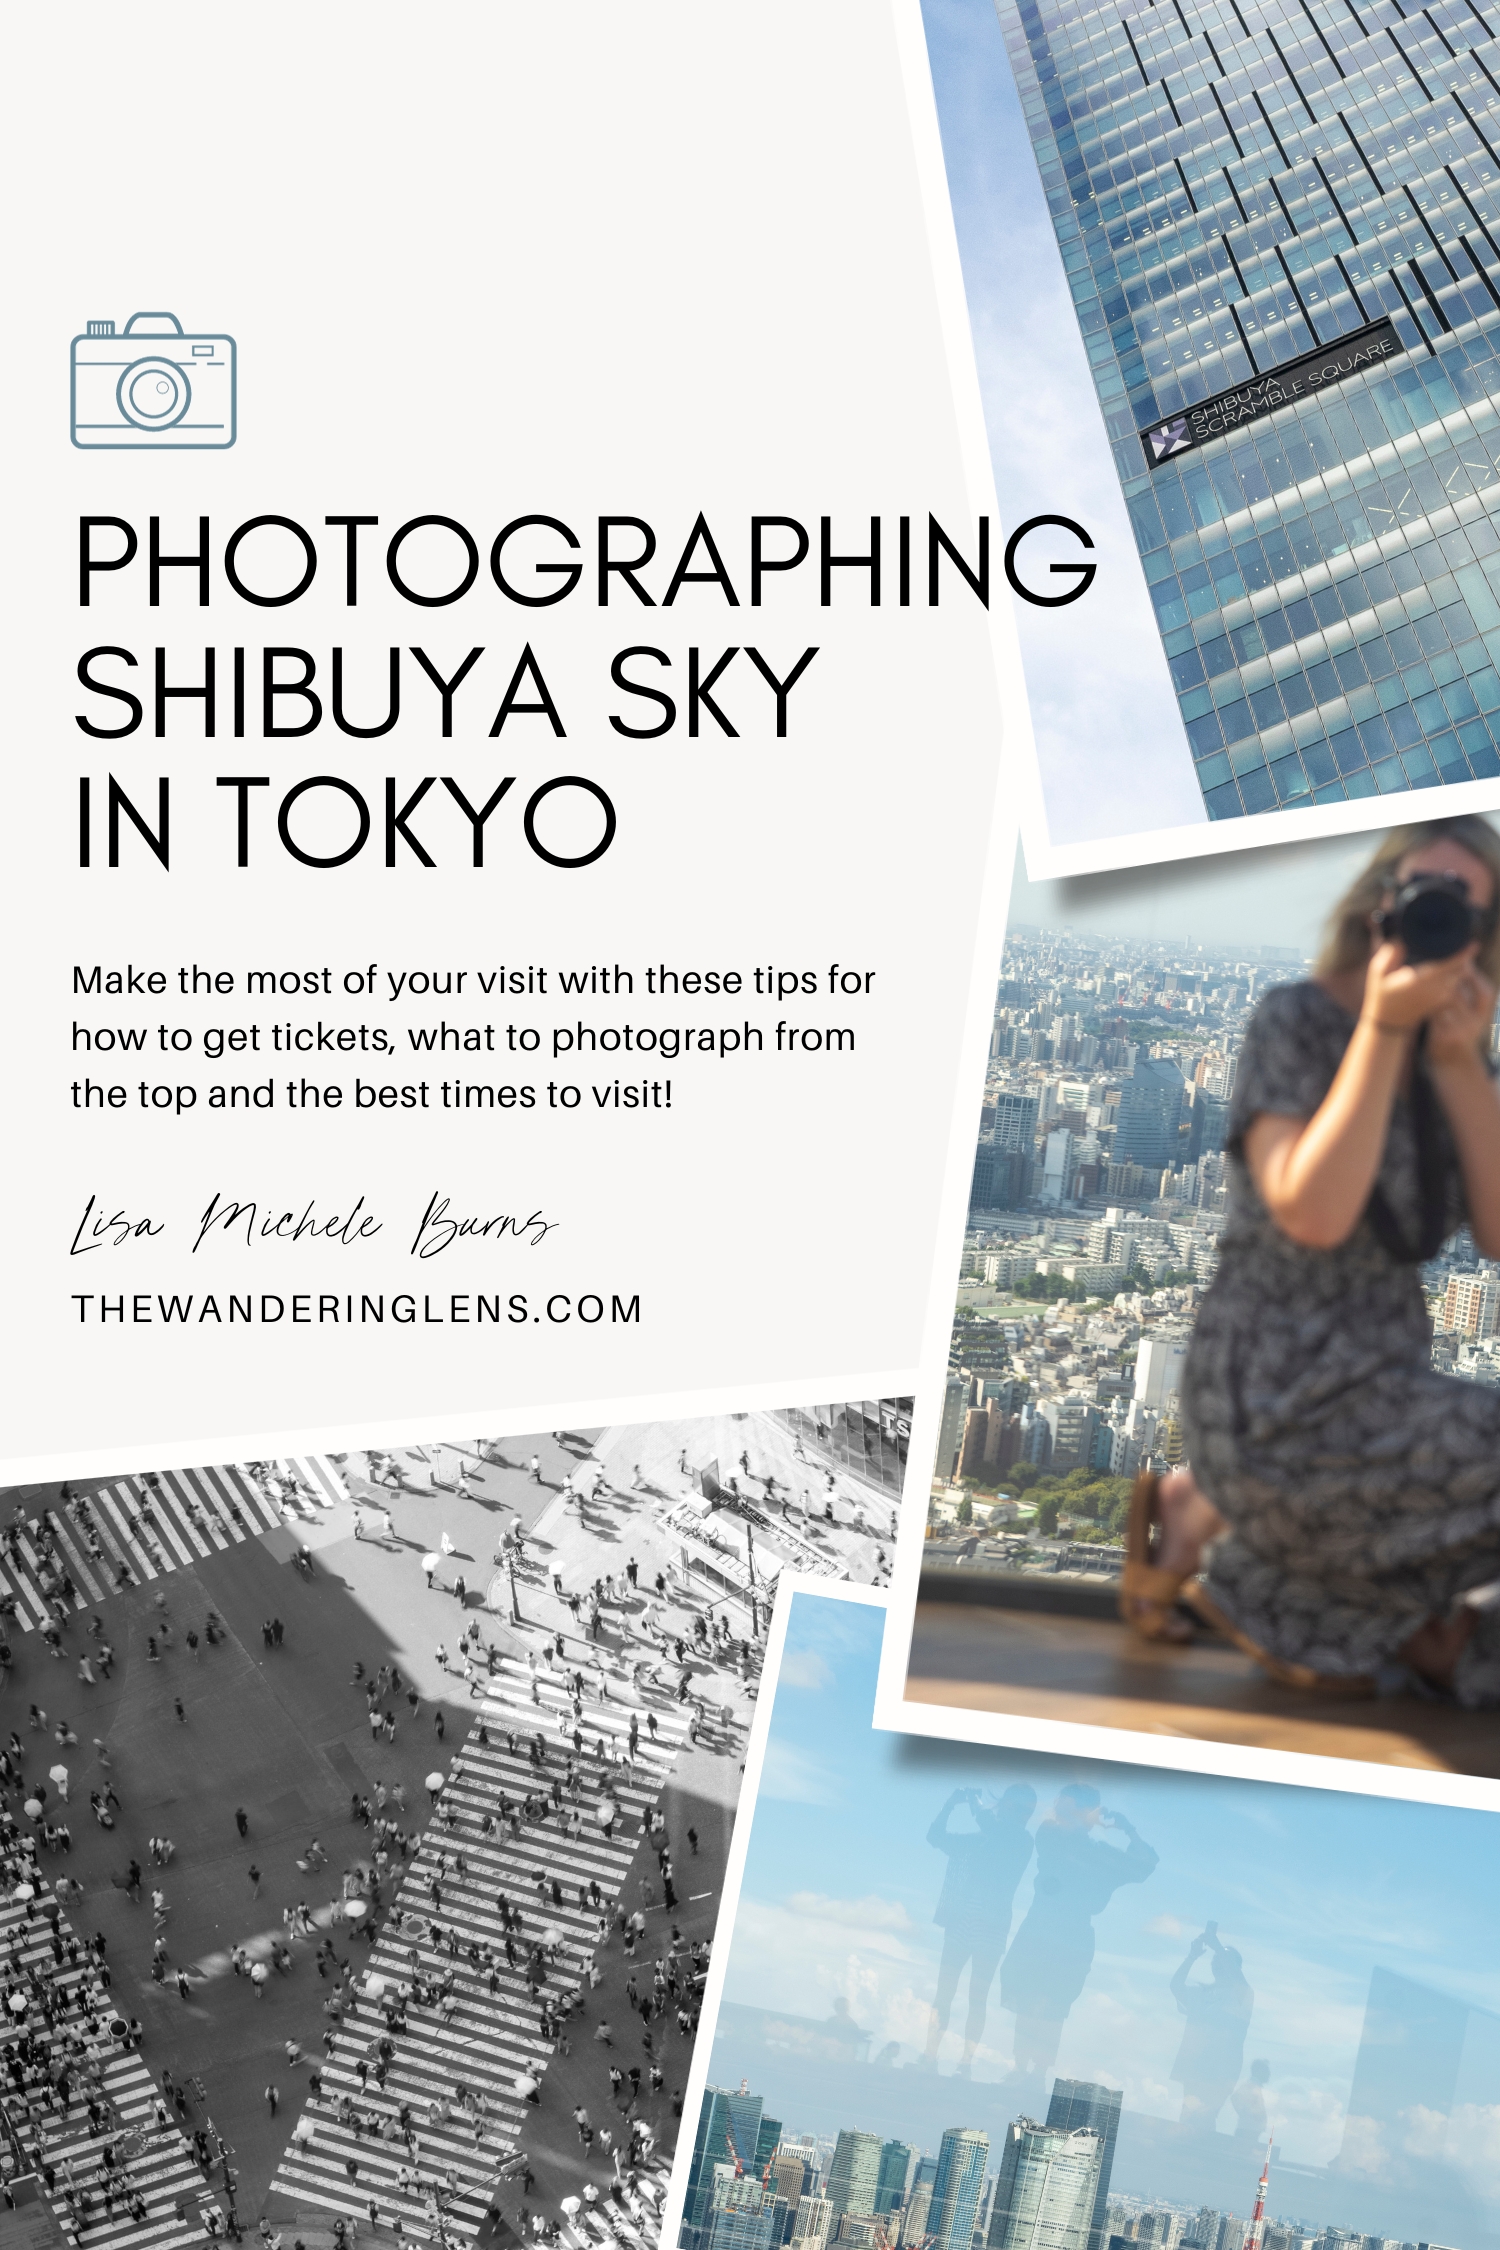
Must-See Tokyo Photography Location: Shibuya Sky
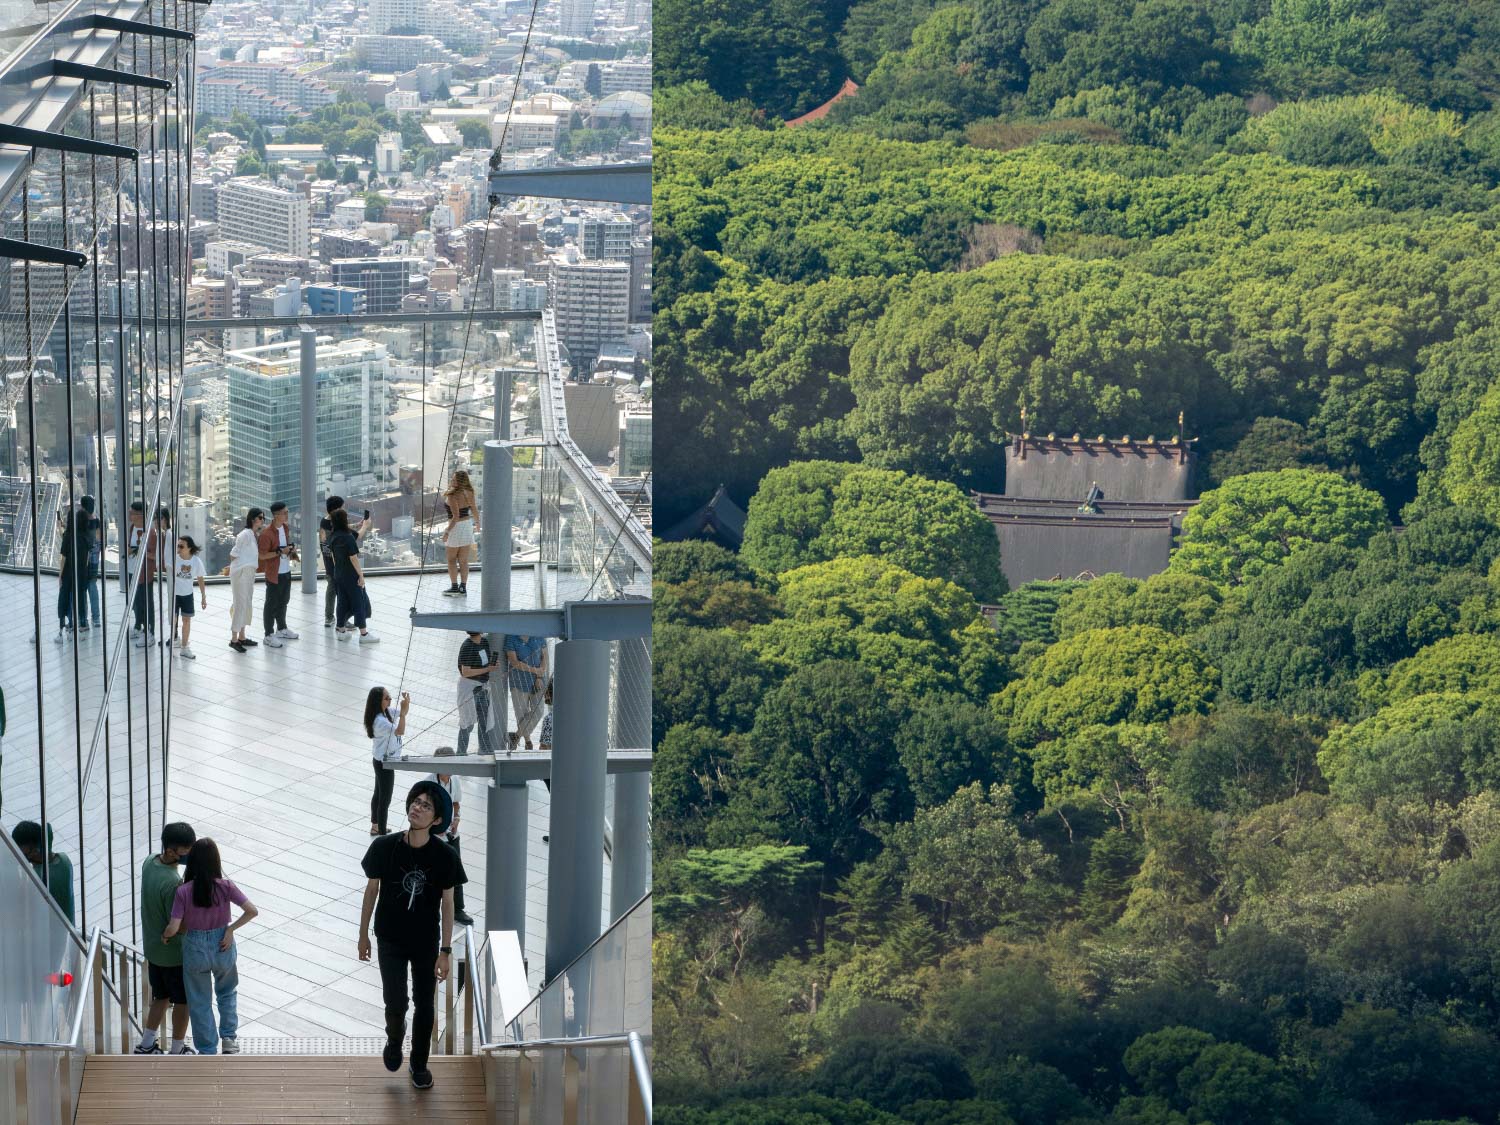
Shibuya Sky is one of Tokyo’s newest and most photogenic attractions, offering breathtaking views of the city skyline from a height of 229 meters. You’ll feel like you’re walking on air above the city and it’s no surprise this observation deck has quickly become a must-visit for those seeking a bird’s eye view of the famous Shibuya Crossing.
Having just visited last week to take a peek and get firsthand experience and imagery, this article will share how to visit Shibuya Sky, some tips for photographing from the top and how to make the most of your experience.
From sunrise to sunset, the lighting conditions at Shibuya Sky are ever-changing, offering photographers an array of opportunities to experiment with various techniques and capture the cityscape in different moods. You can witness the captivating transformation of the city as the sunlight gradually illuminates the high-rise buildings, or capture the vibrant neon glow as night falls, turning Tokyo into a dynamic and colourful show below.
To start off, I want to make it clear that you’ll need to plan your visit to Shibuya Sky. It’s currently very popular, and as such, tickets sell out in advance, making it nearly impossible to rock up and get immediate access on the day. If you’re keen to photograph sunset from Shibuya Sky, you’ll need to reserve your tickets well in advance of the date, I’d suggest booking a month out to secure the time of your choice.
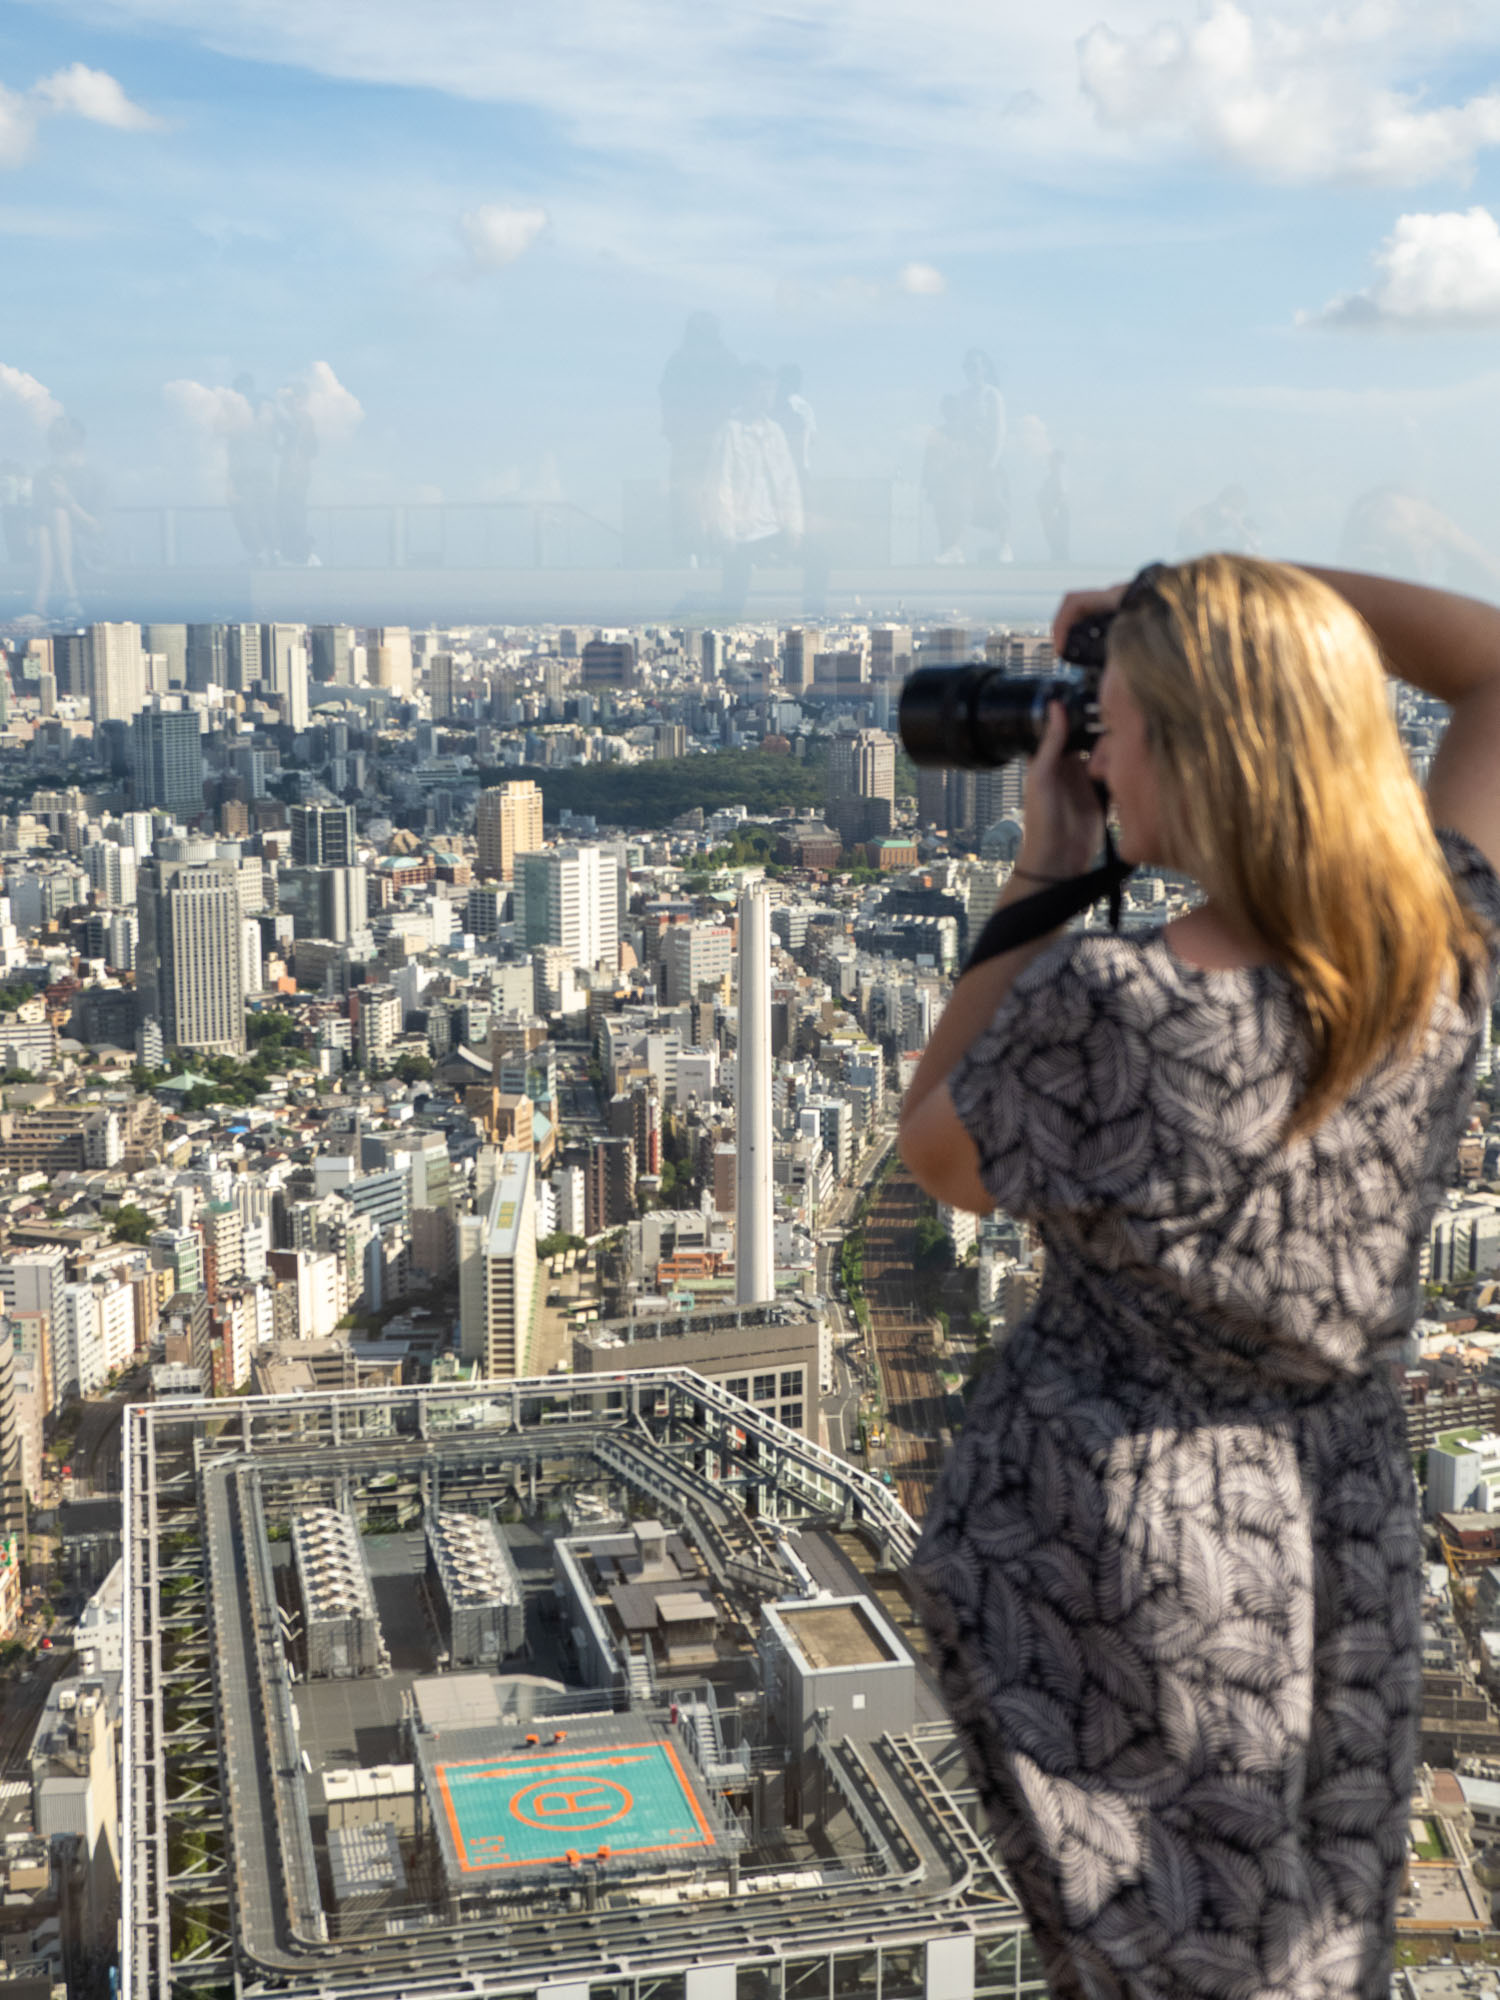
Located in the heart of Shibuya, Tokyo‘s most vibrant neighbourhood, Shibuya Sky offers photographers an unrivaled opportunity to capture the bustling energy and mesmerising beauty of the city. From the top on level 46, you can enjoy sweeping panoramic views of the Tokyo skyline, including the iconic Shibuya Crossing, towering skyscrapers, and the distant Mount Fuji on a clear day.
What can you photograph from Shibuya Sky?
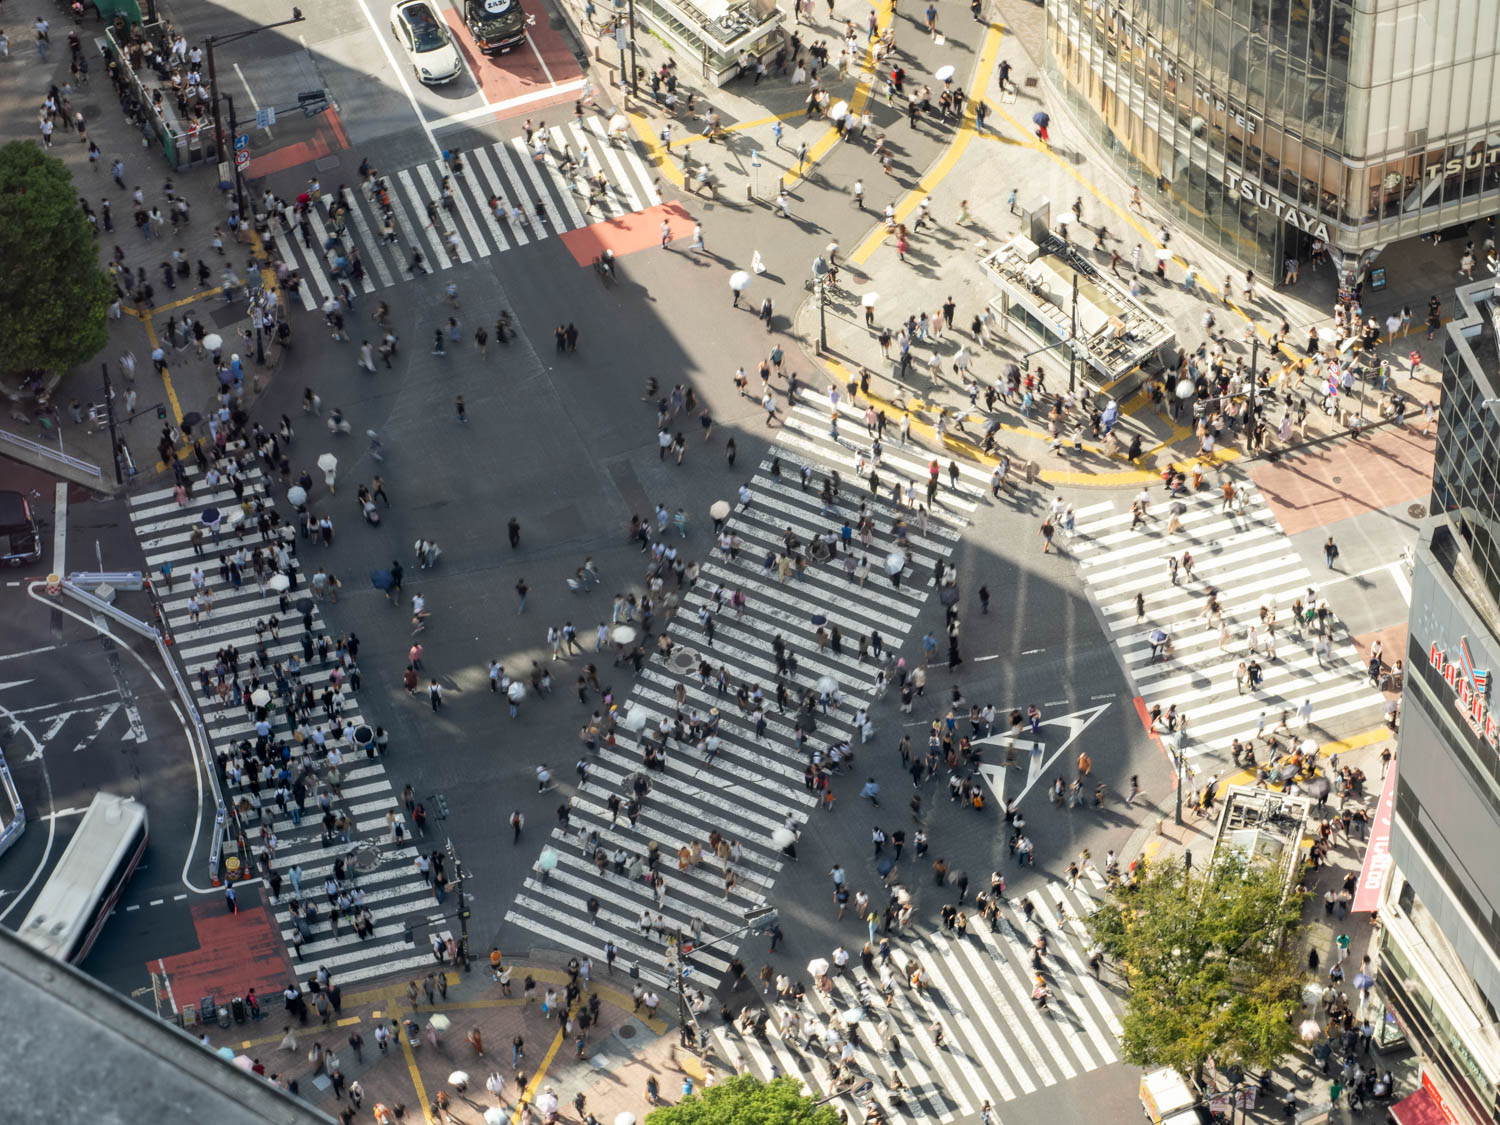
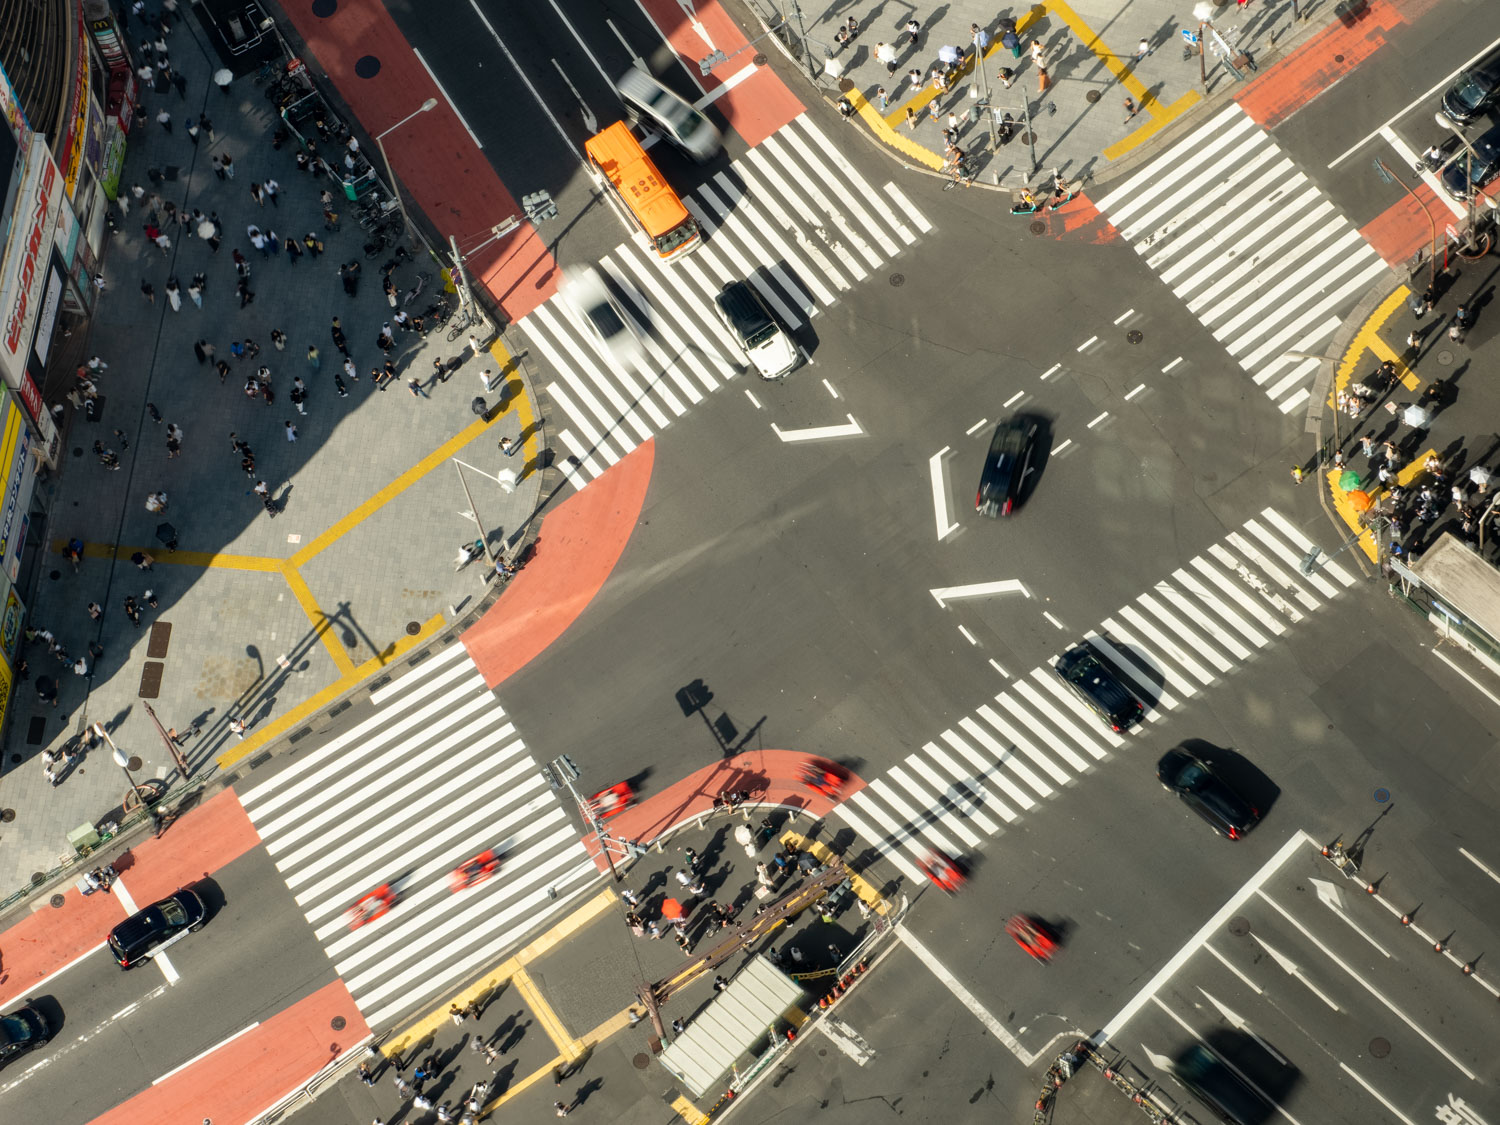
1. Shibuya Crossing: This iconic intersection is a must-snap spot from the top of Shibuya Sky. Capture the bustling crowd and the organised chaos of the world’s busiest pedestrian crossing. Aim for a straight-down bird’s-eye view to emphasize the unique patterns and symmetrical lines formed by the many intersecting roads. There’s an equally photogenic crossing to the right too…focus on Shibuya Crossing, then pan your camera to the right a little to see a crossing with red and yellow lines, I had a lot of fun photographing this one!
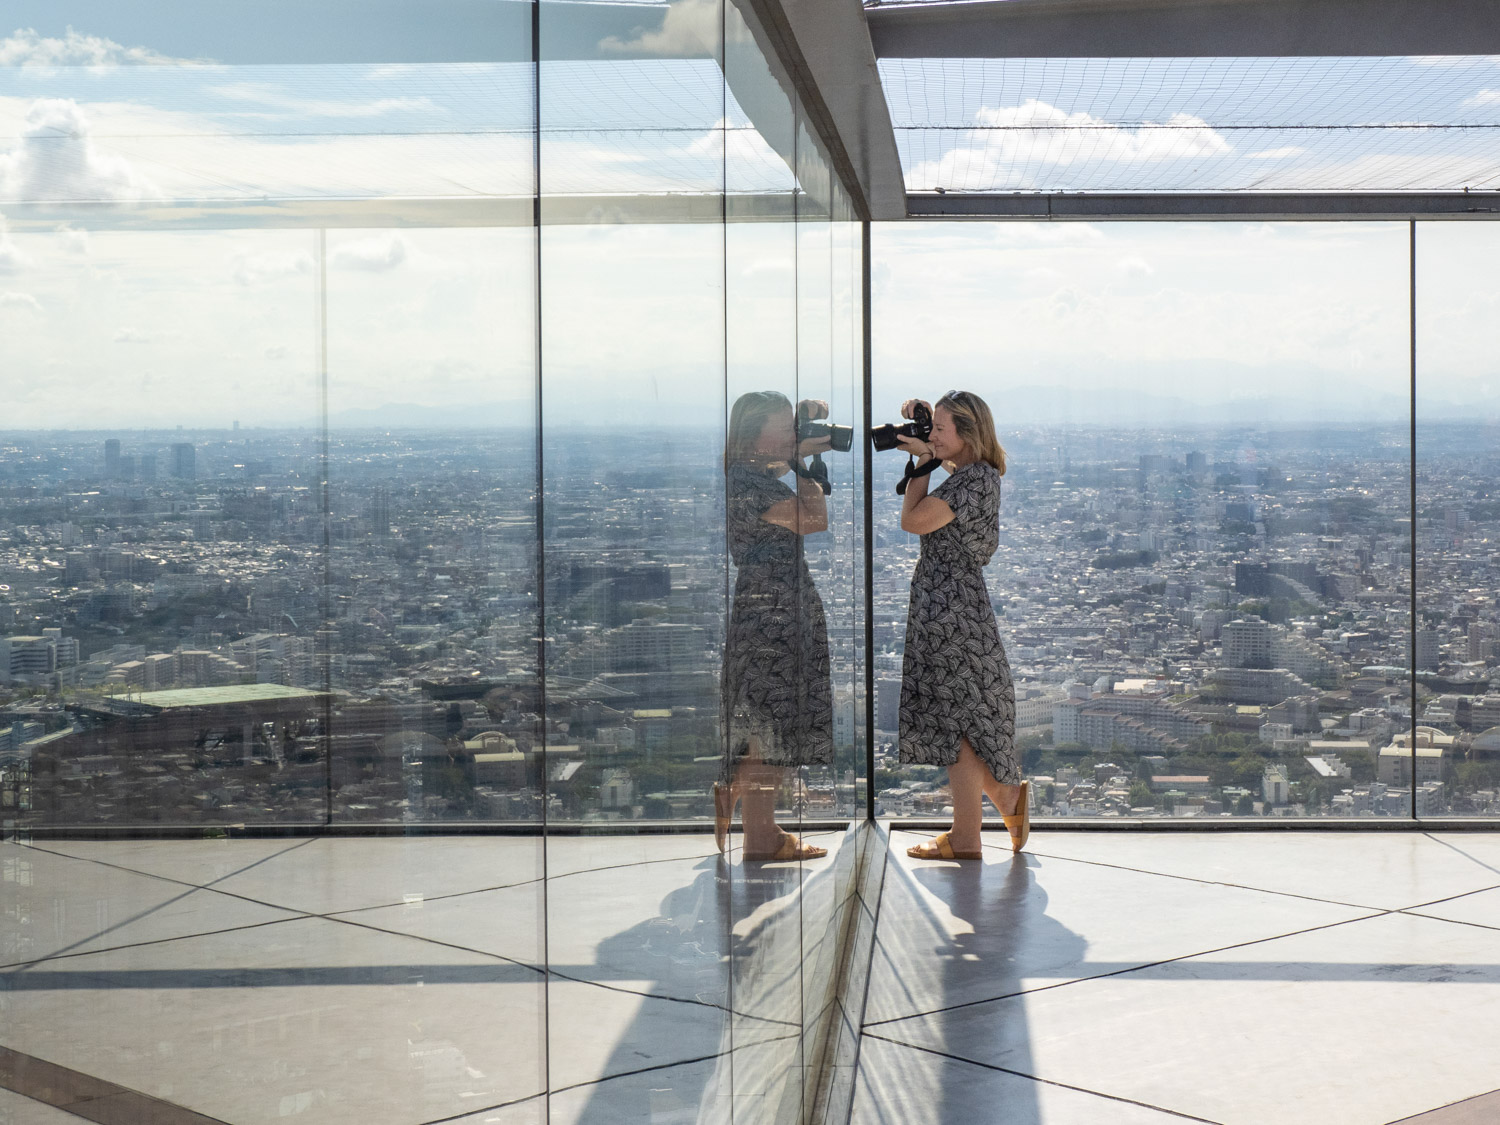
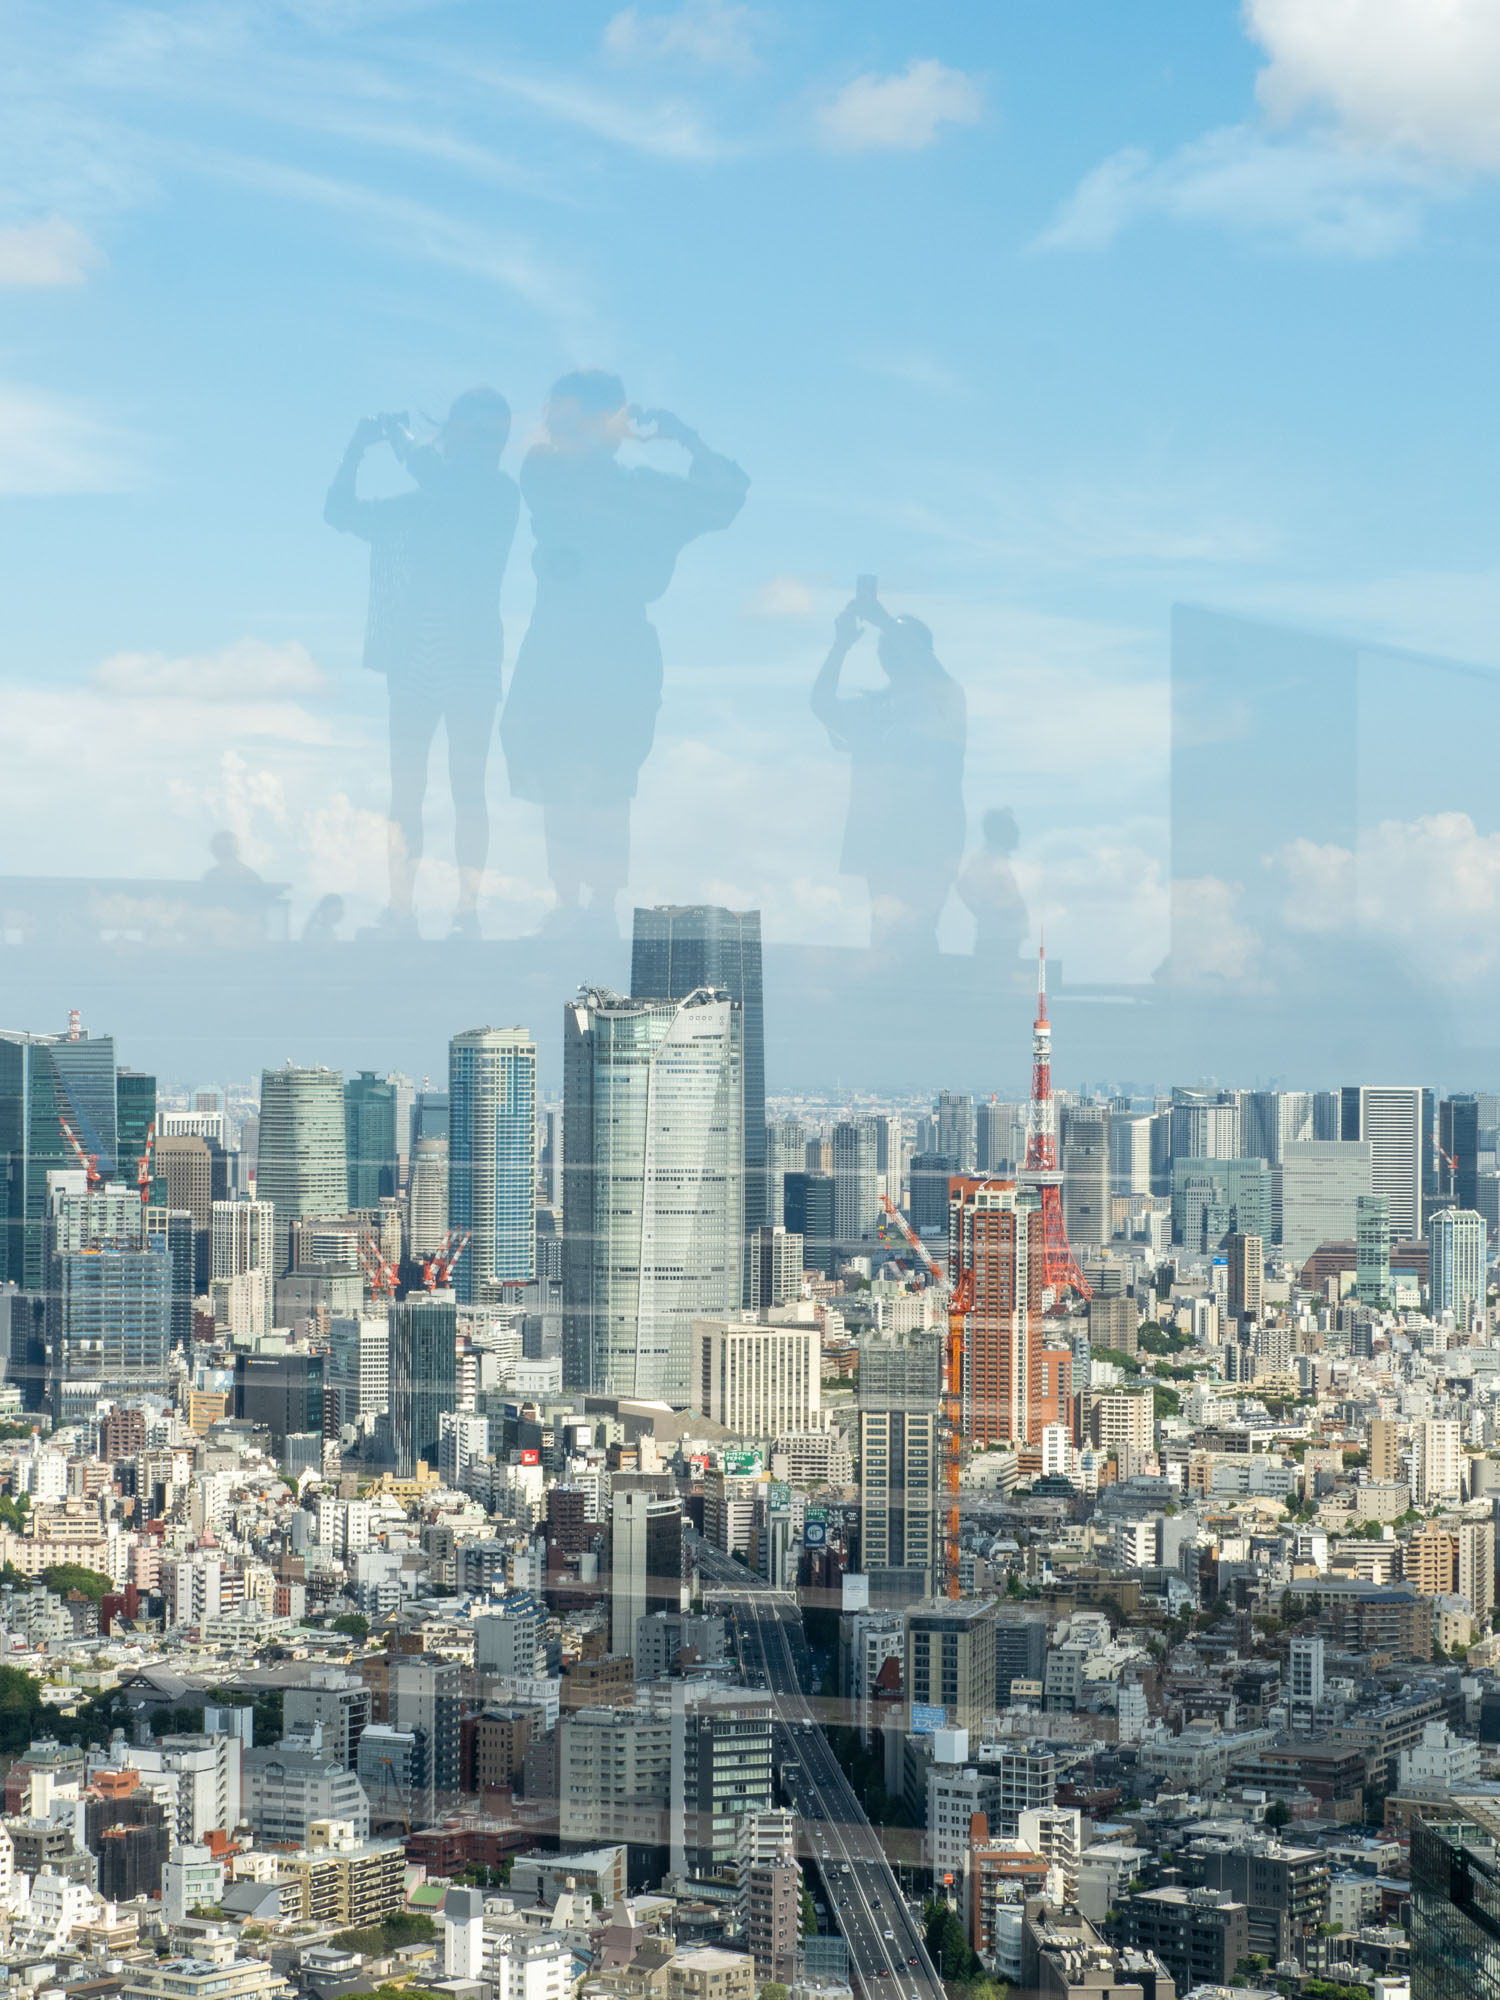
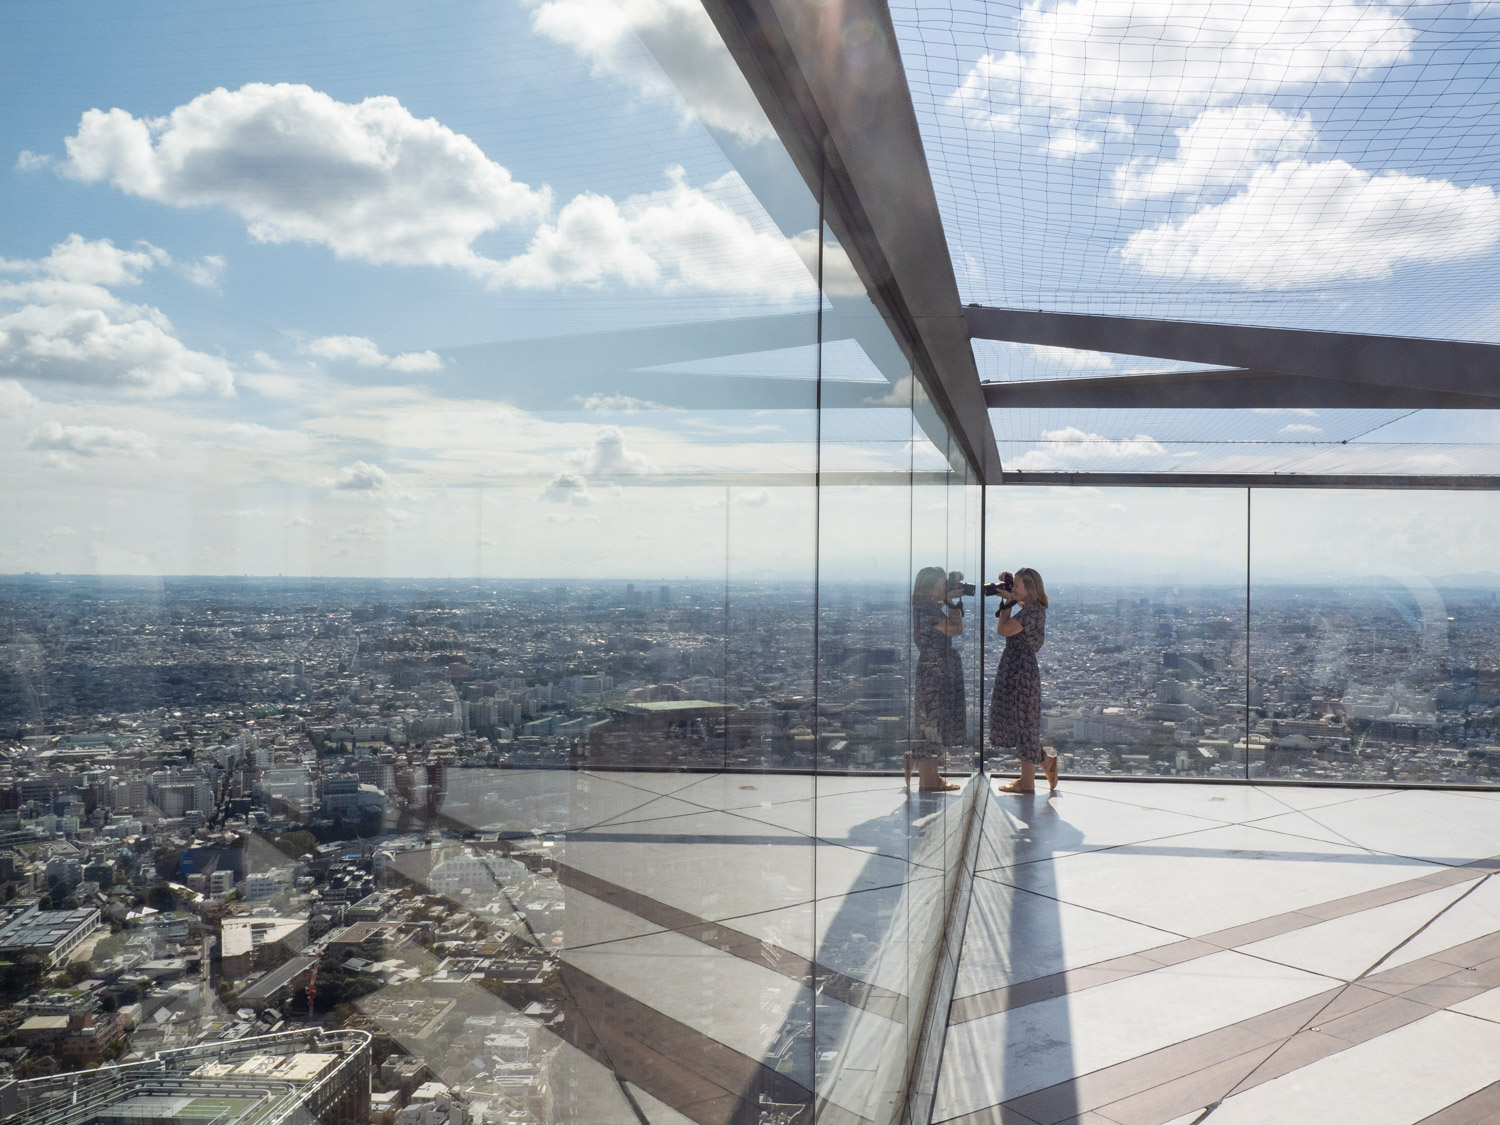
2. Tokyo Tower: Seek out an angle that allows you to frame Tokyo Tower against the rest of the cityscape. This shot not only showcases the modernity of Shibuya but also adds a pop of colour to the skyline. Look for interesting foreground elements or architectural patterns to add depth and visual interest to your composition. You’ll find there are lots of reflections on the glass, I had fun incorporating people reflecting into the sky area of the shot.
3. Yoyogi Park: From the top of Shibuya Sky, turn your lens towards the lush greenery of Yoyogi Park and Harajuku. Look for a perspective that captures the park’s expansive size and contrasts it with the surrounding urban landscape. Perhaps focus on a tranquil area within the park, highlighting the peacefulness amid the lively city. Can you spot Meiji Jingu Shrine?
4. Mount Fuji: While I unfortunately didn’t get a chance to see Mount Fuji from the top due to distant cloud, on a clear day, you might be lucky enough to capture the majestic Mount Fuji in the distance. Aim for a wide-angle shot that showcases the mountain’s grandeur against the urban cityscape but then whip out your zoom lens to get a little closer and bring the mountain into full view. On the top, you’ll find the best views of Mount Fuji on the western side of the building.
5. Night Skyline: As daylight fades and the city lights up, photograph Shibuya from the top at night. Experiment with long exposure techniques to capture the vibrant energy of the city. Select an angle that includes colourful Shibuya skyscrapers, neon signs, and the illuminated Shibuya Crossing, creating a nocturnal masterpiece.
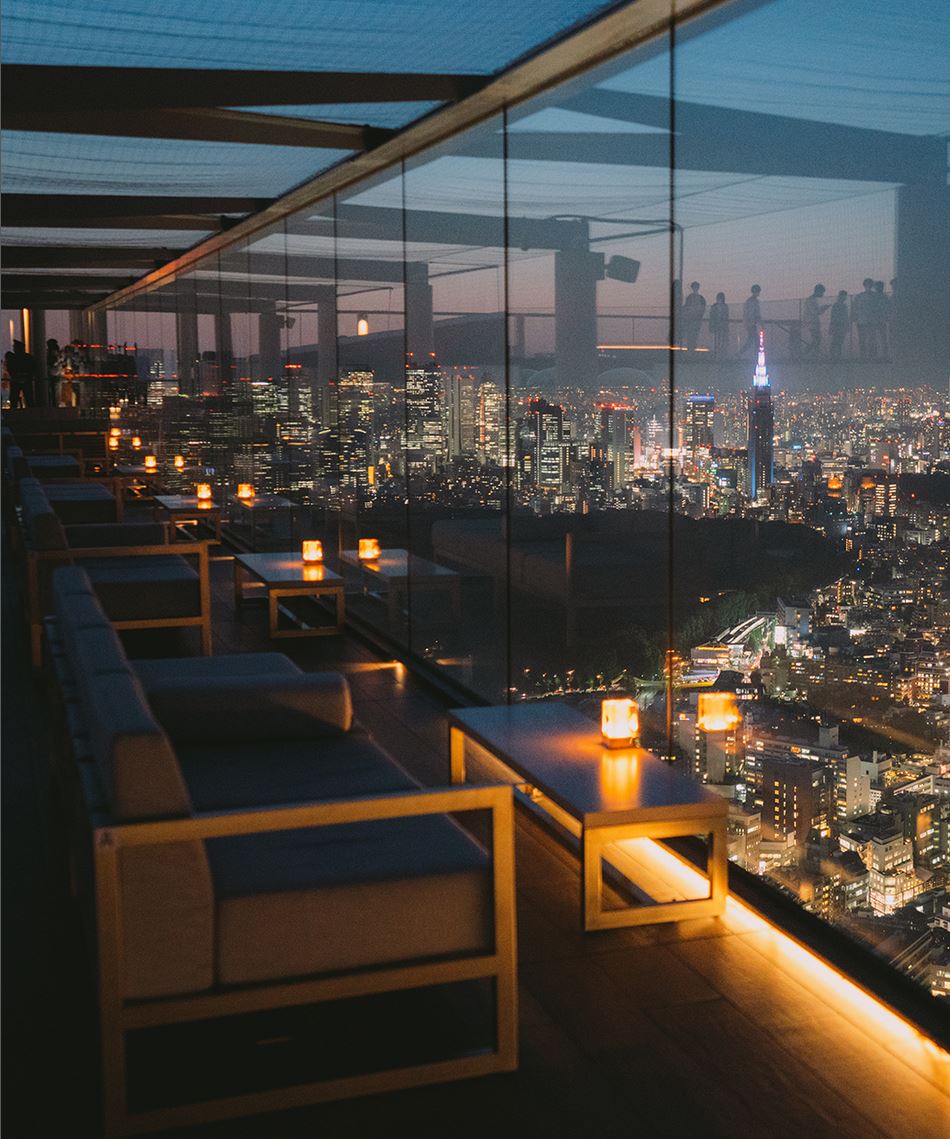
Image Credit @shibuyasky Instagram
Creative Photography Challenge at Shibuya Sky:
Aim to capture the movement of the city below, shooting long exposures of traffic and people as they use Shibuya Crossing, and the surrounding streets and train lines. By walking around the entire perimeter of the observation deck, you’ll find plenty of vantage points to try out some long-exposure images. If the reflections are too much outside, venture indoors on Level 45 and you’ll find it might be easier to photograph through the glass there, with less people and less glare.
There’s a series of art exhibits inside throughout Level 45 and if you’re interested in learning more about Tokyo’s history and landmarks, Shibuya Sky offers informative panels and interactive displays throughout the facility. These exhibits provide a deeper understanding of Tokyo’s transformation over the years and its rapid development into a global metropolis.
Tips for Visiting Shibuya Sky –
- Arrive early, you’ll need to take a lift to access Level 14 and to be on time for your allocated entry. The line can be long so allow plenty of time for this! If you arrive early, there’s a staircase with access back down to Levels 12 and 13 where there are lots of restaurants and stores to keep you occupied.
- Decide what you want to photograph and pack accordingly as you won’t have access to your camera bag when visiting the observation deck. You’re able to carry a camera up with you, however you can’t take a bag of lenses, so prepare to put a lens in your pocket, or take up a versatile zoom lens with you that covers all bases.
- When you exit the locker room area, don’t get fooled by the queue taking photos, venture up the escalator to the top level where you’ll find 3 x more corners to photograph from! Then head back to the other corner once the queue calms down.
- In the summer months, avoid booking a time around peak midday heat at Shibuya Sky as it is intense! They have misting available in some areas on the roof to help cool down but take it from me who roasted up there in 38-degree heat, it is unbearable.
- If you can time your visit to include the golden afternoon light, sunset and some evening twinkles it’ll be best. These time slots are typically the first to get booked up, so reserve a time around 4pm early to ensure you’re getting the most out of a visit to Shibuya Sky.
How to Book Tickets to Shibuya Sky –
You can purchase tickets on-site, but it is highly recommended to book them in advance to skip the lines and ensure availability, especially during peak seasons. Tickets range from ¥2,000 to ¥2,400 for adults, depending on whether you choose the weekday or weekend rate.
Book your Shibuya Sky Tickets via Klook here.
Morning wellness sessions are also offered on the observation deck some mornings, you can purchase a ticket that combines a yoga session with entry. If you’re not a morning person, at various times throughout the year stargazing is also offered, a unique experience in Tokyo, one of the largest cities in the world!
If you want to try your luck in person, once you arrive at Shibuya Scramble Square, head to the 14th floor, where the ticket counter for Shibuya Sky is located.
Looking for a hotel nearby? I stayed at the Mitsui Garden Hotel Jingugaien Premier, located just north of Harajuku in a quiet neighbourhood, ideal as a base for exploring the areas between Shibuya and Shinjuku.

Arriving for your Allocated Time at Shibuya Sky –
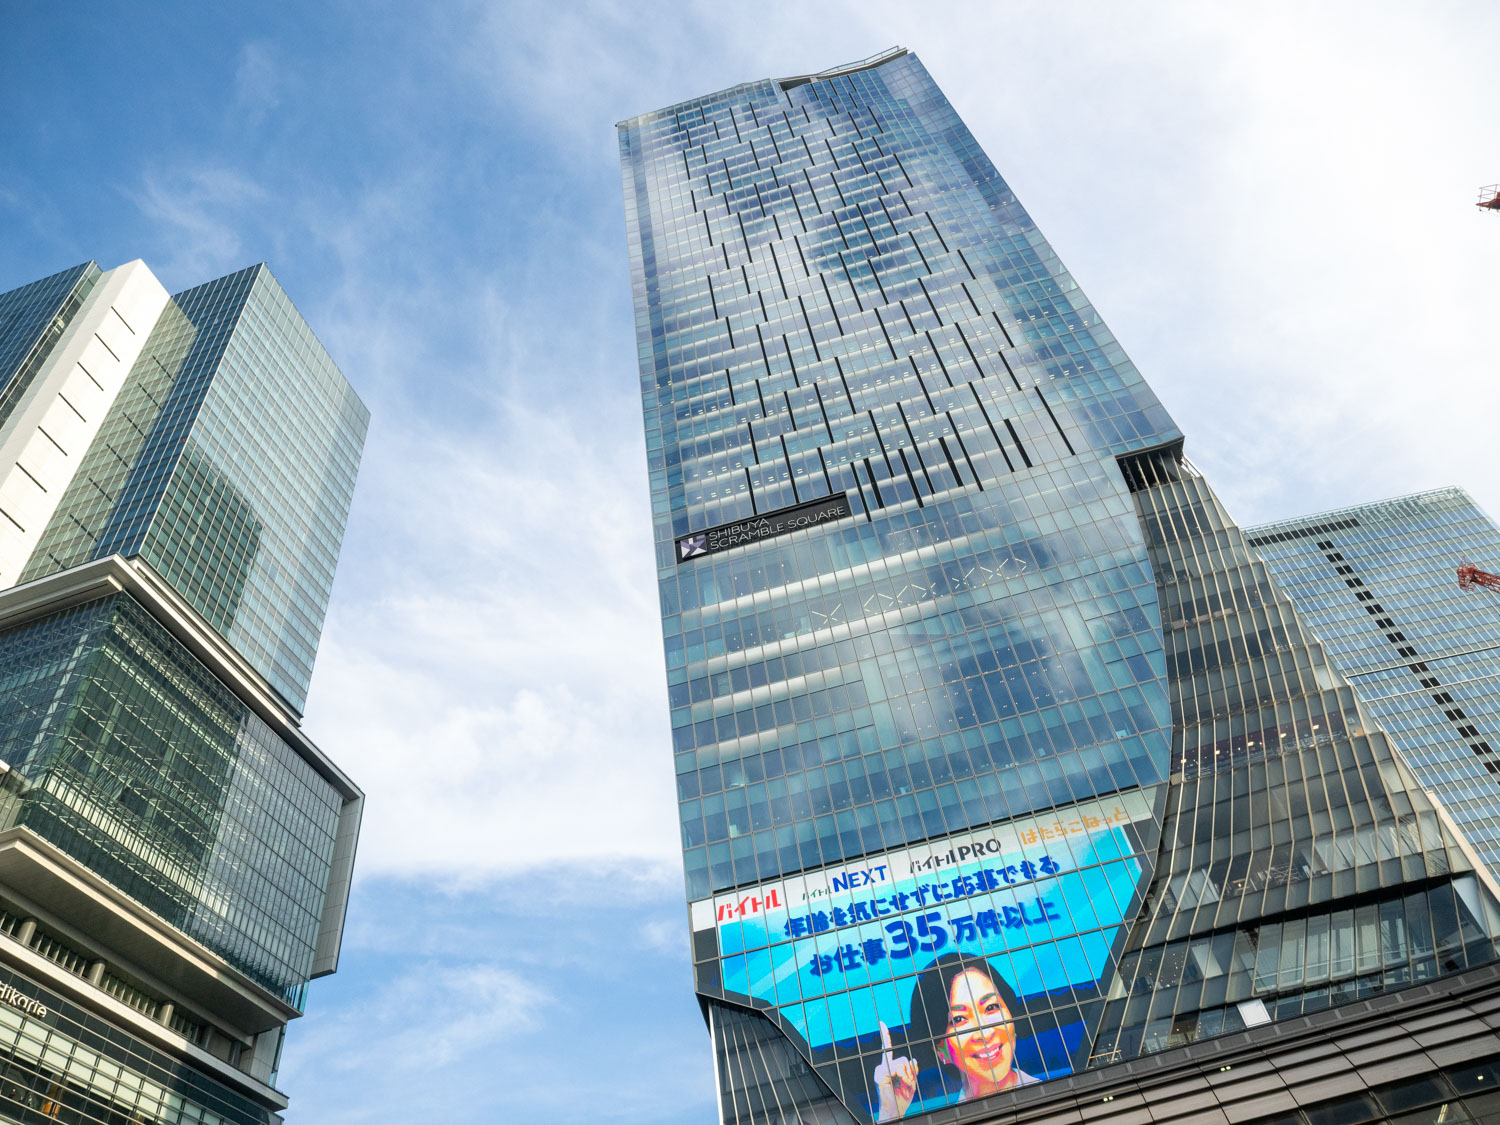
The observation deck is located in Shibuya Scramble Square, a high-rise complex directly connected to Shibuya Station. It can get a little chaotic inside and around Shibuya Station so give yourself plenty of time prior to your allocated time of entry.
To get to the ticket office and entry on Level 14, you’ll need to take the lift from ground level, and the line for this can be considerably long during peak times, so again, arrive early!
After your ticket is checked on Level 14, you’ll proceed to the elevators and enjoy a swift ride to the 45th floor. As you ascend, you’re treated to a light show inside the elevator. Once you reach the 45th floor, the main observation area awaits you via an escalator that takes you up to the Sky Gallery on level 46, but first you’ll need to put all bags into a locker before they’ll allow access to the observation deck.
There’s no time limit for how long you stay up the top on the observation deck, however in summer it does get very warm, so you can take breaks inside on level 45 if you’re keen to wait it out until sunset.
The Lockers at Shibuya Sky
Camera bags, handbags and large accessories like tripods are not allowed on the observation deck of Shibuya Sky. Before venturing outside, you’ll be prompted to find a locker and put your bags inside.
To use the lockers, you’ll need a 100Yen coin (refunded upon retrieval), and there’s a coin machine available if you need change. There are a lot of staff on hand to answer any questions, but after quizzing them about just how many cameras + lenses I could take up, the end result was less is best. I took my OM SYSTEM OM-1 camera with the 40-150mm f2.8 lens and had the 12-40mm f2.8 lens and MC20 2 x teleconverter in my pocket
Photos from the top of Shibuya Sky
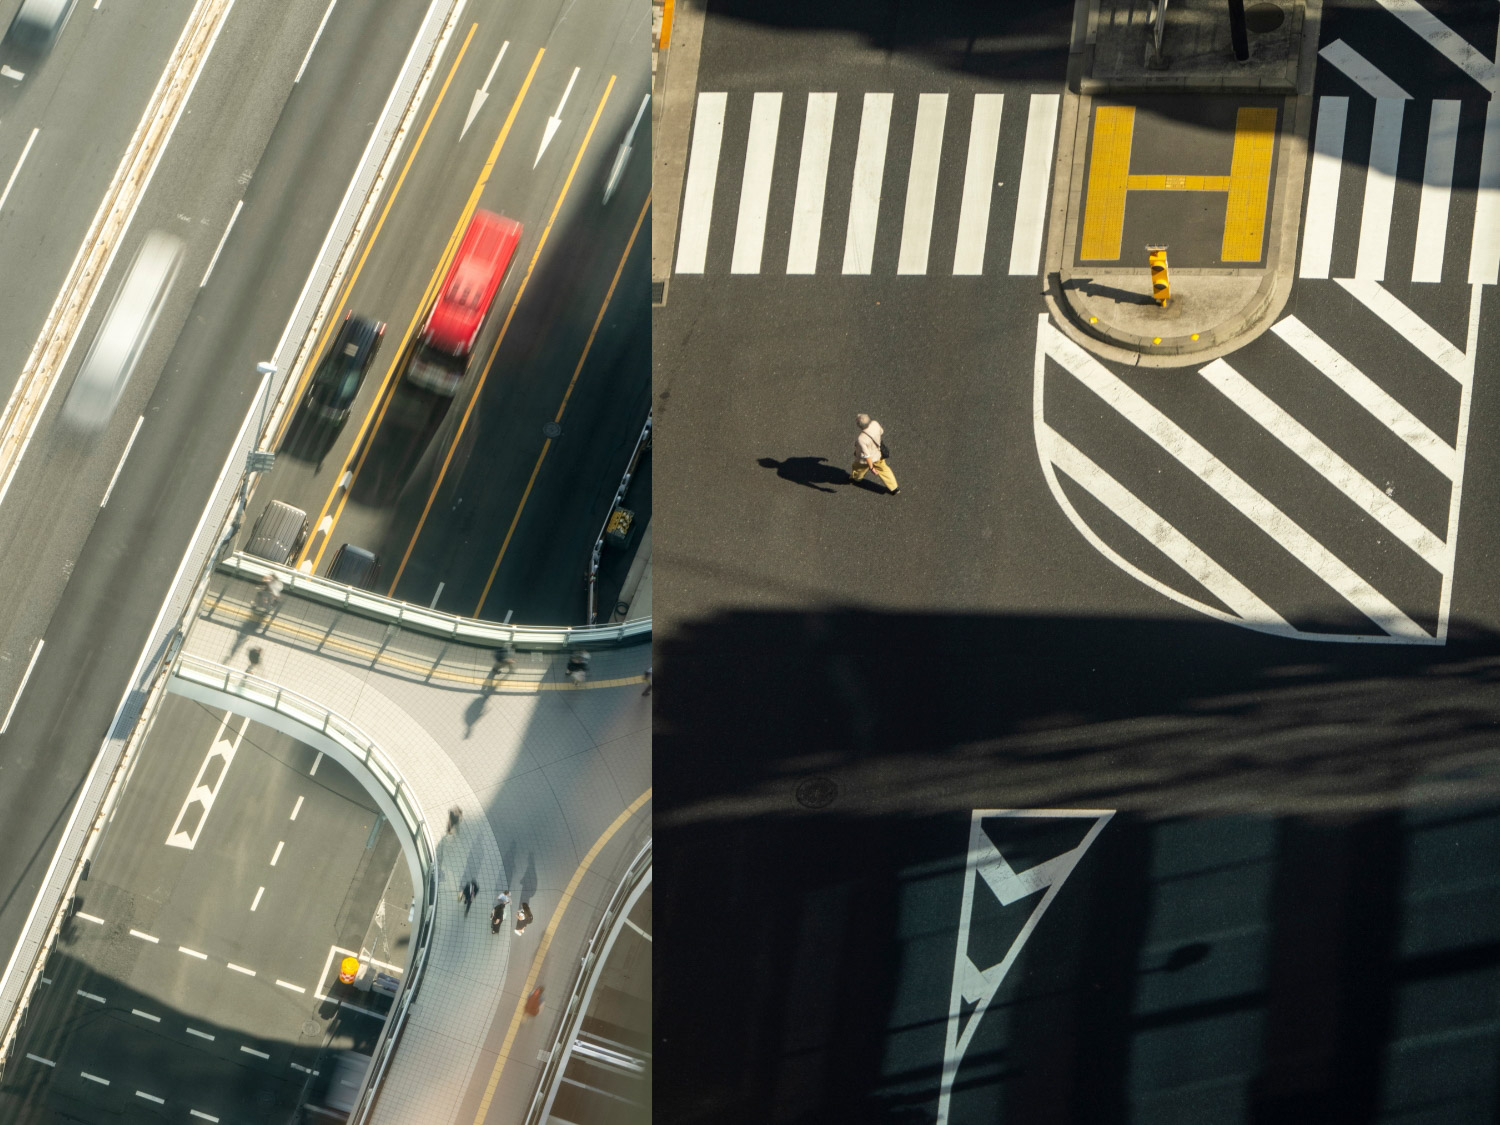
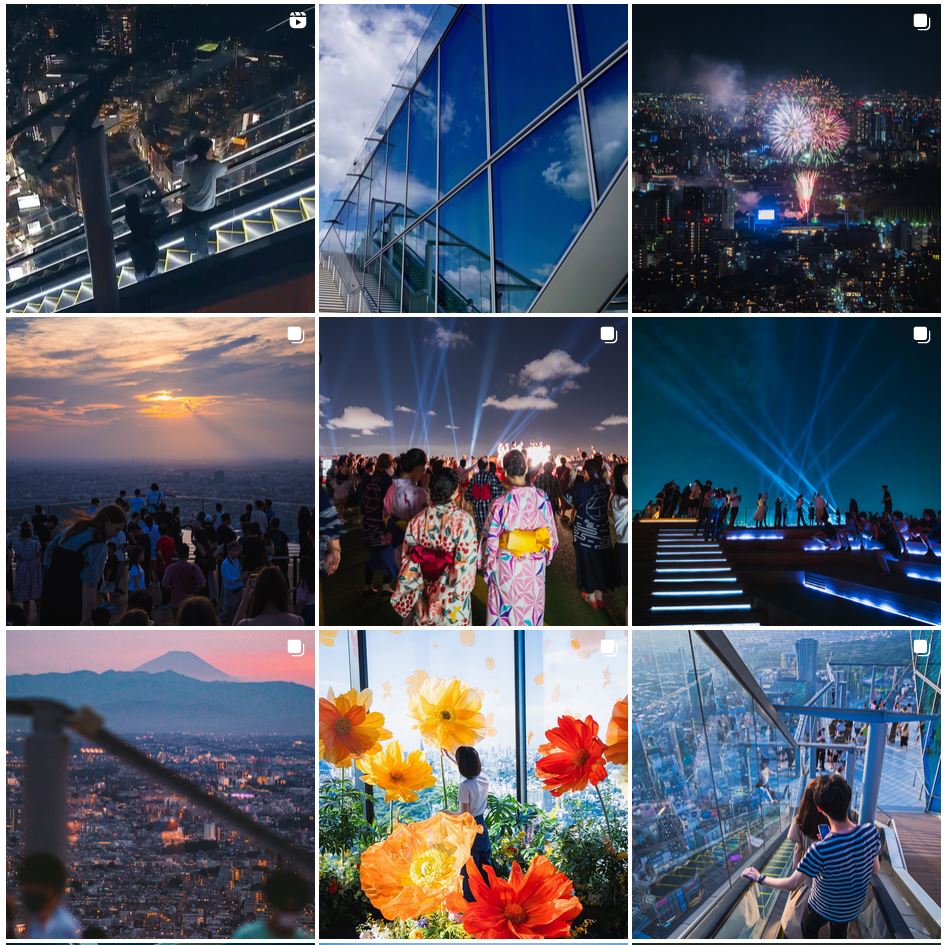
Image Credit @shibuyasky Instagram
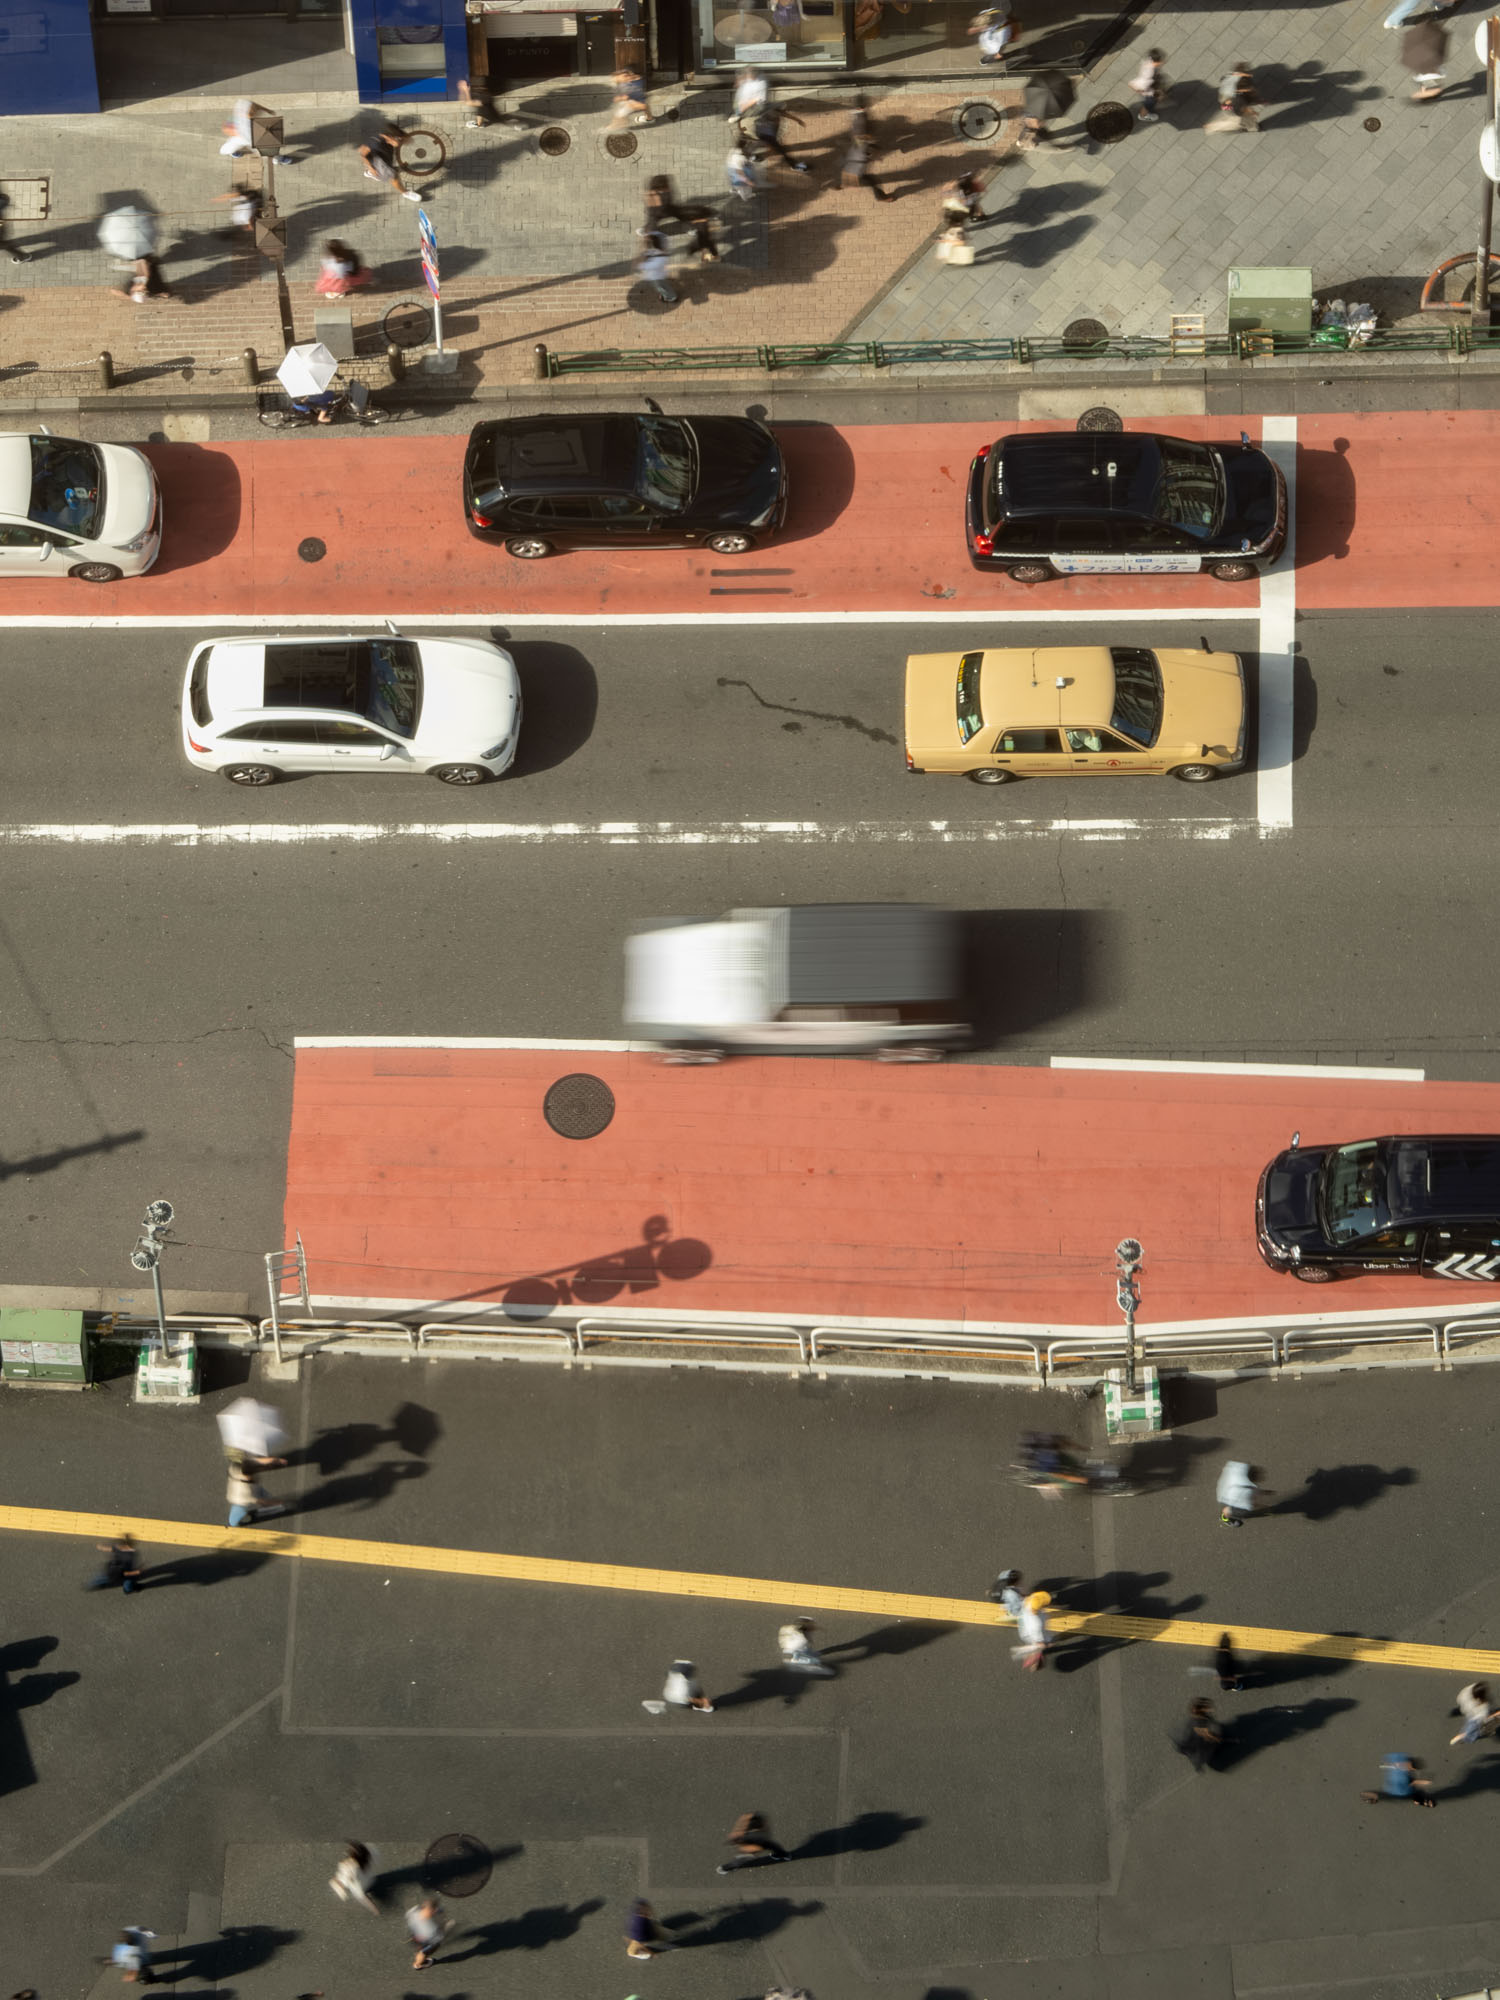
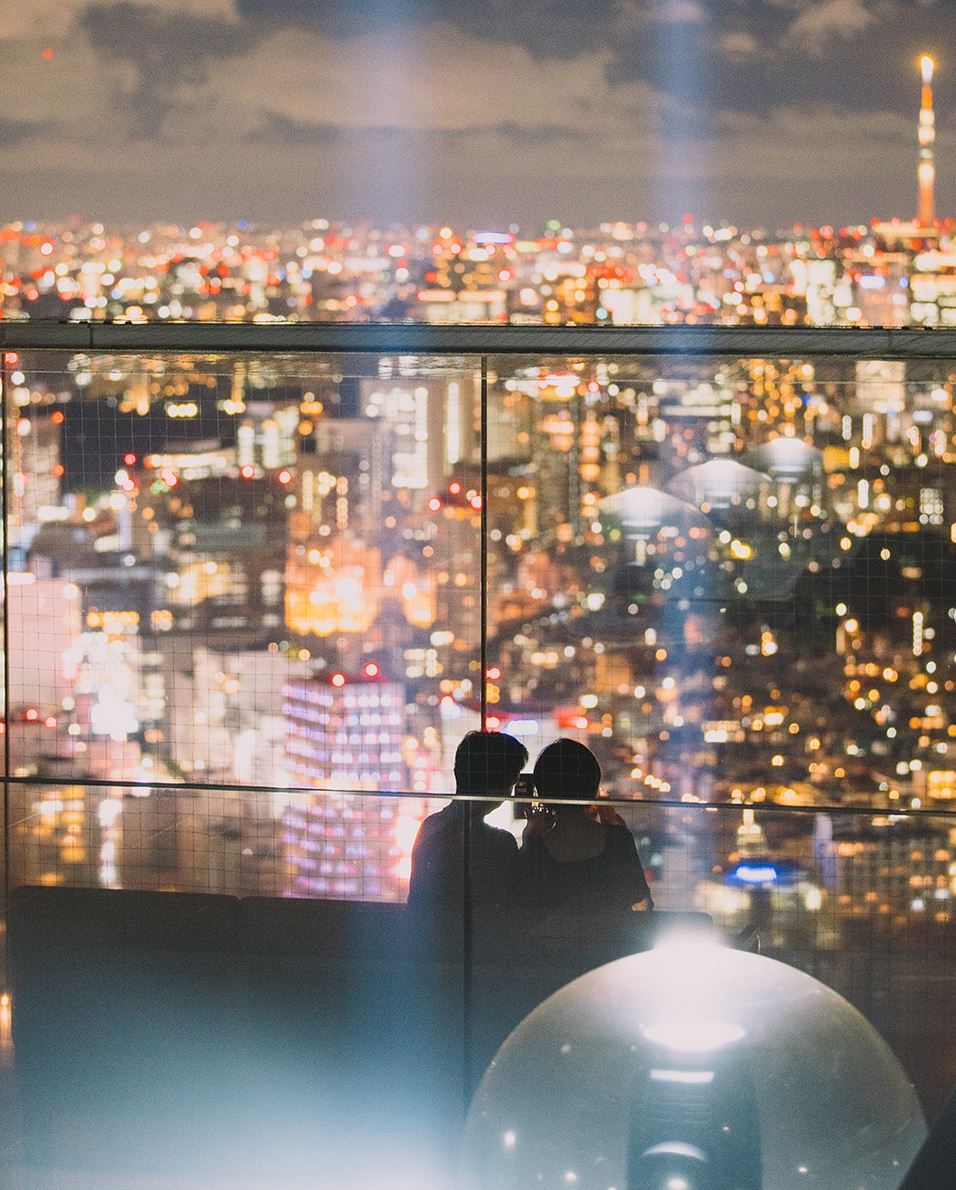
Image Credit @shibuyasky Instagram
Related Tokyo Travel Guides on The Wandering Lens:
A Photographer’s Guide to Tokyo
Visual Hotel Review: Hoshinoya Tokyo
Photographing Sunrise at Senso-ji Temple, Tokyo
Are you seeking a career in travel photography?
Join me for ‘The Freelance Travel Photographer Course‘, an 8-module online course where I break down everything you need to know about working as a travel photographer and get you ready to craft your first pitch and find work in the industry!
If you’re dreaming of getting published, building a portfolio, and working with tourism brands on creative campaigns…you’re in the right place.
It’s okay if you’re not completely ready, that’s what this course is for, to guide you through the process of finding direction, finding your place in the industry and deciding what you’d like to offer and contribute – it’s about finding the right clients suited to your style of photography, and learning how to approach them to find work as a travel photographer.
Travel Photography + Your Future –
My aim as a photographer, educator and editor of The Wandering Lens is to raise the bar in the tourism industry and continue to support other photographers in their journey to work as a travel photographer – it’s such a rewarding career path and I hope you’ll join me in the industry soon!
Lisa Michele Burns – Course Creator and Travel Photographer (see who you’re learning from view portfolio)

Hello! I’m the founder and photographer behind The Wandering Lens.
With 19+yrs experience as a professional travel and landscape photographer, all advice found on this site is from my personal experience, or that of contributors, on the road. I hope it’s useful for your own travels and would love to hear in the comments about your trips and experiences around the world.
Leave a Comment