
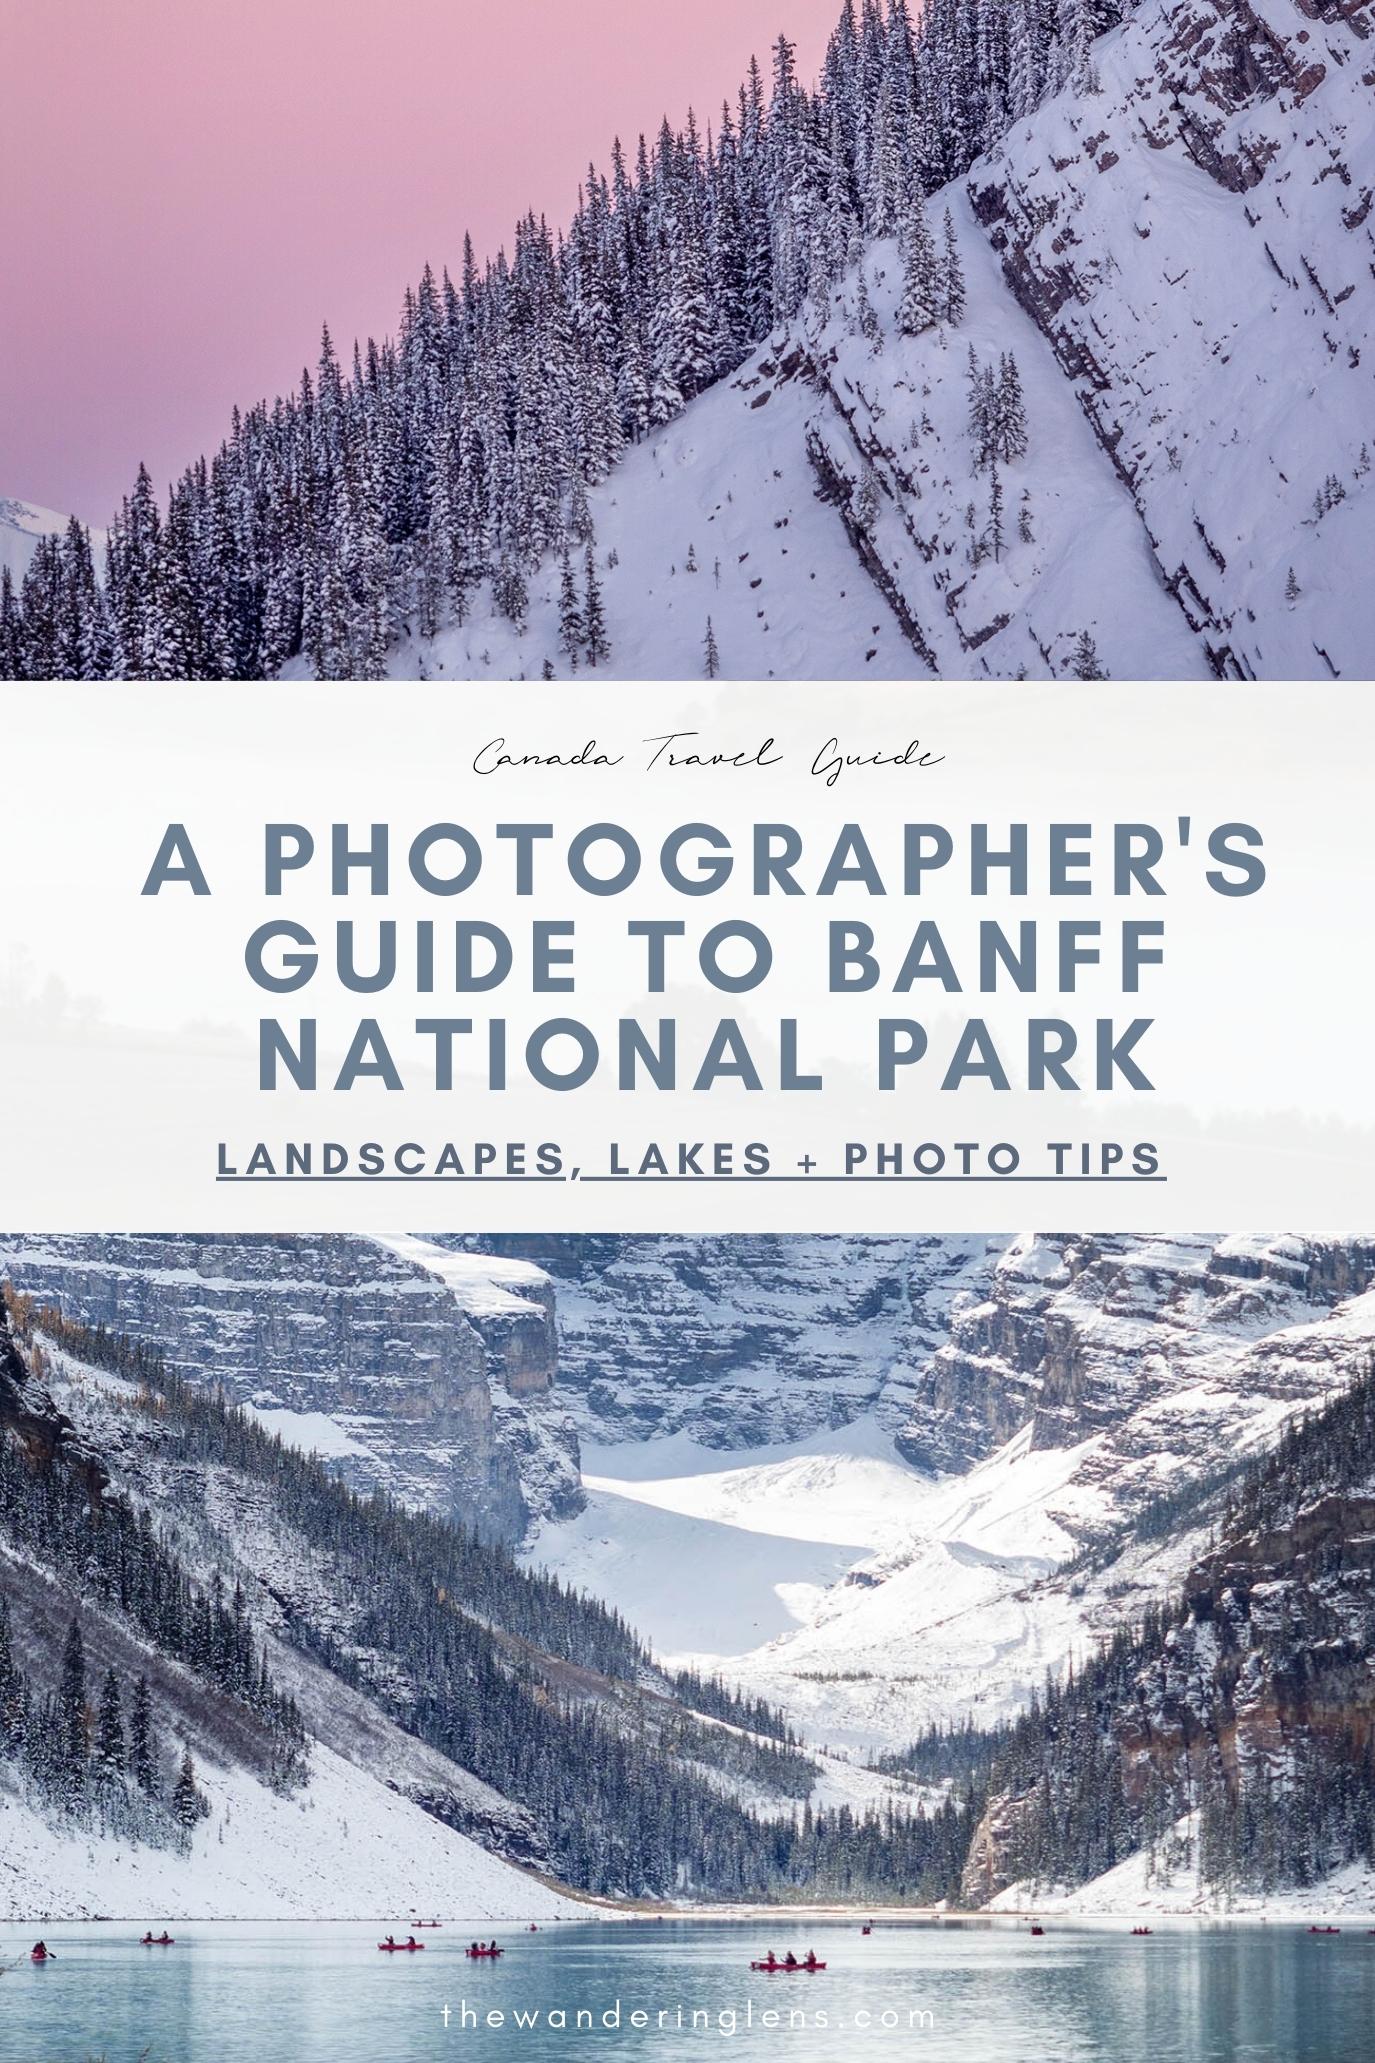
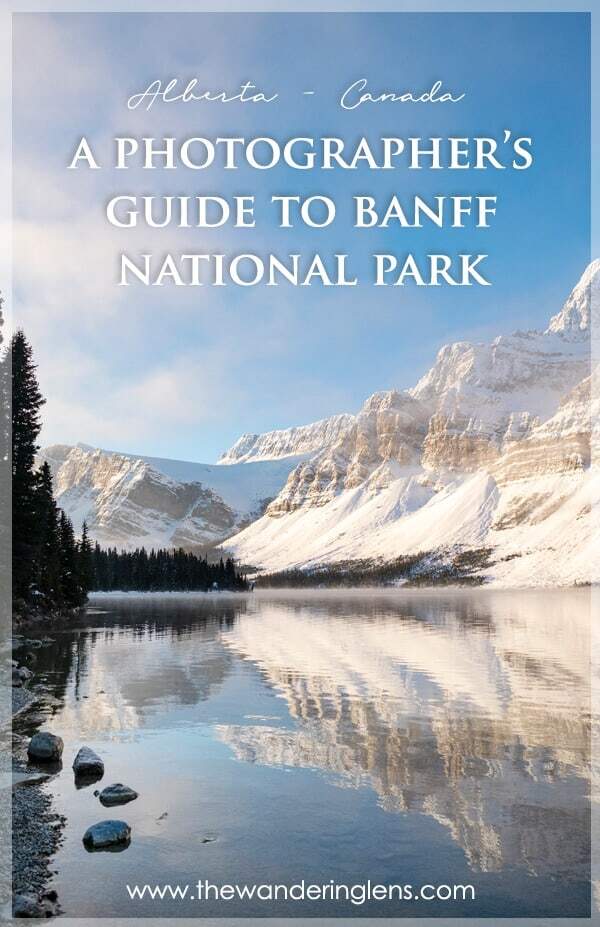
A Photographer’s Guide to Beautiful Places in Banff National Park, Canada
Glacial Lakes – Waterfalls – Rugged Peaks + so much more!
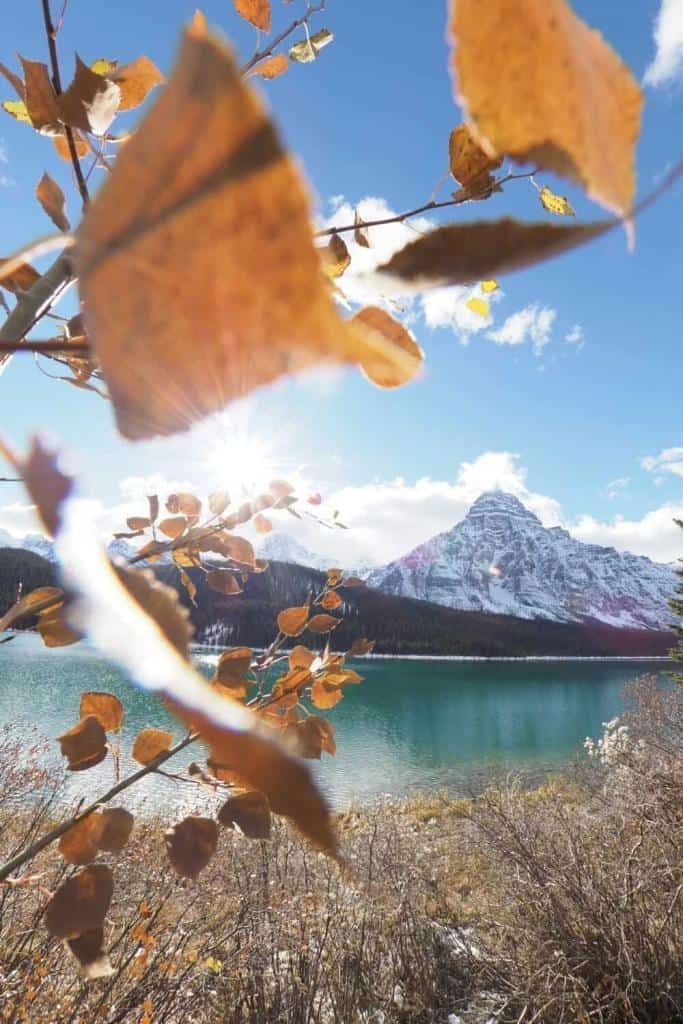
As mist wafts through the valley and snow capped peaks rise above reflecting turquoise lakes I couldn’t help but think to myself, that Banff National Park is perfection.
The Canadian Rockies are one of those dream destinations for most photographers and from the very first glimpse, the mountains draw you in with their stoic presence and alluring beauty.
Banff National Park offers all the scenic wonders you could ever wish to photograph and depending on your season of choice, you can experience ice caves, turqouise lakes, snow covered forests or lush green meadows. From Castle Mountain to Lake Louise and all the beauties of the lower Icefields Parkway, you could easily spend months exploring around Banff without repeating locations or trails.
As a photographer, I know that priorities always lie in finding those ideal photo spots to capture a destination so my time in Banff was spent researching the best vantage points and photography locations in order to compile this guide. Yep, horrible job I know.
Below you’ll find a map to my curated list of the best photography locations in Banff National Park and if you scroll further down there’s detailed descriptions and photo tips for each spot.
Map: Banff National Park Photography Locations
Click the map to open it in Google and take with you as you explore the photo locations mentioned throughout this guide!
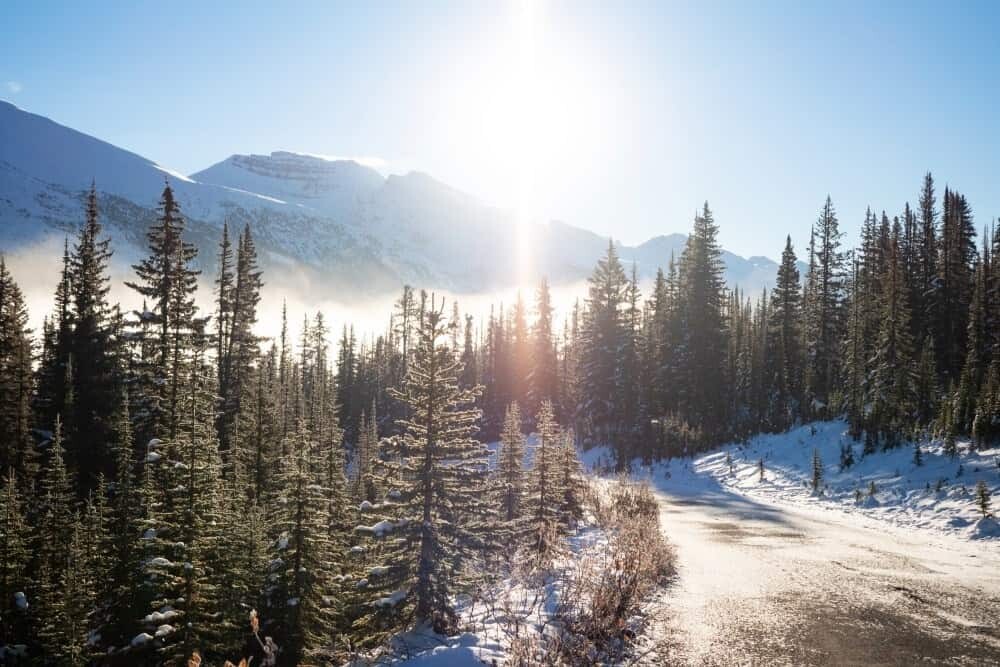
Bow Valley Parkway
Before we get started on the individual photo spots, this route needs to be mentioned. The Bow Valley Parkway (Route 1A) provides access to some of the best photography spots in Banff National Park, connects Banff and Lake Louise whilst being a lot calmer than the highway.
On the Bow Valley Parkway you’ve got a higher chance of seeing wildlife and there’s oodles of photo spots and hiking trails to keep you snap happy. The Bow Valley Parkway begins just north of Banff and with a lower speed limit, it feels like a leisurely drive through all the alpine scenic wonders you could hope to see on a visit to the Canadian Rockies.
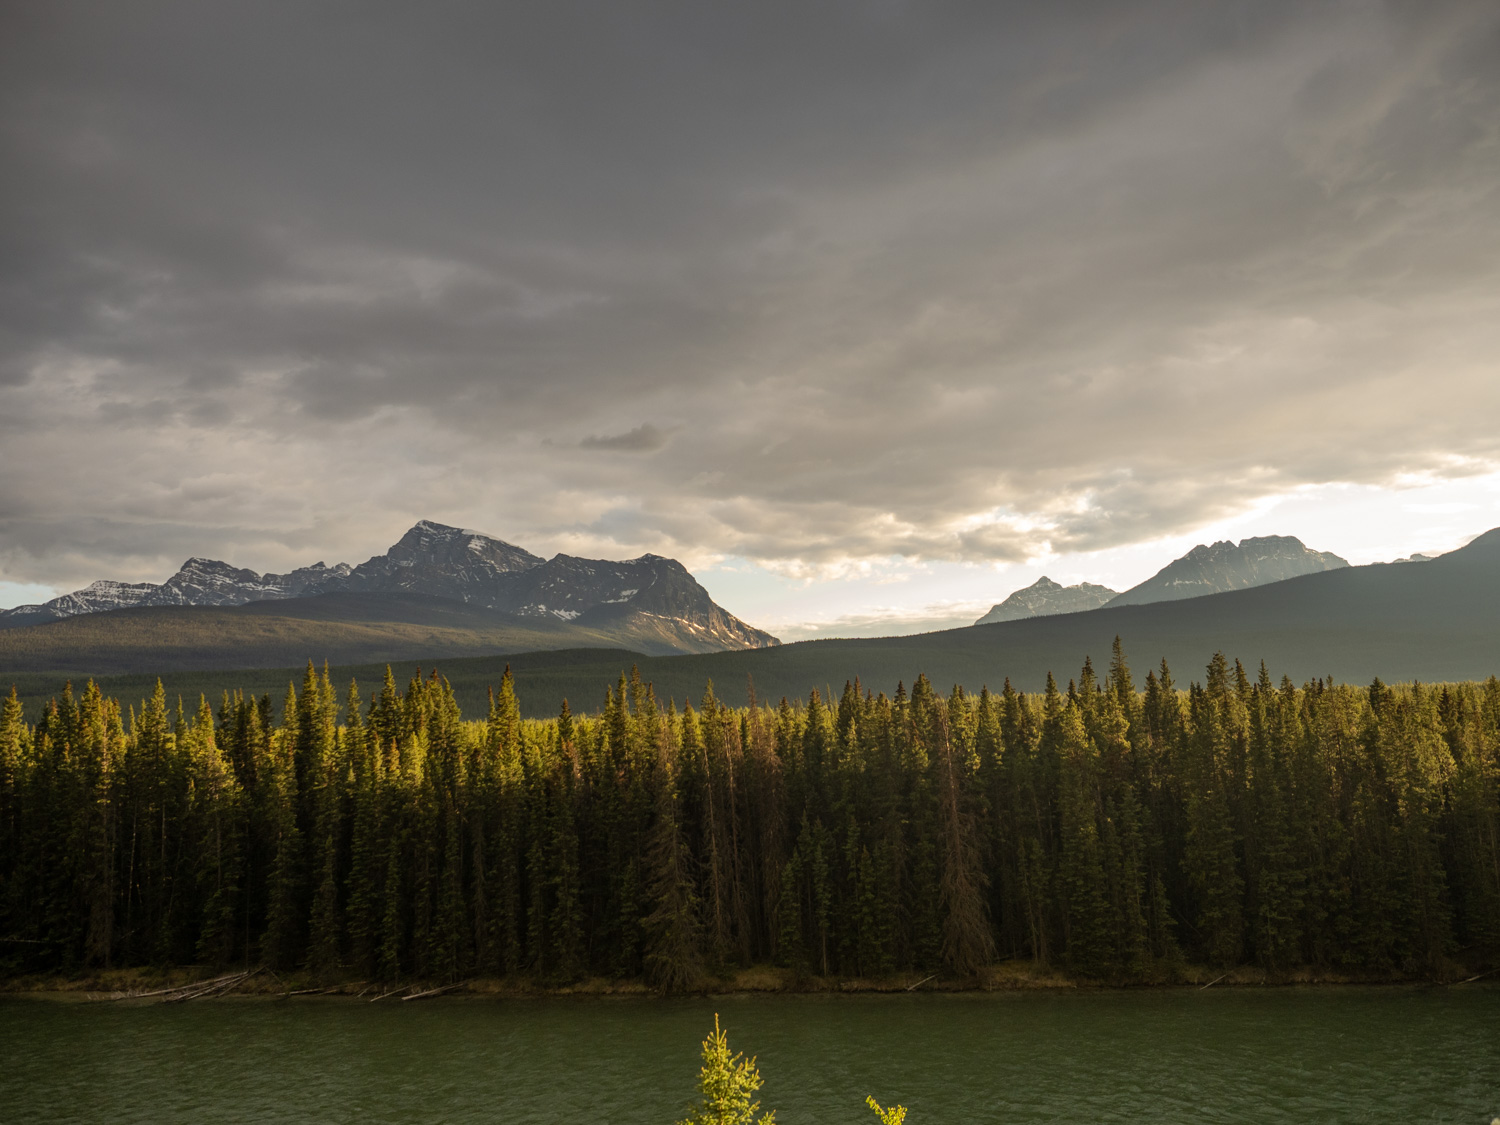
One of my favourite stops on this route is Storm Mountain Lookout, where panoramic views look toward Storm Mountain with the Bow River and forests in the foreground. You can also get lucky and watch a train come through the valley! There’s plenty of space to move around and I find it far less crowded than Morant’s Curve.
*Just to note, there’s currently a pilot program running which means for three years 2023-2025, the southern section of the route will have limited access from 8am-8pm at certain times of the year to create a safe habitat for wildlife. It’s in place from May 1st – June 25th and September 1st – October 1st, meaning you’ll need to access the Bow Valley Parkway via Castle Junction. If you’re visiting Johnston Canyon, simply go this way and turn right to head back south via route 1A. Cyclists are allowed to access the road, so if you’re hoping to see the entire route in daylight hours, get peddling 🙂
Bow Valley Parkway Travel Tip: There’s a number of safe areas/parking spots located along the Bow Valley Parkway to pull over and scour the surrounding landscape to check for any wildlife. Don’t stop your car in the middle of the road, and beware of Bear Jams…traffic jams caused by people stopping to photograph bears!
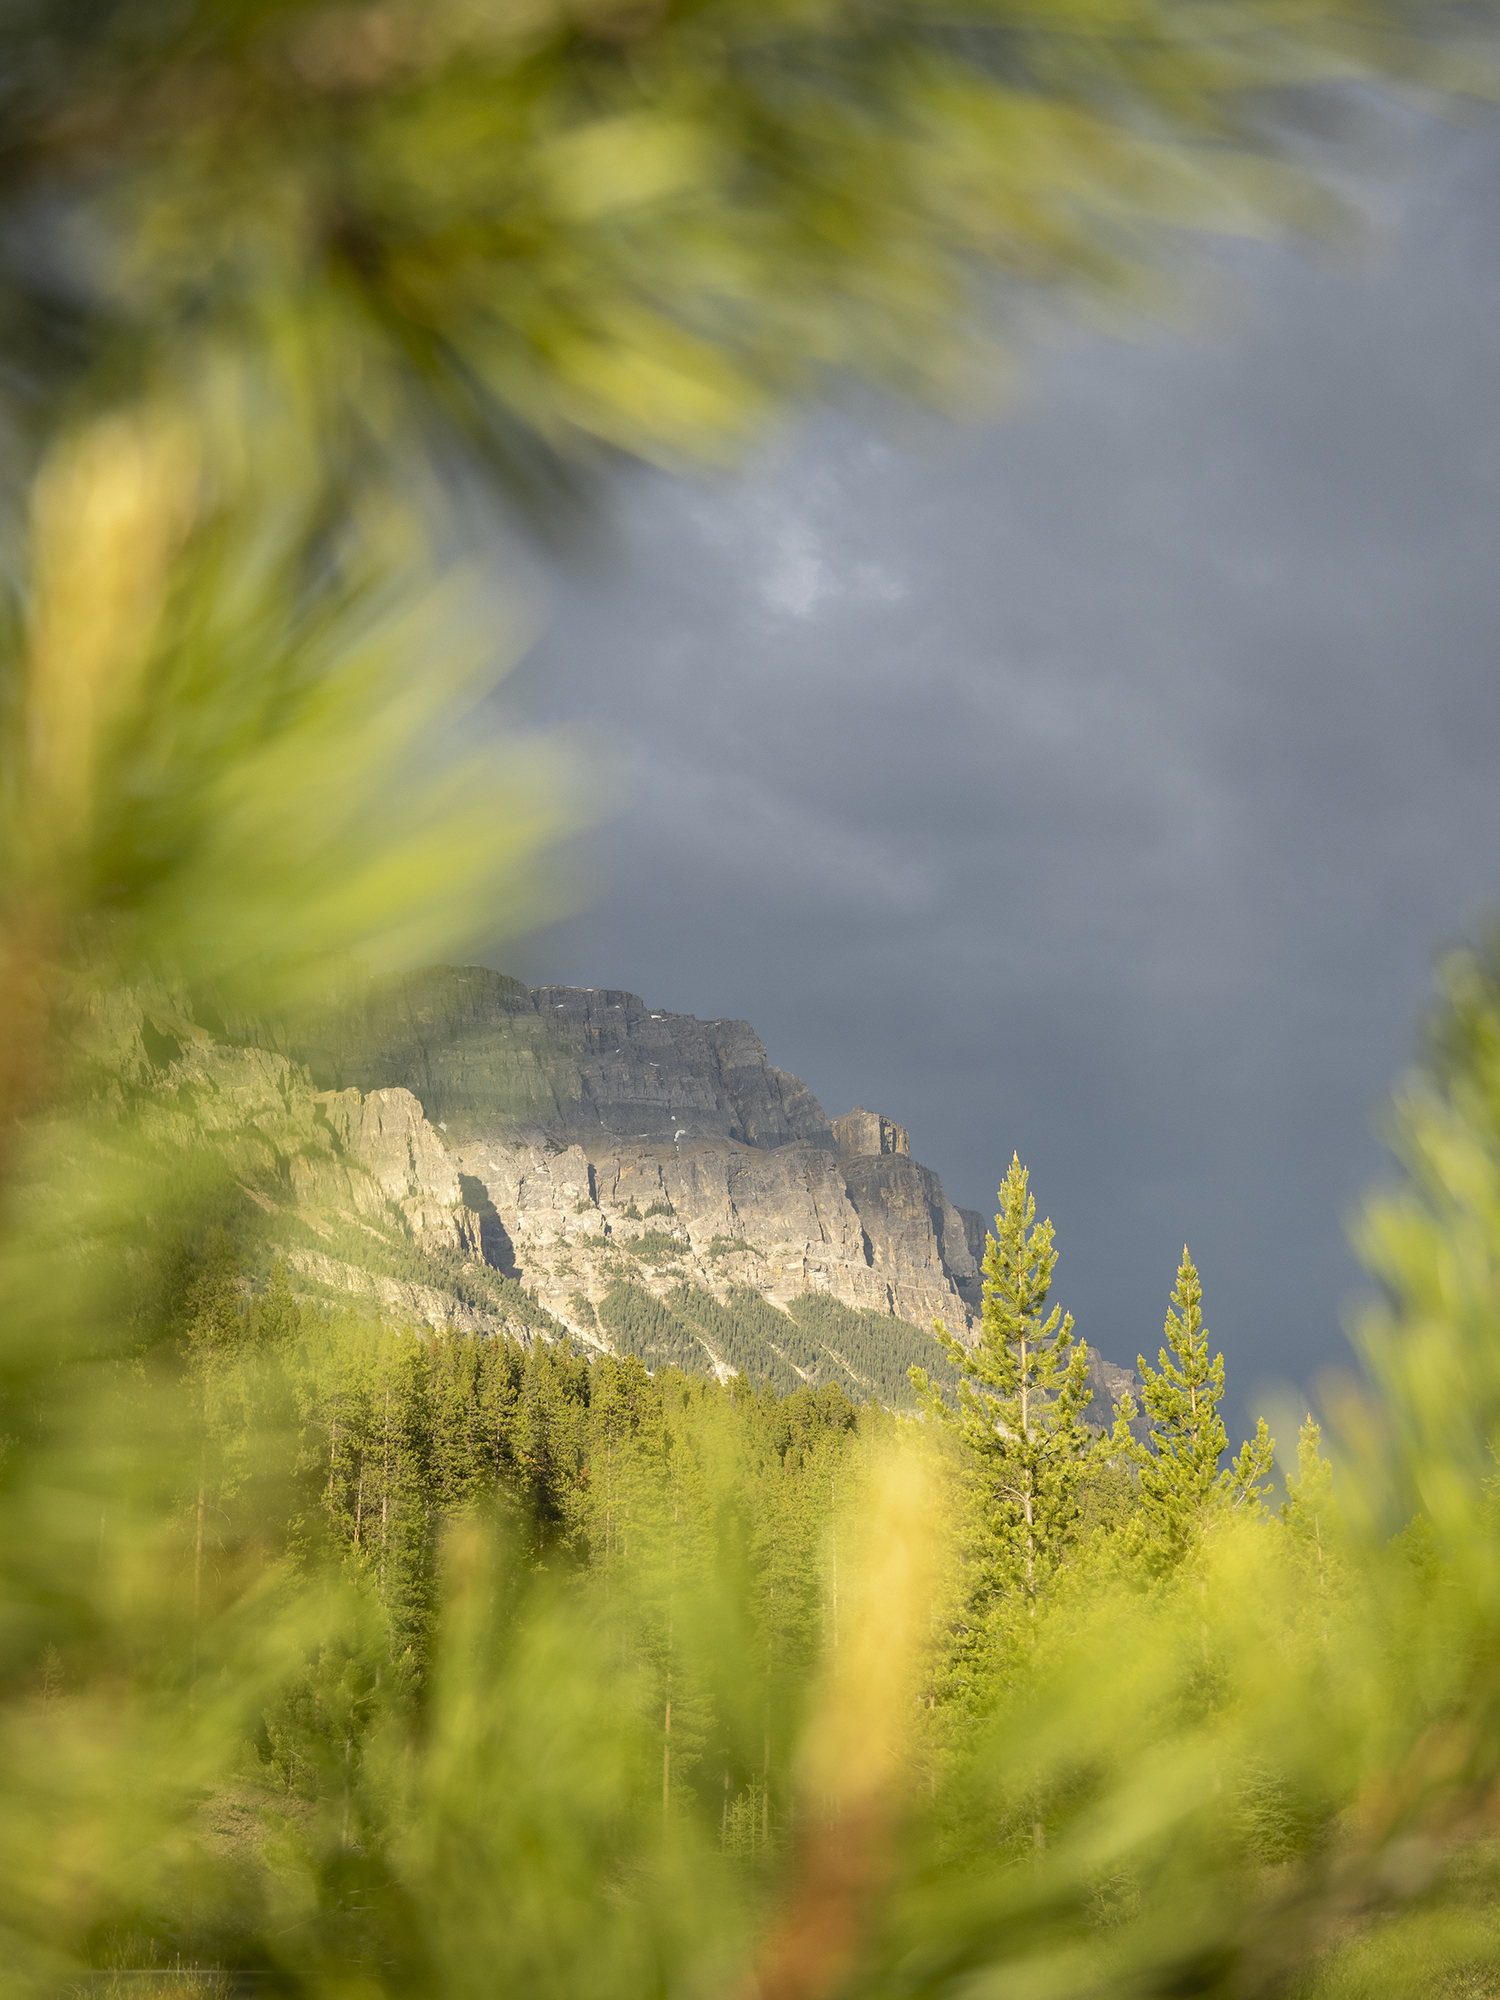
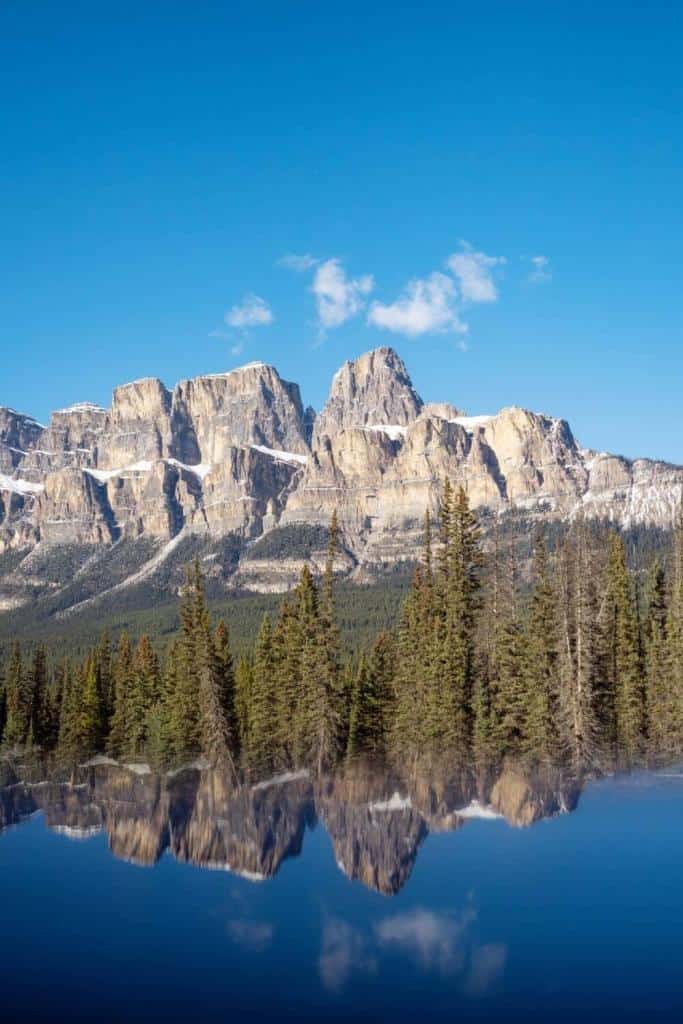
Castle Mountain
Rising up from the forest with rocky ridges stacked from left to right, Castle Mountain is one of the most photographed mountains in Banff National Park. You can capture this beauty from a number of angles, so I’d suggest attempting to get creative and finding your own spot.
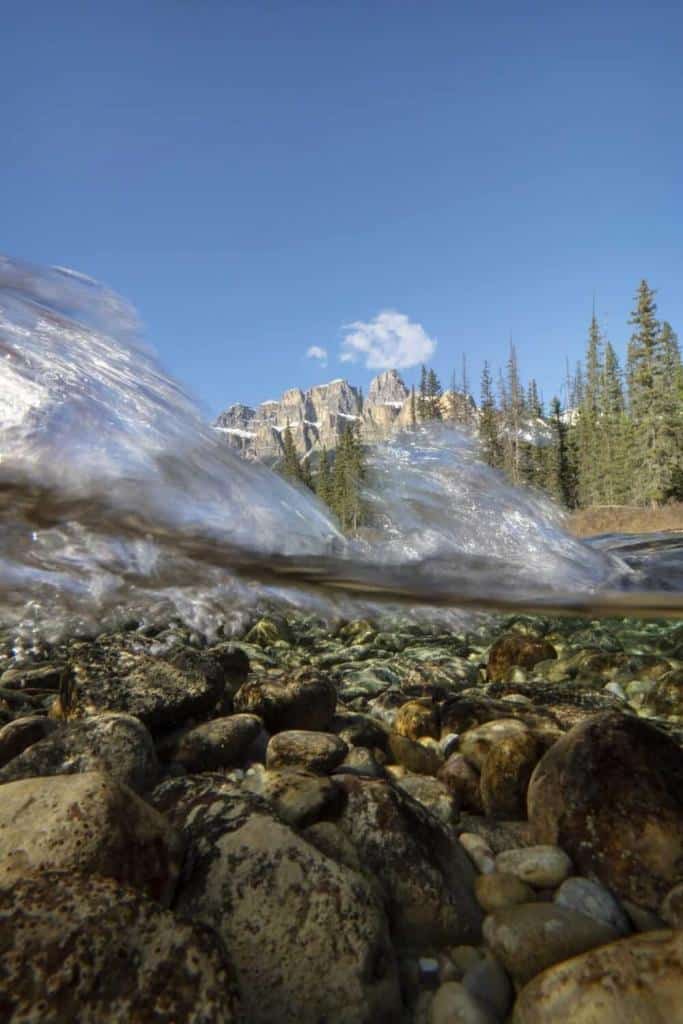
The most popular location for photographing Castle Mountain is from the banks of the Bow River beneath the Banff-Windermere Highway Bridge near Castle Junction. Access the river by passing through the wildlife gates (on foot) on the western side of the bridge, being of course careful to close the gate behind you. *Just to note, this access may be restricted so if the gate is closed, find an alternate angle elsewhere.
Castle Mountain Photo Tip: Be sure to move away from the other people with tripods set up in order to find a unique composition and capture your own angle of the scene. I took a pair of gum boots so I could wade into the river and photograph split-level shots, not only because I’m crazy obsessed with this technique but in order to find a fresh perspective of this popular photo spot.
**I have to say a huge thank you to the amazing Marta from In A Faraway Land who wrote about this spot in her guide to Banff National Park. Take a peek at her incredibly detailed itineraries to photographing the Rockies too!
Otherwise, some great photo spots include a highway pit stop just after passing the Redearth turn-off when driving from Banff. From here you can see the entire mountain and use the valley and Bow River as your foreground elements. There’s also the view from close up if you can find a safe place to pull over while driving along the Bow Valley Parkway.
On the Bow Valley Parkway, there’s a small parking around just after the road separates (if travelling from the north). This point offers a great viewpoint of Castle Mountain and you can frame the rocky cliffs with greenery.
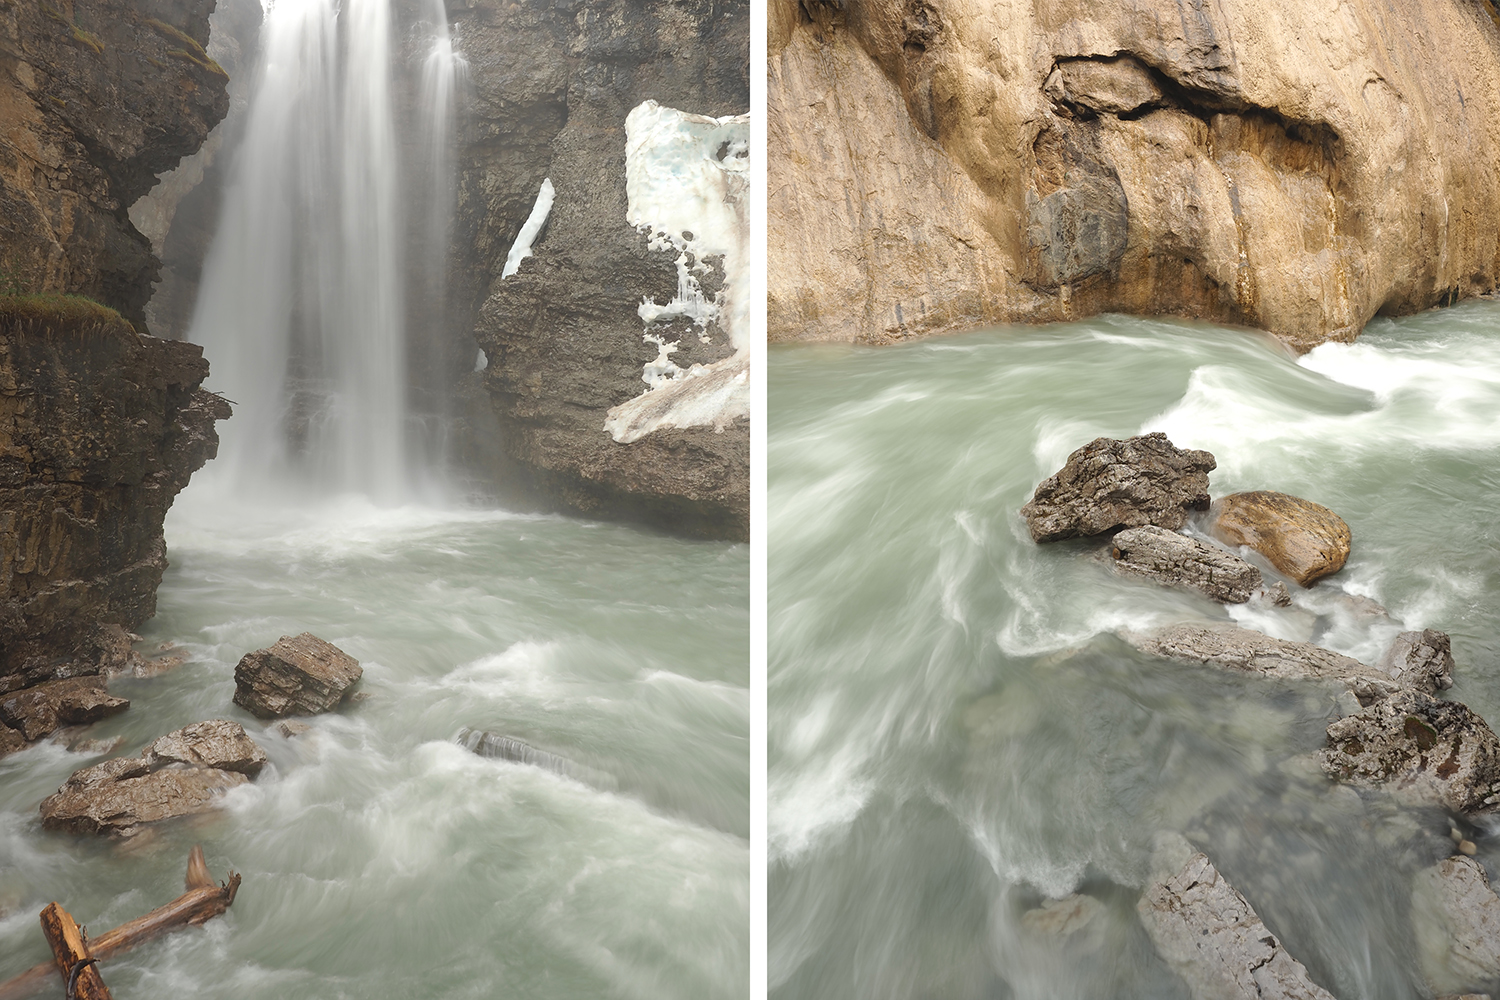
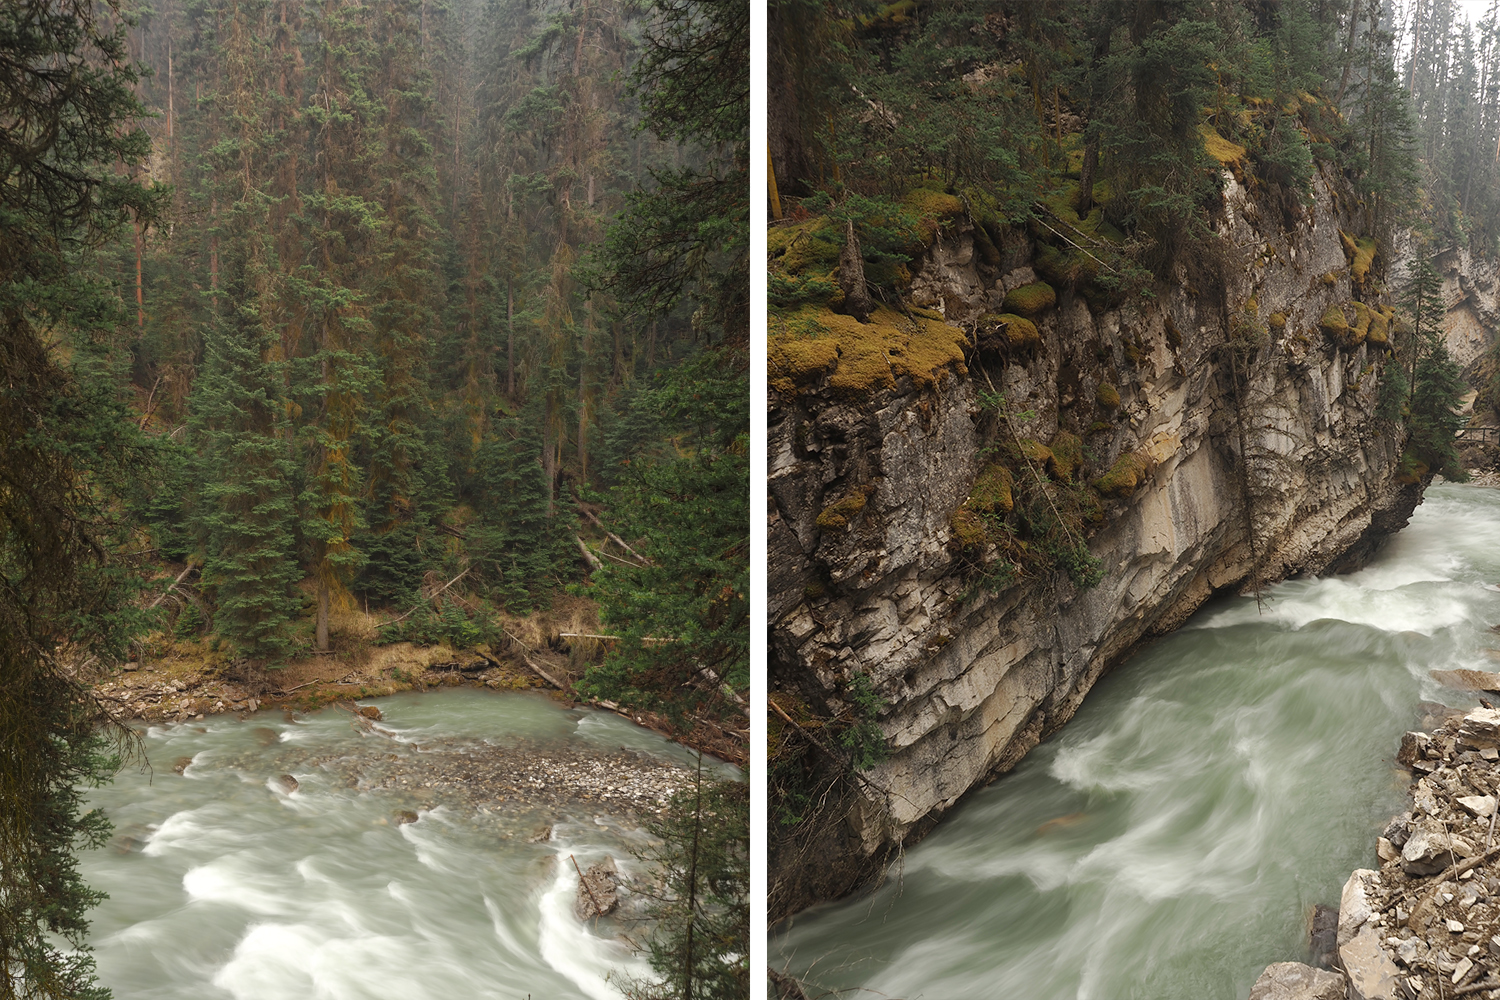
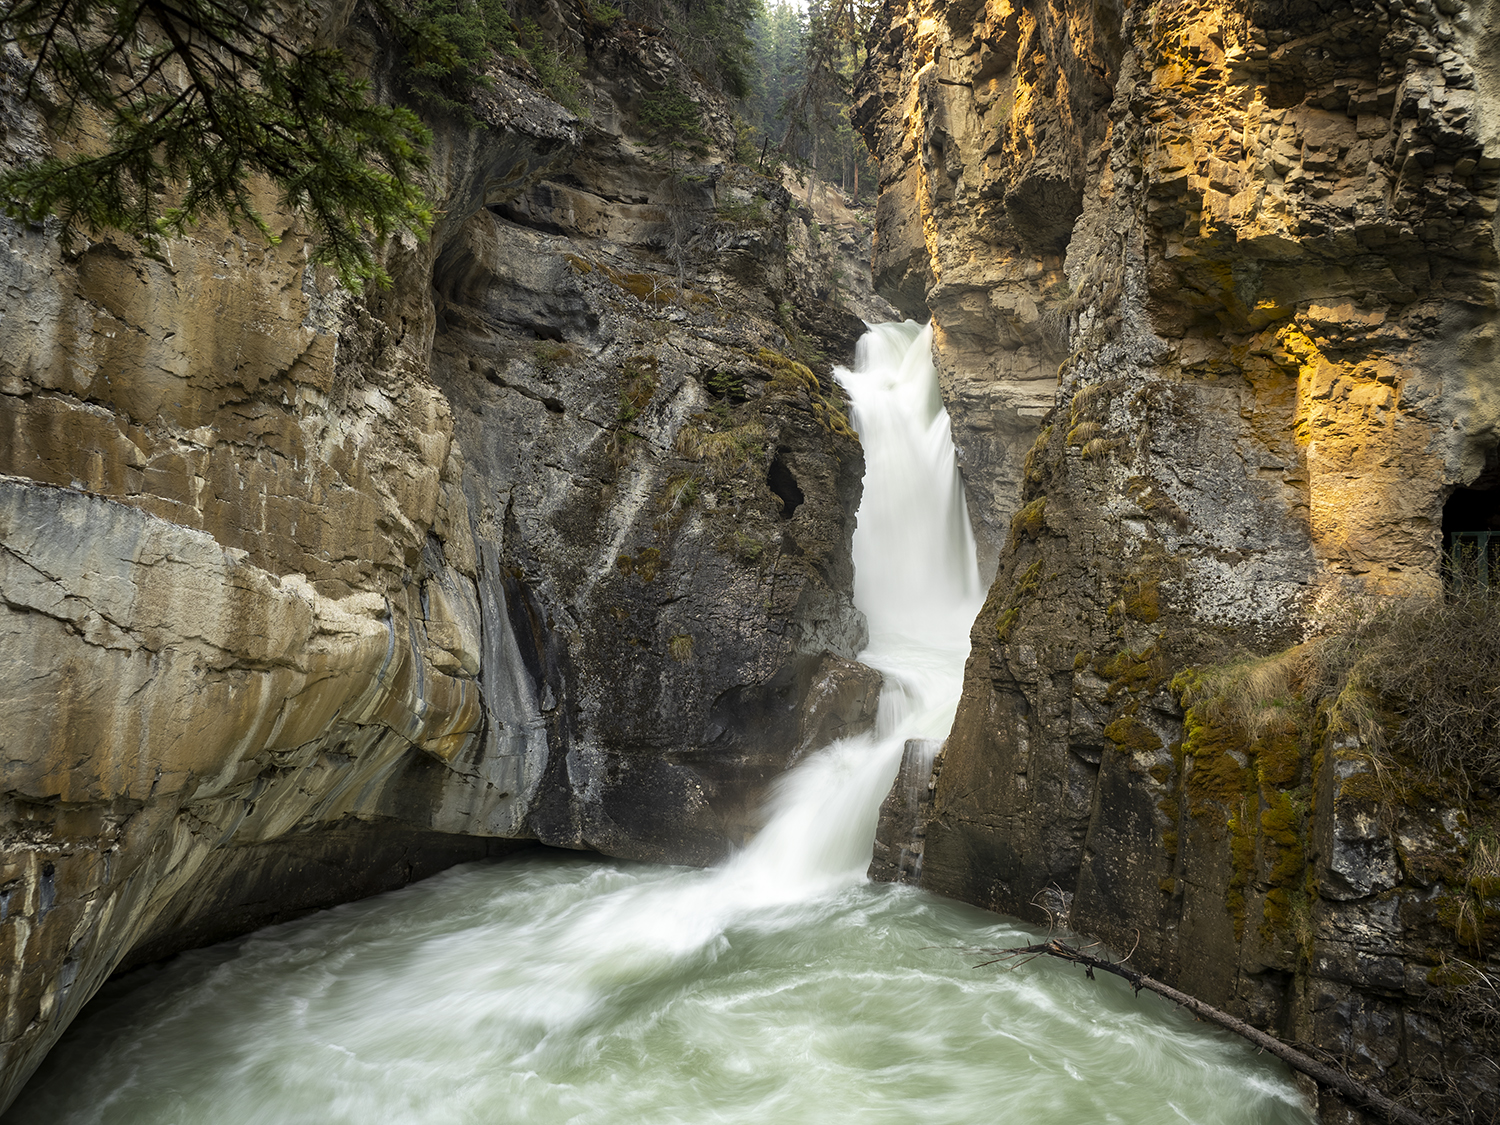
Johnston Canyon + Falls
A narrow gorge filled with cascading little rapids and towering forests leads the way to Johnston Canyon, a must-see for any photographer visiting Banff National Park. The hike comprises of the Lower Falls and Upper Falls with those keen to hike a little further being treated to an incredible scene.
If you’re short on time though, the lower falls are a total dazzler. Walk across the bridge and through a little cave to be overpowered by the roar and force of thundering water pouring into the canyon.
Johnston Falls Photo tip: On the hike up have a zoom lens handy to capture details of the rapids and surrounding scenery. Once you arrive at the falls though, a fish-eye or wide-angle lens will enable you to fit them in their entirety, so you don’t miss any bit of the magic.
Travel tip: In winter this track can be VERY slippery and dangerous. There are railings most of the way but hiring crampons is essential in my opinion. I wore them and managed the hike in 20mins whereas I saw people on the way back that were still slipping over and clinging to trees 45mins since I passed them. Visit Wilson Mountain Sports in Lake Louise to hire!
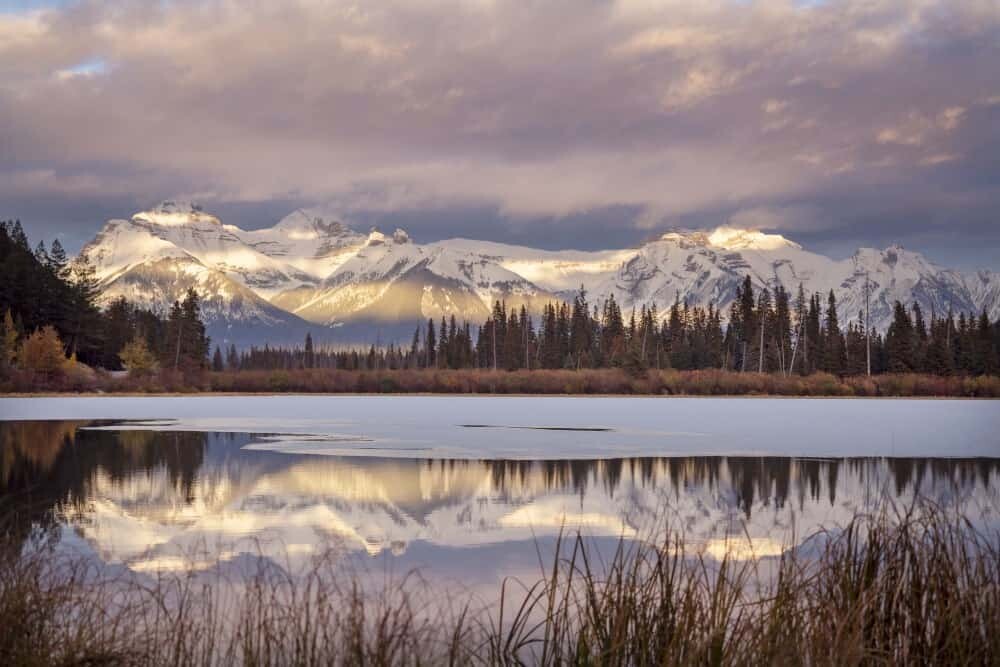
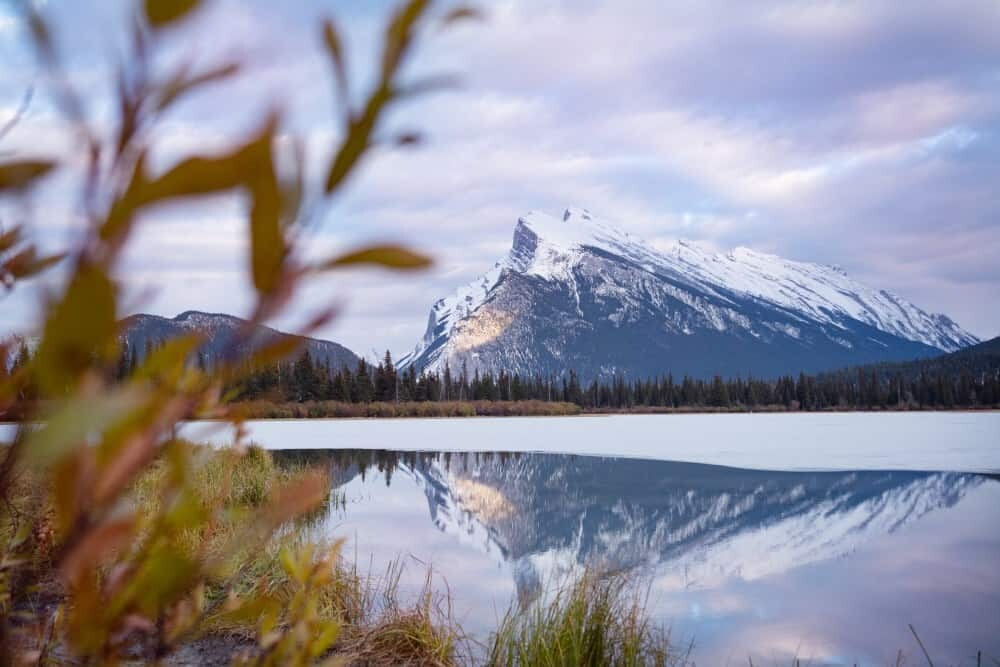
Vermillion Lakes
This gorgeous spot is right beside Banff meaning it’s ideal for sunrise or sunset photos in Banff National Park because it’s so close if you’re staying in town.
The Vermillion Lakes provide photographers with a beautiful vantage point across the wetlands towards the jagged Mount Rundle along with an almost 360degree view of the surrounding peaks. Arrive early if you’re looking to photograph sunset to grab yourself a nice position because it can fill up quickly with photographers.
Vermillion Lakes Photo tip: Use the reeds and water to frame your shots and seek out reflections that can make your image pop. The Vermillion lakes are generally quite shallow meaning they’ll be relatively still unless there’s a strong wind. It’s a great spot to capture astrophotography or even long exposures of clouds as they pass above the mountain peaks.
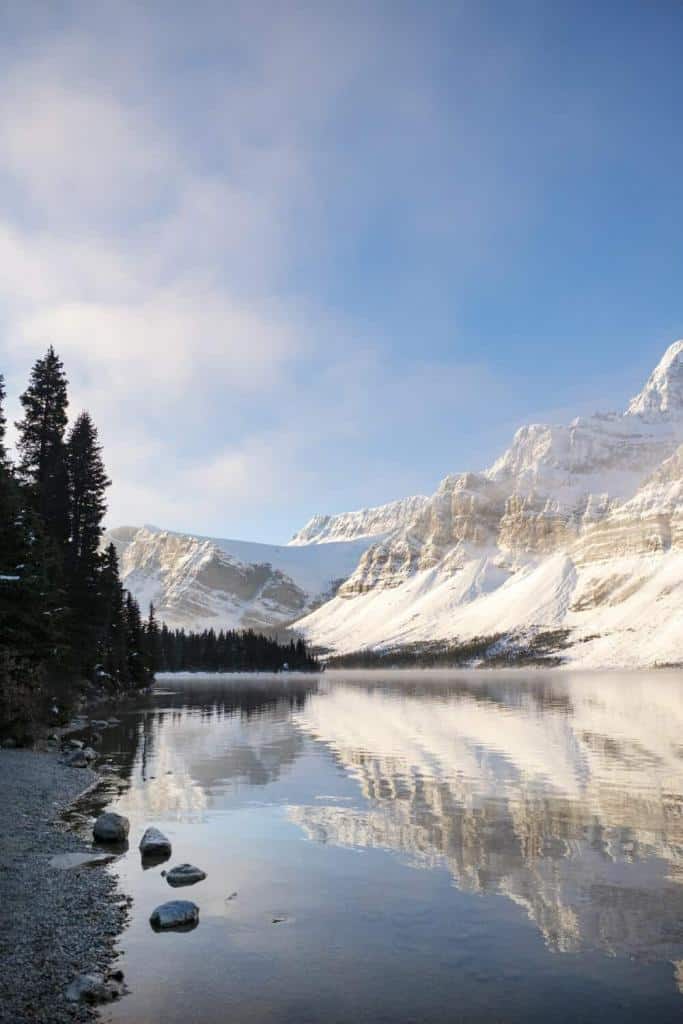
Bow Lake
Expansive natural wonders are immediately visible once you approach Bow Lake. Forget hiking hours to reach perfection, at Bow Lake its right in front of you and photogenic at every angle.
You’ll find Bow Lake located along the Icefields Parkway but it’s one of the first lakes you’ll come across when travelling from Banff and is only a 25min drive from Lake Louise. Because it’s so easy to access, Bow Lake is an ideal spot to venture for a sunrise photography mission!
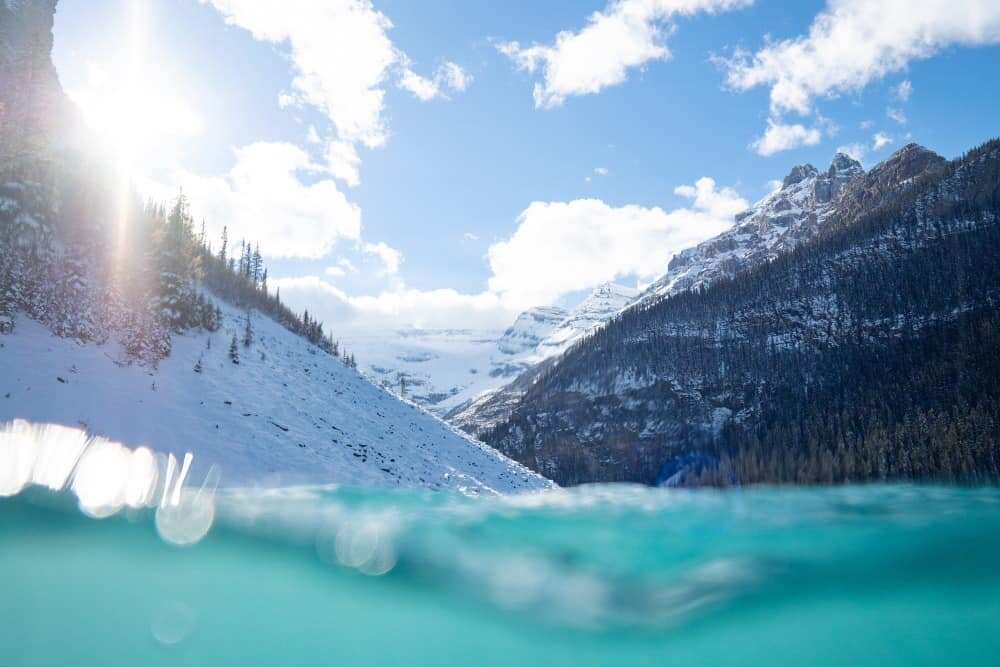
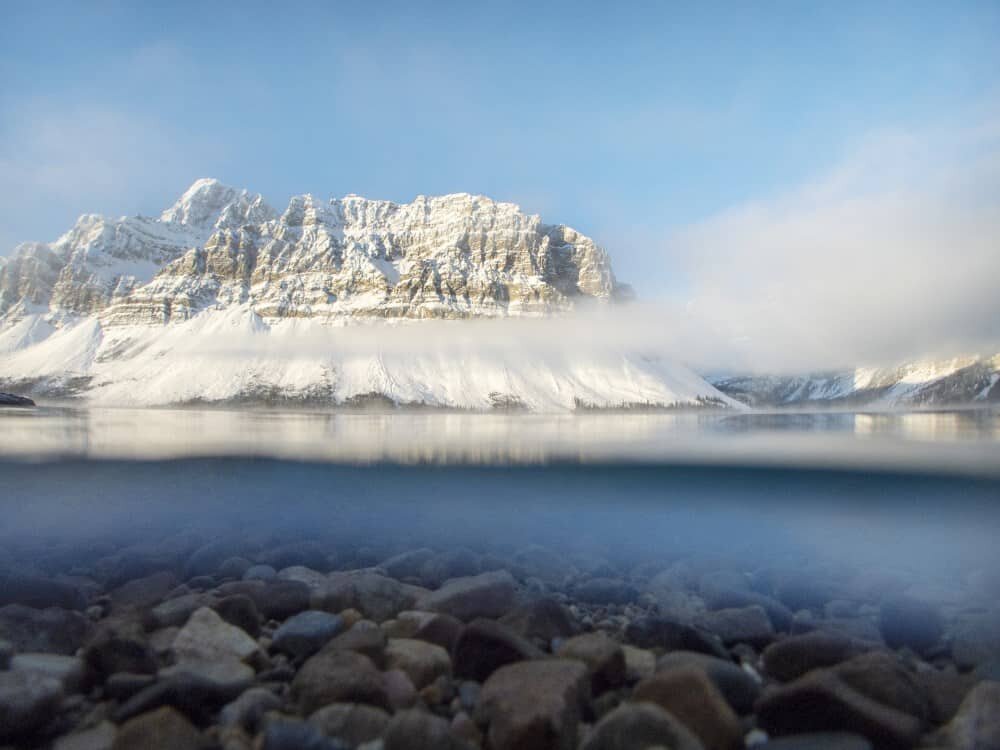
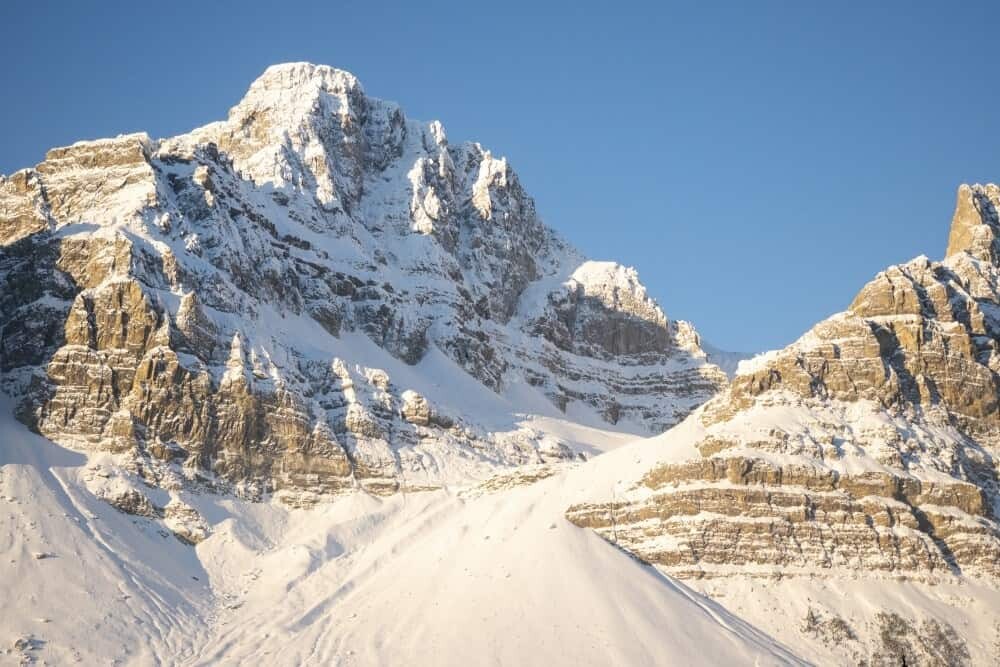
Park your car at the view point beside the Parkway and wander down the hill to photograph the scene from the clear water shores of the lake. It’s the perfect spot to try some split-level images with Crowfoot Mountain looming closely behind. Standing at 3,055m, Crowfoot works with the lake to provide a stunning scene enabling you to wander around the lake and capture various angles.
Bow Lake Photo tip: Due to its location, Bow Lake is a great spot for sunrise. Arrive early and cross your fingers you’ll witness some morning mist drifting across the water as the early morning sun rays illuminate the peaks above. If you’ve got a waterproof camera, it’s also a fun spot to try some split-level underwater photography!
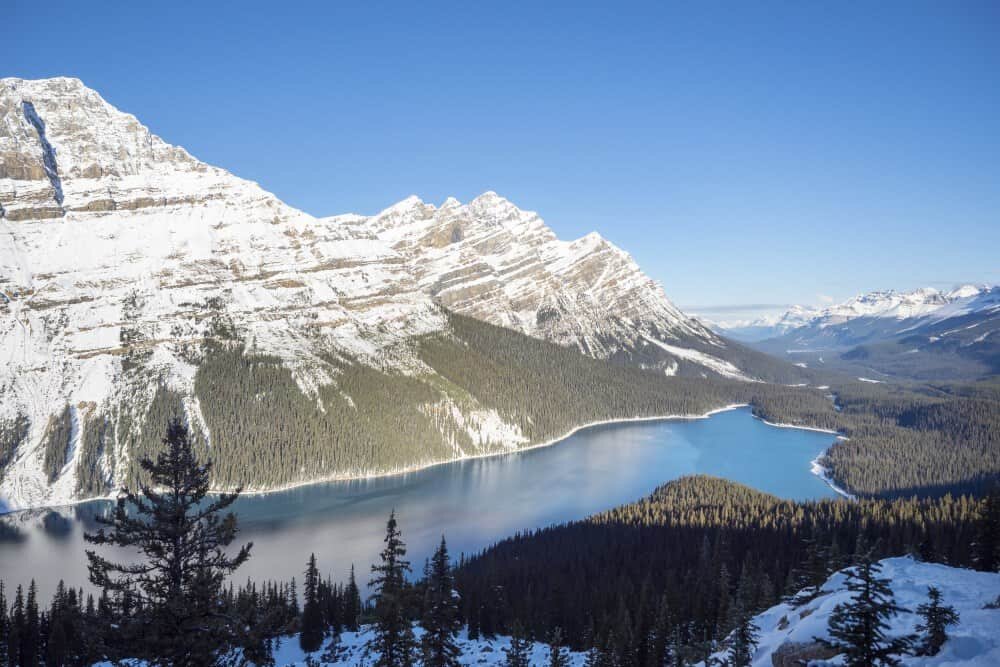
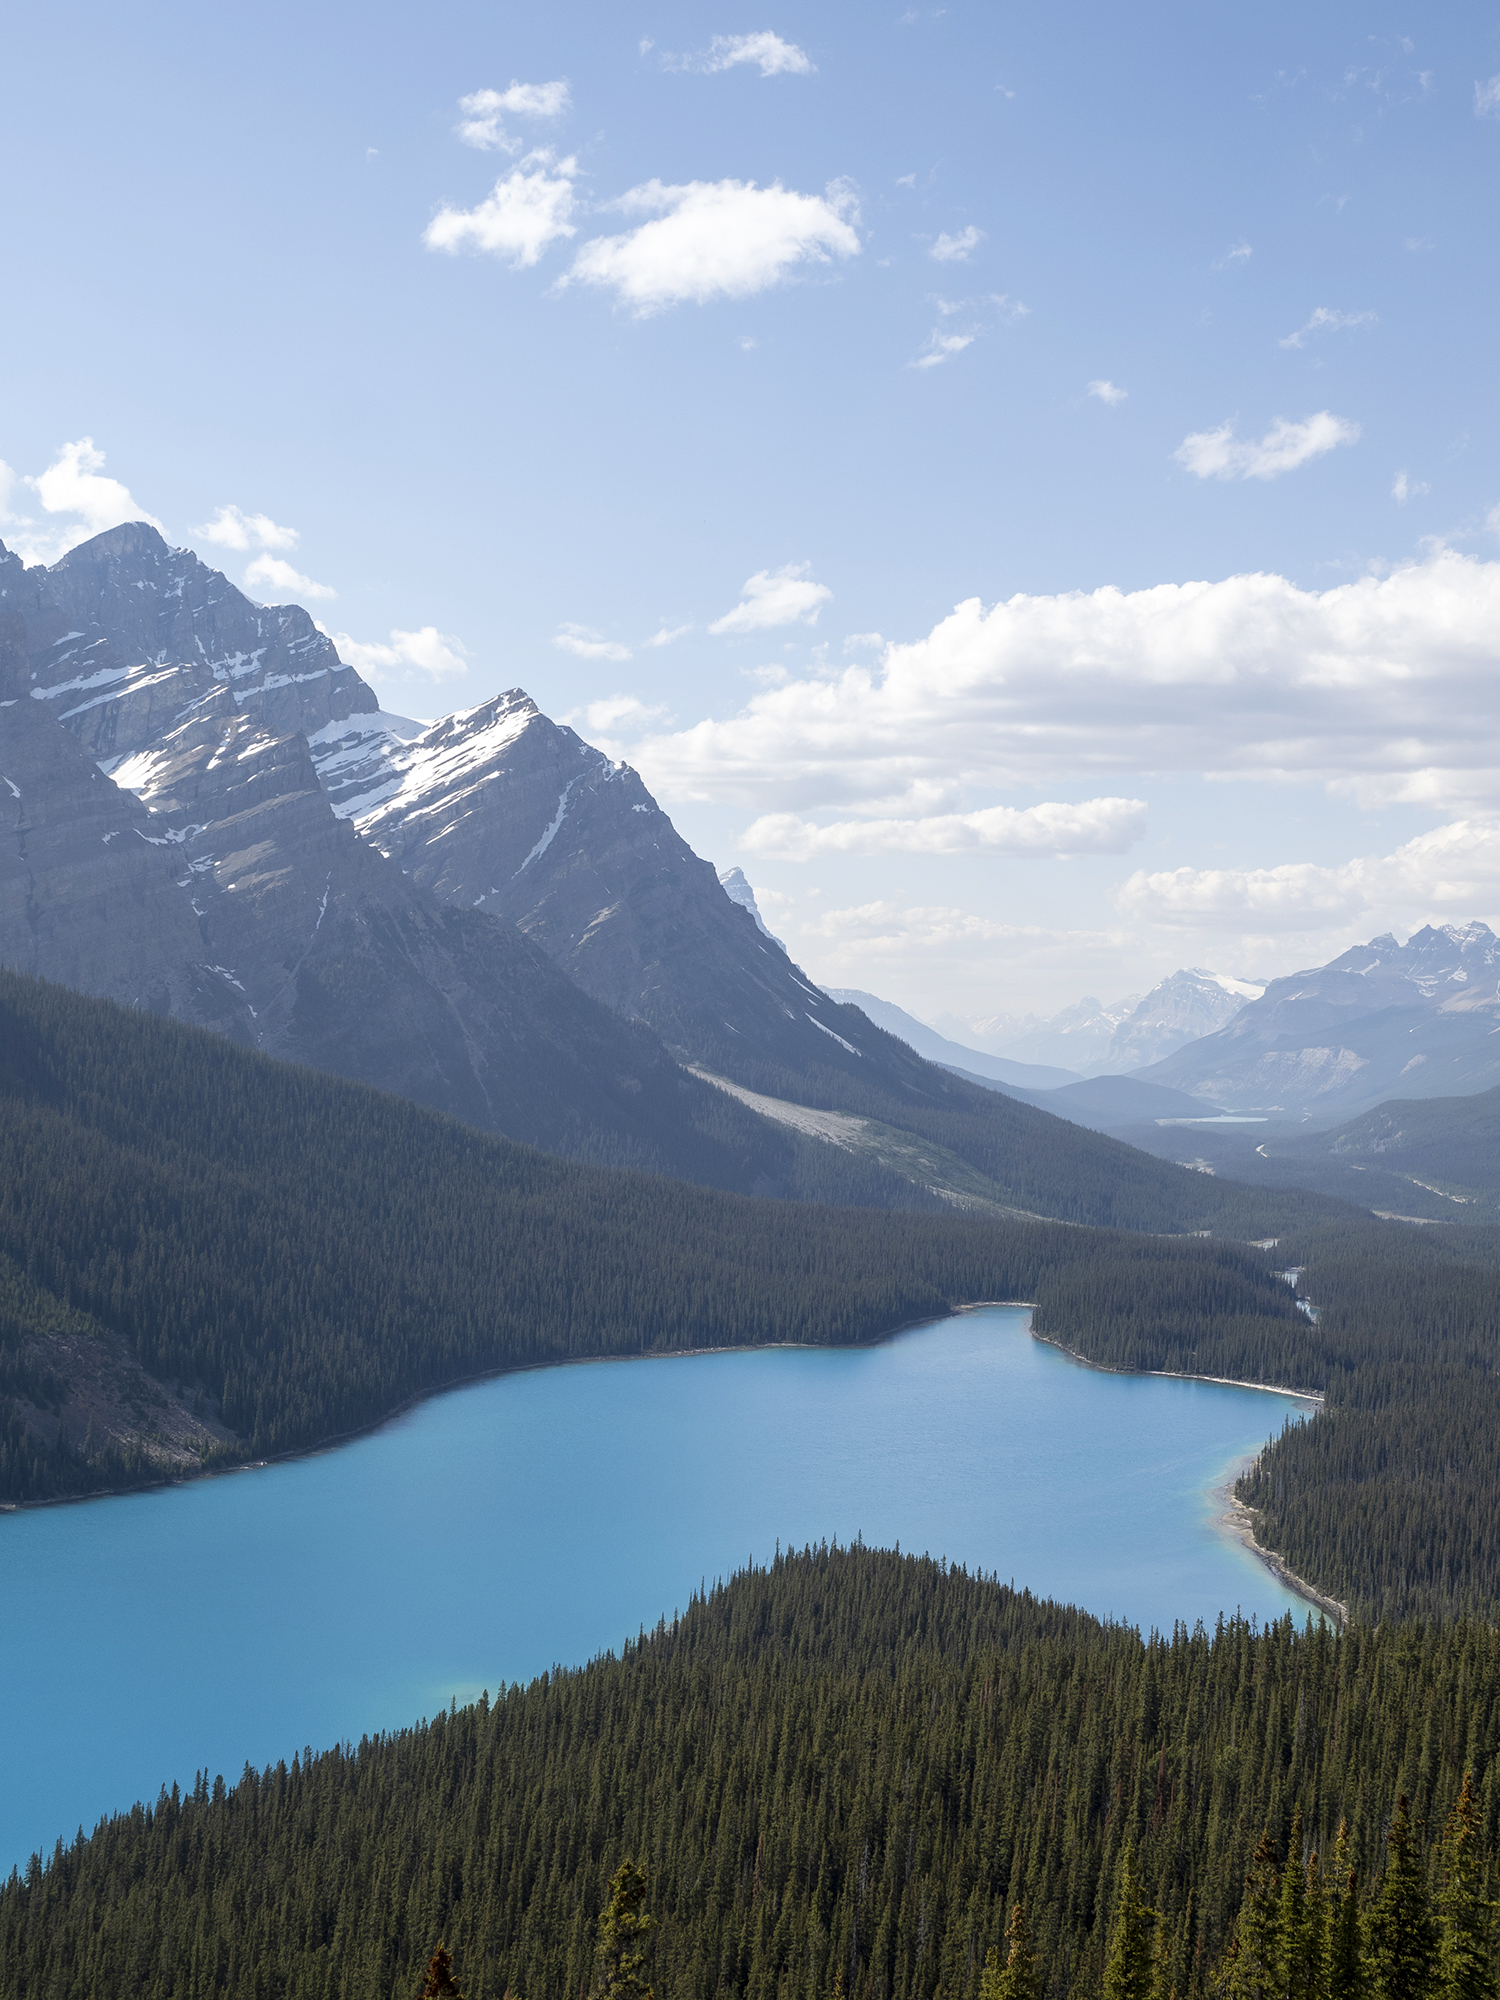
Peyto Lake – The Peyto Lake Hike
Is it a dog? Is it a wolf? Peyto Lake is one of the most popular stops on the Icefields Parkway and for very good reason! A short uphill track from the car park, the Peyto Lake Hike will lead you towards one of the best views in the Rockies.
Not only is the shape of the lake a draw card, but it’s intense vibrant turquoise colour changes as light and ice effects its tone throughout the day and seasons.
Created by glacier rock flour that flows into the lake in the summer months, the water colour is seriously striking even on a cloudy day. In the winter months, the lake is frozen, visit in May to see the lake thawing with incredible ice patterns, or in the summer months for that intense vibrant blue.
Peyto Lake Photo tip: Peyto Lake is popular so arrive early or later in the day to avoid sharing the view with tour buses. If you can make it here for sunrise it’ll be worth the effort, alternatively later in the day will see fewer crowds also.
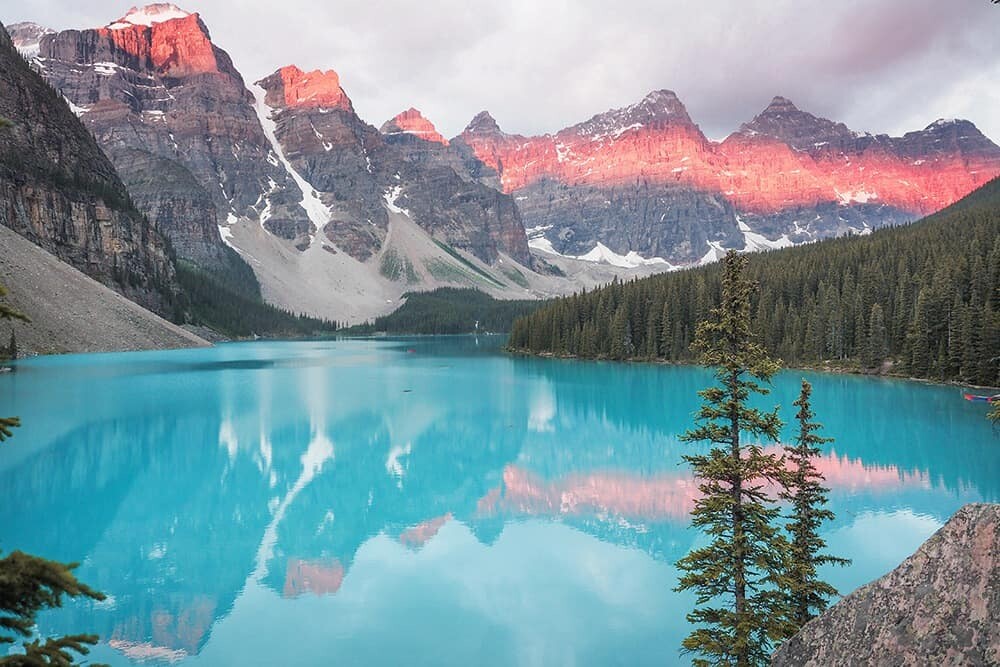
Moraine Lake
*Due to early snow fall and hazardous road conditions, I was unable to visit this spot on my trip but luckily Adventurer and Dual Olympian Samantha Reid (check out her Instagram + Youtube channel) has been based in Banff for the past year and shares her tips below…
Moraine Lake is easily one of my favourite lakes in Banff National Park and I’m not the only one who thinks so. Make sure you get to the lake early to get a parking space or catch public transit for a hassle free visit. The access road to the lake is only open seasonally so if this one is on your bucket list make sure you plan to visit between May 22 and Oct 10 (these dates are weather dependent and are subject to change).
Once you’re at the lake take a short hike up the rock pile trail to get that classic shot looking down on Moraine Lake with the 10 peaks in the background. For an alternative perspective follow the lakeshore trail for magnificent views looking across the lake towards Mount Fay and the Fay Glacier.
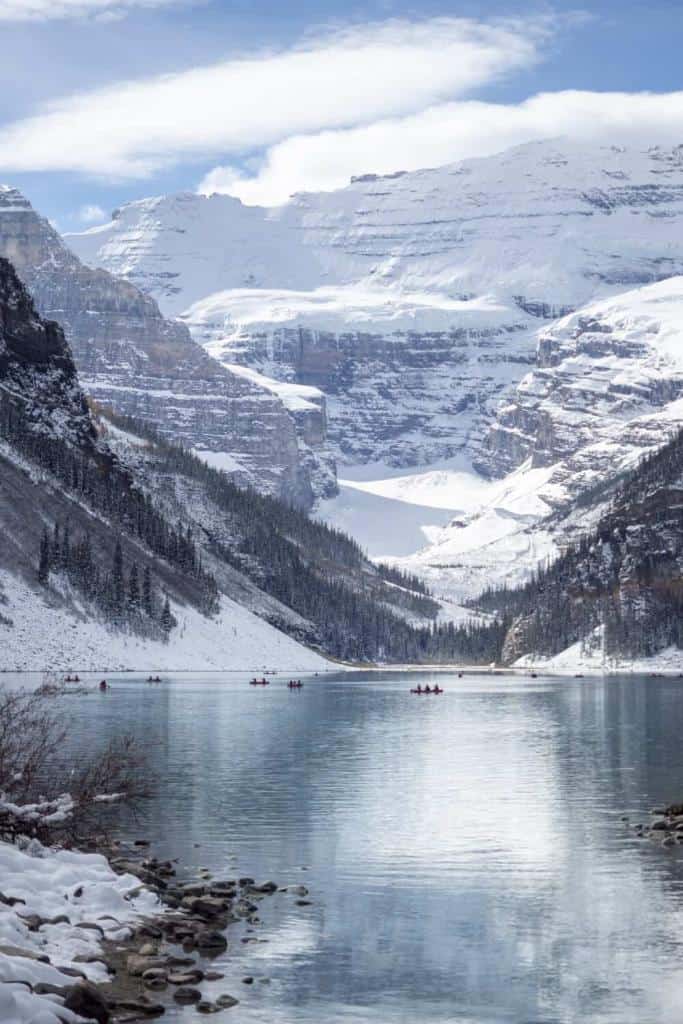
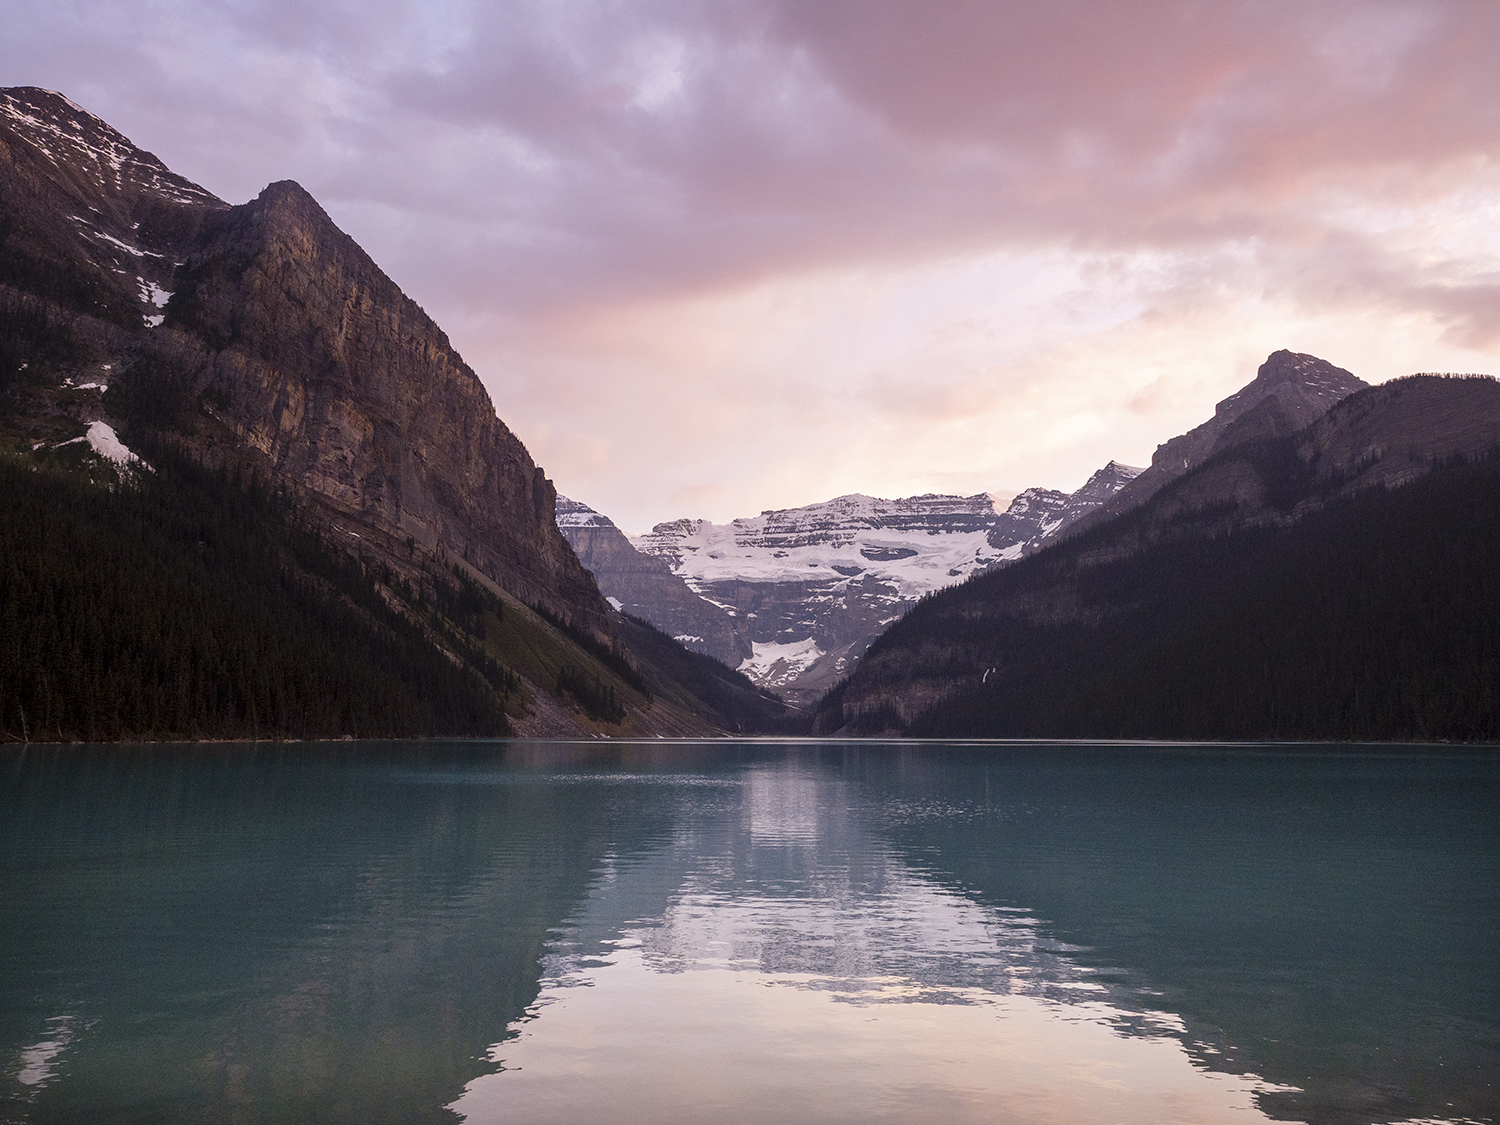
Lake Louise
This is the spot where your jaw will drop and the only word that’ll come out of your mouth is WOW. Lake Louise is postcard perfection and if you’ve dreamt of photographing the Canadian Rockies, it will well and truly feel like you’ve arrived.
The only downside to its beauty is of course the crowds it attracts. However, you can find a way to experience the tranquillity of Lake Louise and photograph it’s scenery without joining the tripod wars along the lake…get yourself a canoe or get hiking!
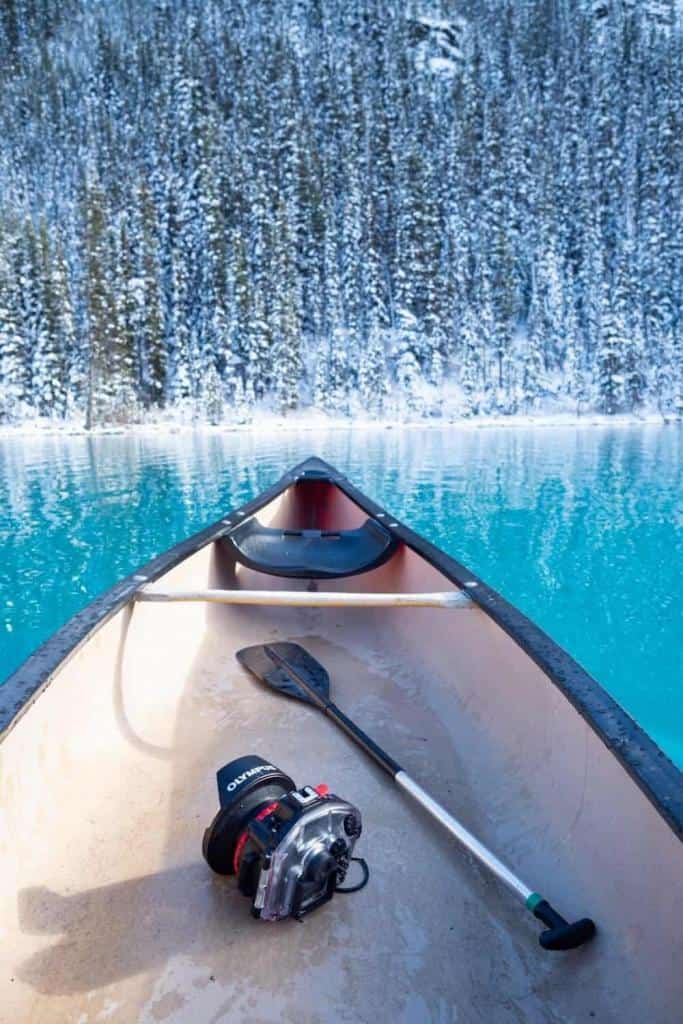
Paddling on Lake Louise has to be one of the best photography experiences I’ve ever had. Despite the steep price of $115+tax per hour ($105+tax per 30mins), if you’re serious about capturing some unique shots of the landscape this is the best way to do it. Canoes can fit up to 3 people so splitting the cost makes it a little more affordable. Read about my experience canoeing on Lake Louise here.
Once out on the lake, paddle up towards the glacier, along the shore line to photograph the forests and rocky scenery then don’t forget to highlight the turquoise blue in the foreground, it’s hard to get a bad shot here!
I also opted to take out my underwater housing, dunking it off the side of the canoe to attempt a unique shot of Lake Louise with some split-levels. It meant I got a little wet each time the camera came back into the canoe but it made the experience even more fun and thrilling.
Those not keen to paddle can venture along the make hiking trails that weave around and above Lake Louise. There’s a path right along the lake’s edge that requires no extreme level of fitness and provides a number of alternate views across the lake right up until the foot of the glacier.
Lake Louise Photo Tip: Arrive early to beat the crowds and if you can’t, be sure to wander along the hiking trails to avoid selfie sticks and people posing on rocks.
Lake Louise Travel Tip: As the seasons change, Lake Louise takes on a different appearance. You can enjoy ice sculptures and skate once it’s frozen over in winter, or in summer, soak up the sunshine or even take a dip if you don’t mind the chill of glacial fed water.
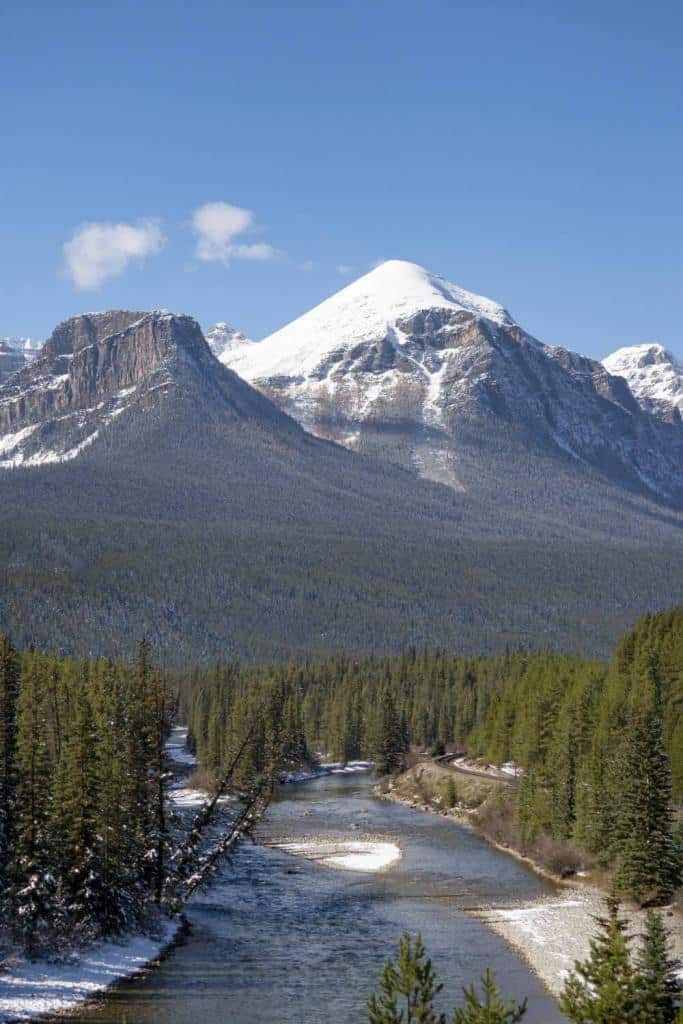
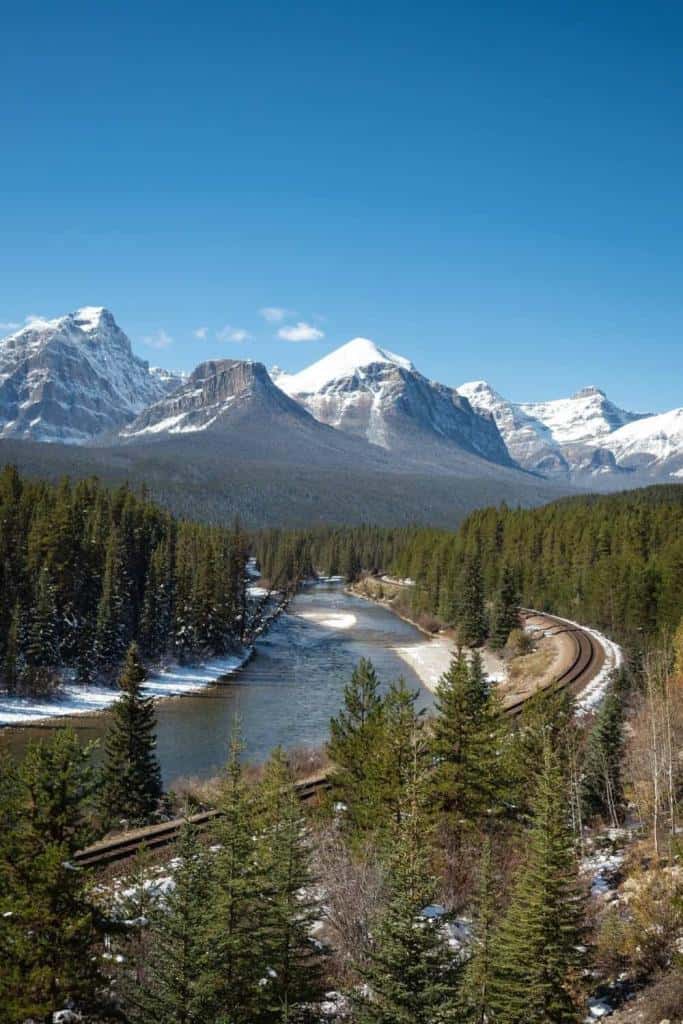
Morant’s Curve
Iconic views await at this unassuming corner found along the Bow Valley Parkway. I’d seen photos of this spot but until driving right upon it and pulling over because it looked pretty, didn’t have it on my itinerary but want to make sure you do!
The Canadian Pacific Rail track winds along the forested banks of the Bow River providing a fantastic photo spot to capture the landscape.
Morant’s Curve Photo tip: Check the train schedules or allow time to wait it out for a train to pass along the tracks. Otherwise, any time of day will work in this location and as I said, the image below was taken without any plans around 2pm. There’s plenty of space to share the spot with other photographers!
Travel tip: Park in the small car park opposite the photo spot and keep an eye out when crossing the road.
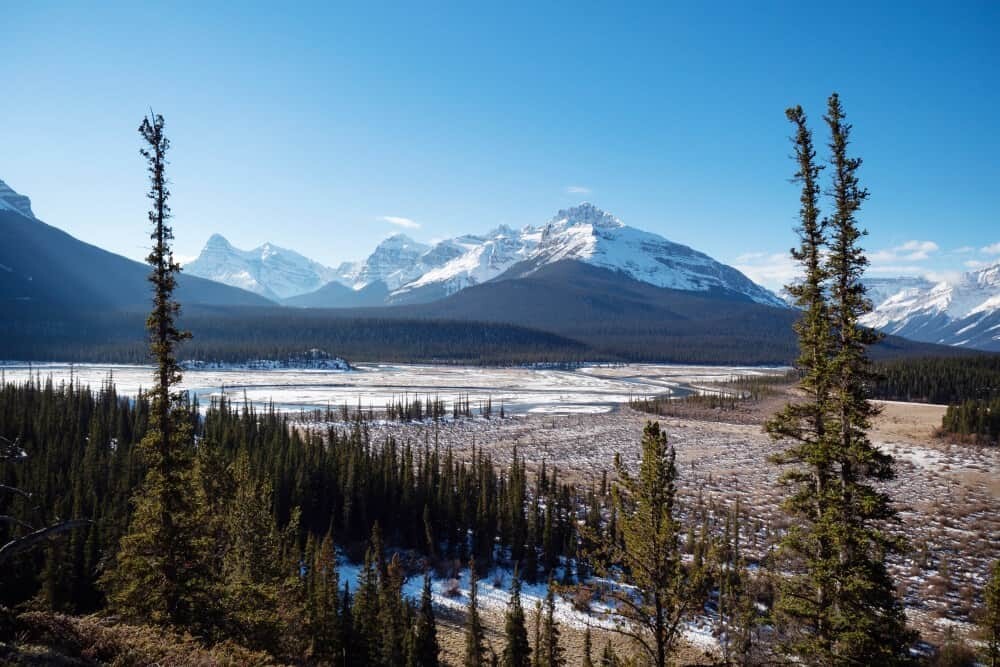
Saskatchewan Crossing
Located along the Icefields Parkway in Banff National Park, this spot allows for a great chance to stretch your legs and snap some shots of the expansive landscapes of Saskatchewan Crossing.
Originally used by fur traders and travellers to cross the North Saskatchewan River on their way to British Columbia, now it’s where a number of hiking trails begin, particularly one to the stunning Glacier Lake. It’s also not too far from the very photogenic Abraham Lake, where the ice bubbles keep photographers very occupied in winter!
If you’re driving the Icefields Parkway and heading north, there’s a rest stop on the left side of the road where you can capture some images looking down over the river basin.
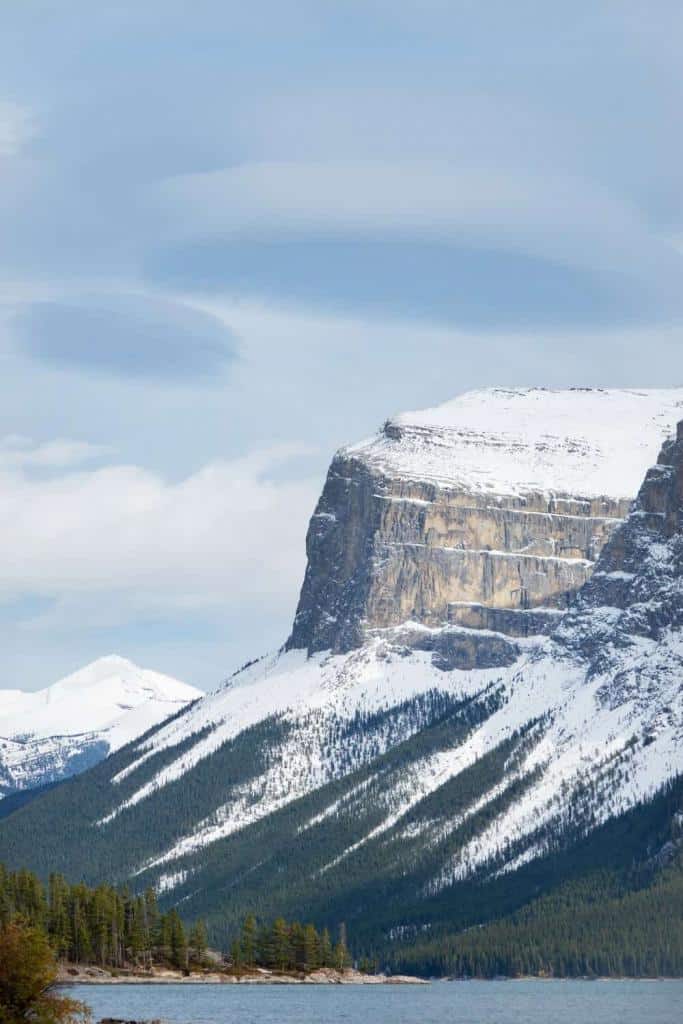
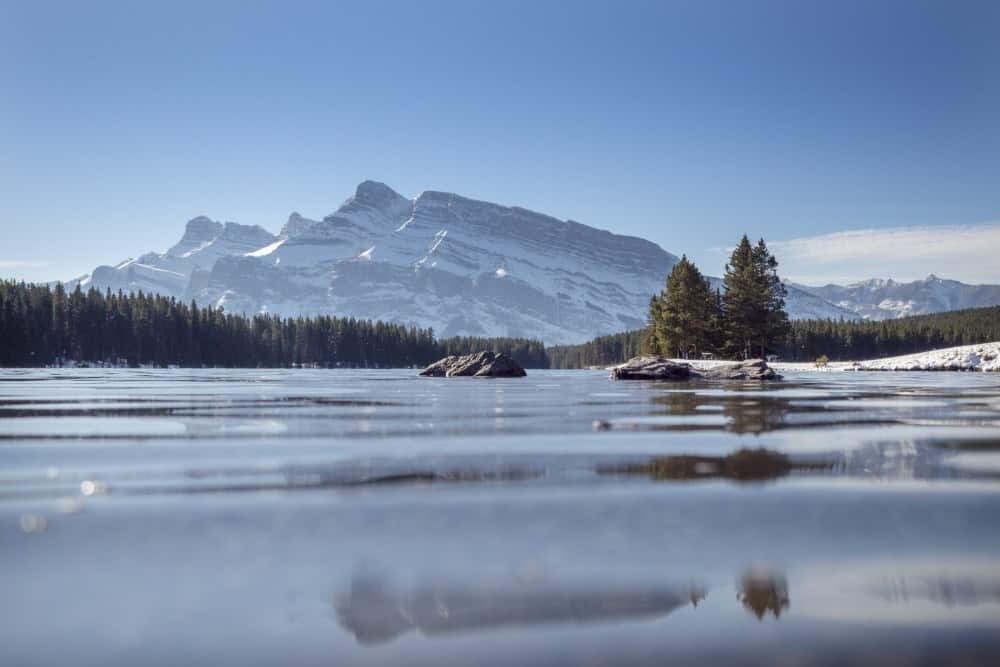
Lake Minnewanka
Just a short drive from Banff you’ll find this gem, Lake Minnewanka which is one of the best locations to go for an all-day hike and explore the wilderness of Banff National Park.
Lake Minnewanka can be explored by boat with a cruise available and kayaks to hire however in my opinion, the trail that leads around the shore is just as good and will allow you plenty of time to wander at your own pace and photograph the landscapes. From the shore you can nab some great shots of Mount Inglismaldie and Mount Girouard once you get a little further around the lake.
Just beside you’ll find the equally beautiful Two-Jack Lake which offers a gorgeous perspective back towards Mount Rundle, a great spot for sunrise and sunset photography!
Lake Minnewanka Photo tip: The trail is photogenic in itself offering plenty of little coves to include in your composition of the stunning scenery, a rocky shoreline and lots of places to enjoy a picnic. (Just be sure to pack your food up and avoid any lingering smells so you don’t attract bears!)
Banff Gondola – Sulphur Mountain Banff
Float above the forests in a gondola that’s taking you all the way to the top of Sulphur Mountain to access one of the best views in Banff National Park! A ride on the Banff Gondola is one of the best things to do in Banff and not only is it photogenic, it saves you hiking all the way up hill…I’m all for visiting any photography location that doesn’t make my legs hurt!
Once up on top there’s a visitor centre with indoor experiences to learn about the region along with a café, souvenir store and restaurant. On the top deck there’s fireplaces, outdoor seating and a great terrace to start photographing the scenery. In my opinion though, the best photography spots from the Banff Gondola are along the walkway towards Samson’s Peak.
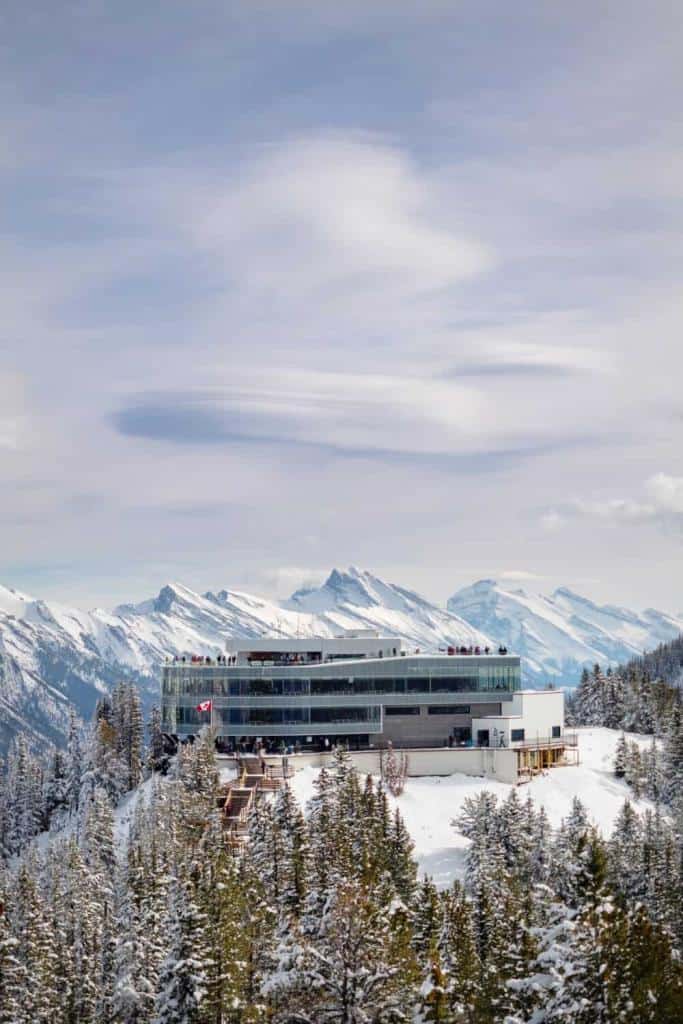
There’s a 1km wooden boardwalk that ventures across the top of the mountain providing spectacular views over the peaks and valleys in all directions. Once you reach the end, there’s a 360 degree view over Banff National Park, down to the town of Banff, over towards Lake Minnewanka, and Mount Norquay.
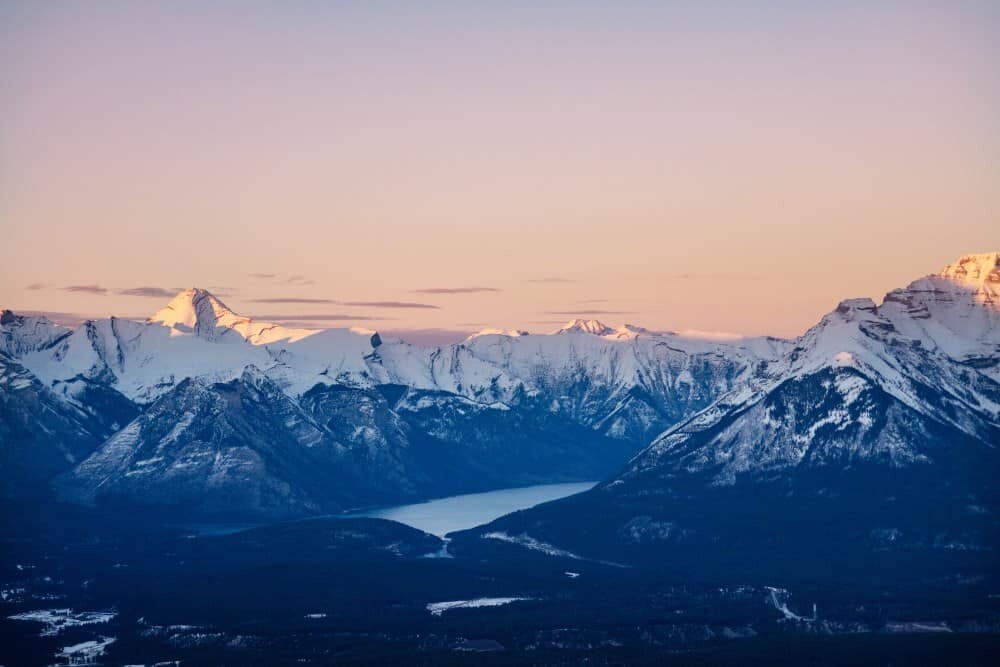
Photo tip: Time your visit so it allows you to photograph in the afternoon light and then wait around for sunset, it’s such a beautiful thing to photograph the dusk colours as they fall over the peaks of Banff National Park. In winter you’ll find it’s really, really chilly up the top so ensure you have weather ready clothing and hand warmers for inside your gloves, my fingers nearly froze!
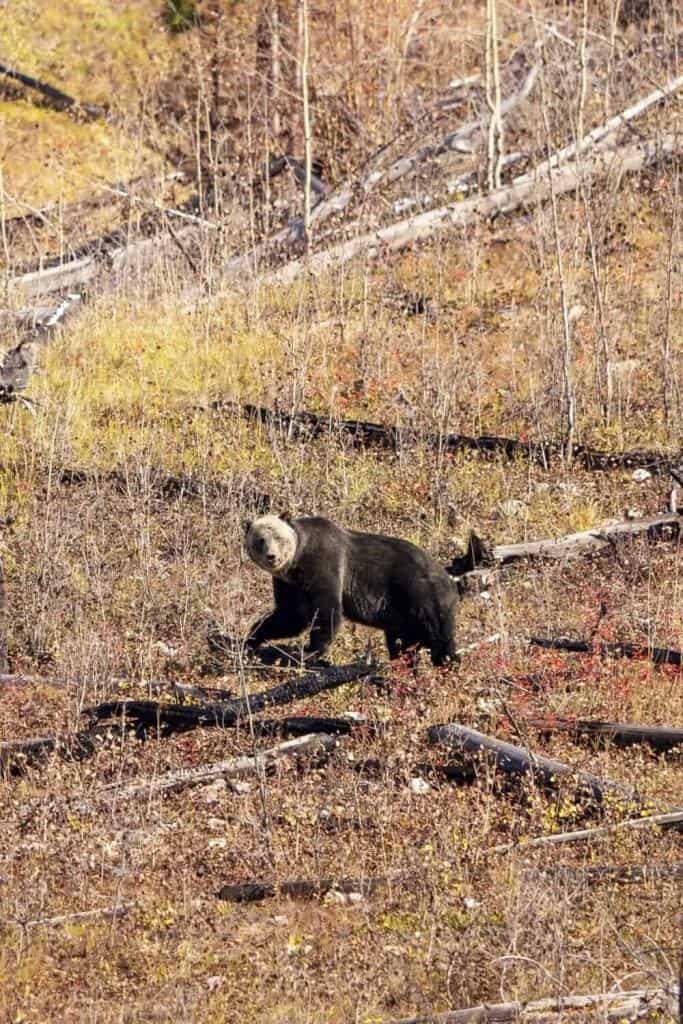
Getting stuck in a Bear Jam –
While exploring Banff National Park you’ll no doubt find yourself in a “Bear Jam” or some kind of road block caused by wildlife. This is of course what everyone is hoping to see but sometimes this situation can be dangerous, especially when tourists leave their cars and approach the wildlife.
In any case, it’s safest to stay inside your car, don’t approach the wildlife and definitely do not attempt a selfie with a bear. If you find yourself in a bear jam grab your zoom lens and get snapping stalker style through the windows of your car instead.
If you’re hoping to move along before everyone else just drive really slowly if possible to continue your journey. There’s sometimes large groups of Rocky Mountain Sheep that love to nibble on cars and pick up and squished bugs, it’s pretty hard to move along until they’re done so patience is also a big factor here and it’s worth going with the flow and realizing that it’s not a situation that you’ll find yourself in often!
Where to Stay in Banff National Park?
So, this is the fun part because there are SO many options of where to stay in or around Banff that whether you’re a lover of luxury or camper, there’s something for everyone.
Let’s start with the luxury side of things because usually when there’s a luxury hotel involved, it’s more than likely going to be photogenic in its own right. This is absolutely the case with The Post Hotel in Lake Louise, it’s got that cosy, wooden chalet vibe and welcome’s you with all the trimmings of a five-star establishment.
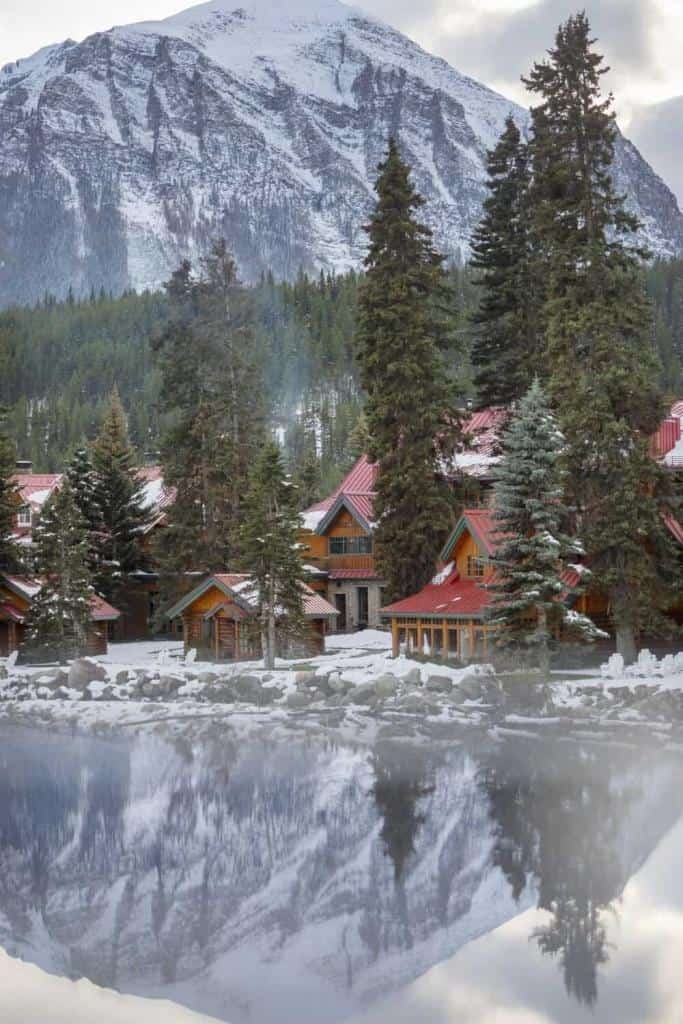
Like stepping into a private ski lodge, The Post Hotel features rooms with a fireplace, charming interiors and the kid of atmosphere that makes you want to snuggle up under a blanket and watch the snow fall outside. The ideal relaxing retreat after you’ve been out photographing in Banff National Park. I’ll be sharing a more detailed visual review of The Post Hotel shortly so keep an eye out for more images!

Those keen to keep things simple and stay either in a self-catering apartment or hotel, here are some options to look through that might fit the bill.
Recommended Banff Hotels –
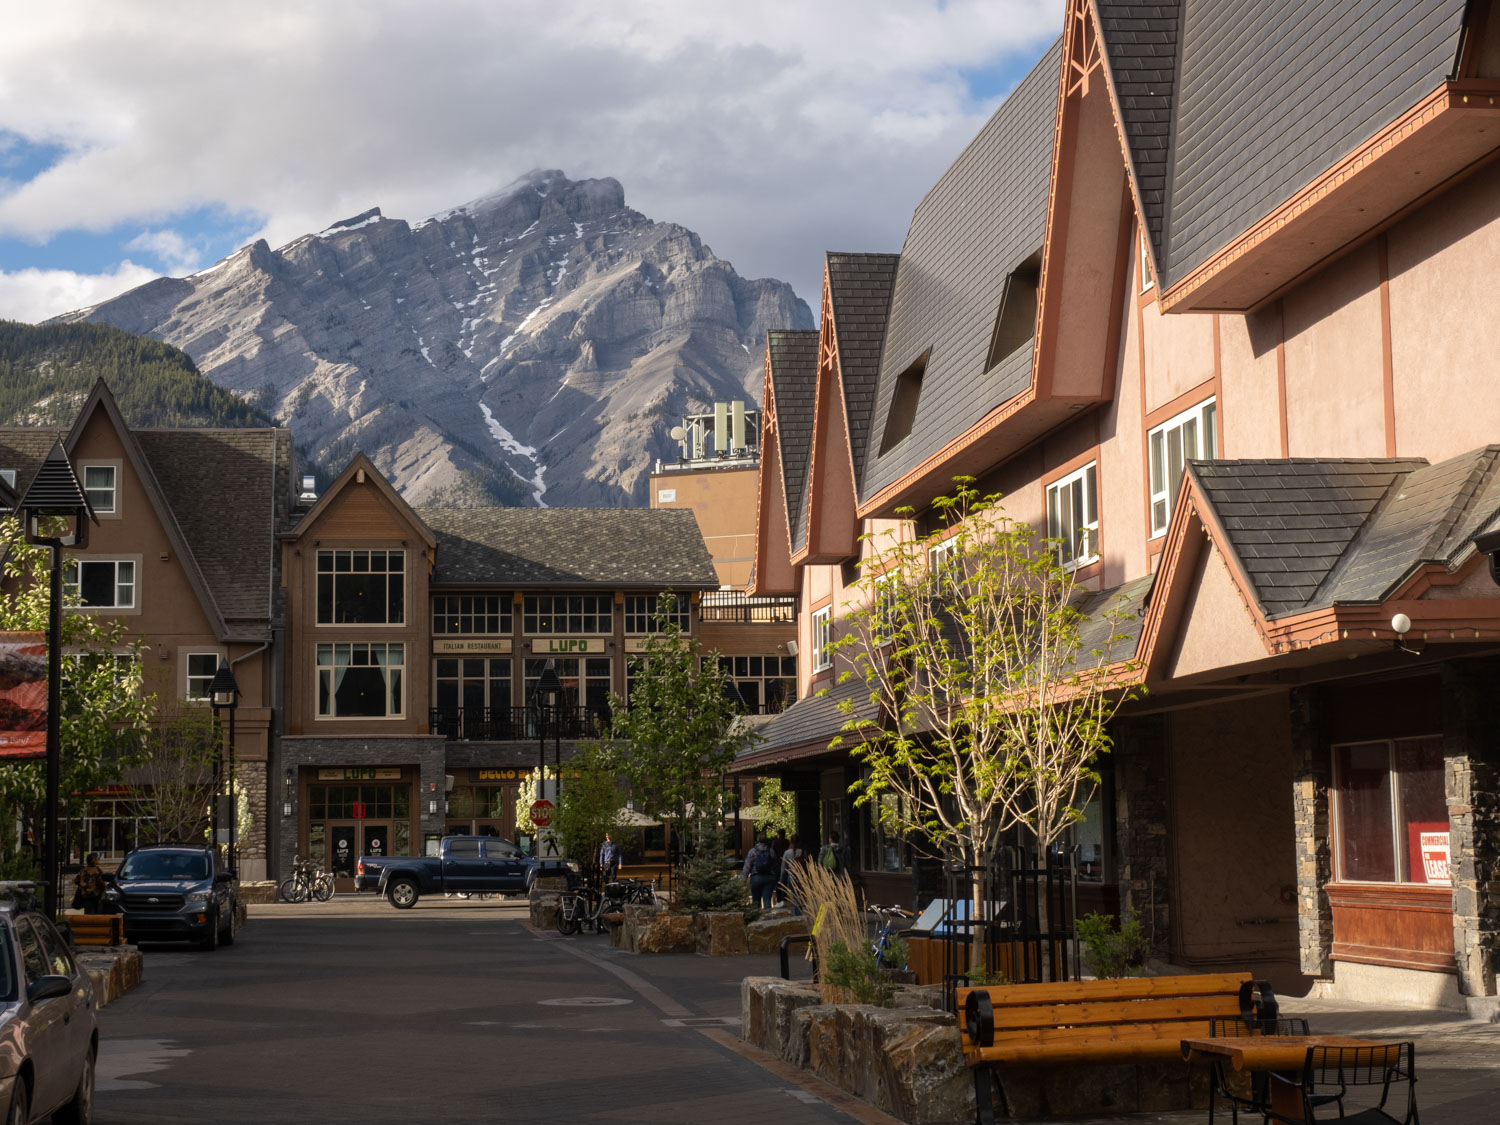
On my most recent visit, I stayed at multiple properties under the Basecamp Resorts brand and can absolutely say, they’re a wonderful place to base yourself when exploring Banff National Park.
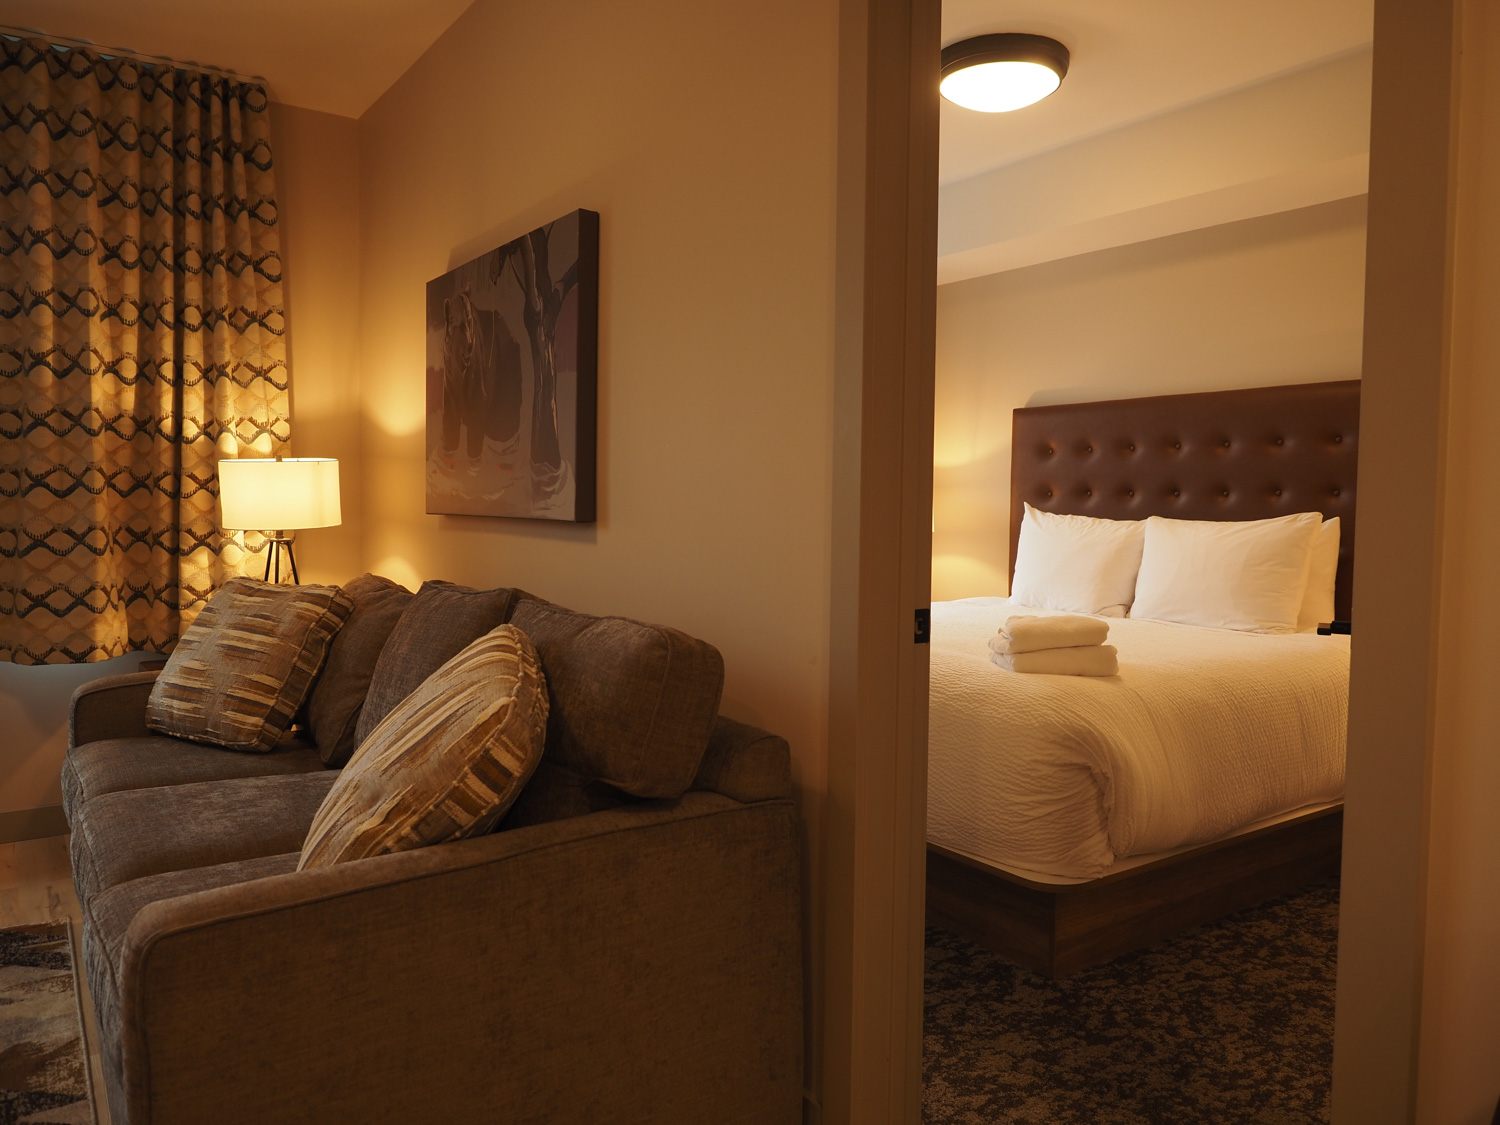
Their Banff hotel, Basecamp Suites Banff, is ideally located right in the centre of Banff, close to cafes, restaurants, walking trails and the Bow River. Each of their stylish, yet affordable properties feature apartments, meaning you’ve got everything needed to relax, unpack and explore the mountains. They’ve got kitchens, bath tubs, comfortable beds and parking.
With multiple lodges, resorts and cabins, you can opt to stay a few days in Banff, Canmore, at Baker Creek and then head over to Golden where they’ve recently opened a new lodge.
Read my review of Basecamp Resorts here.
Elk + Avenue – Newly refurbished and right in the centre of Banff
Banff Rocky Mountain Resort – An adventurer’s retreat with pool, tennis courts, spa and self-catered apartments.
Banff Boutique Inn, Pension Tannehof – A luxurious B&B nestled along Cave Ave just a short walk across the Bow River from downtown Banff.
Information on camping in Banff National Park can be found via the Parks Canada website which lists availability of over 2400+ sites throughout the park along with pricing and facilities info.
Best Time to Visit Banff National Park
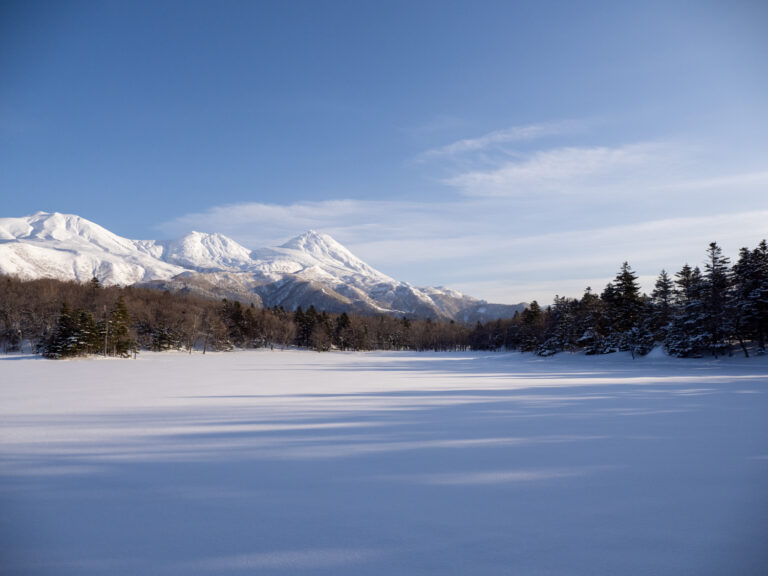
Of course this depends on what you’re hoping to photograph and what activities you’re most excited about doing. If it’s skiing and snow, then winter will be your ticket, however my visits in late autumn and again in early spring felt like they were timed just perfectly. In late autumn, the summer crowds had diminished, the larch trees were displayed a vibrant golden colour, there was early snow fall resulting in the alpine scenery looking fab and photogenic. May brought thawing lakes, still covered with gorgeous ice patterns and peeks of the gorgeous blue coloured water, plus far less crowds.
Visiting in May felt like I was watching the mountains wake up from their winter slumber, warmer and longer days brought lots of wildlife sightings, no mosquitos and chilly nights.
Summer in Banff National Park can get a little chaotic with the amount of people visiting but if you’re hoping to camp, experience the outdoors and capture that summertime glow of the mountains, it’s worth a visit.
Actually, I can’t imagine a bad time to visit Banff National Park, these mountain landscapes are just so stunning from every angle that it would be hard to leave disappointed regardless of when you get a chance to visit.
When you’re planning things to do in Banff National Park, be sure to check local weather forecasts so you’re not caught in a snow storm or harsh conditions. My guide ‘Weather Forecasting for Landscape Photographers‘ links to some of my favourite weather apps and websites for tracking wind speed and cloud cover.

Hello! I’m the founder and photographer behind The Wandering Lens.
With 19+yrs experience as a professional travel and landscape photographer, all advice found on this site is from my personal experience, or that of contributors, on the road. I hope it’s useful for your own travels and would love to hear in the comments about your trips and experiences around the world.
Blog Comments
Iris
February 17, 2019 at 10:26 pm
Love the original twist of your pictures! Went to Banff and Jasper last summer but I think after seeing your pictures, I will have to go back in Winter! 🙂
Lisa Michele Burns
March 6, 2019 at 10:37 am
Thanks so much Iris, I love how much the seasons can change a landscape like this. Winter is definitely my preference for the mountains, there’s something extra photogenic when there’s a sprinkle of snow around 🙂
crackmacs
March 6, 2019 at 10:31 am
Love Banff soooooo much. Best place in the world.
Lisa Michele Burns
March 6, 2019 at 10:33 am
With you there, it’s hard to find somewhere that offers as much as Banff does for photographers!