
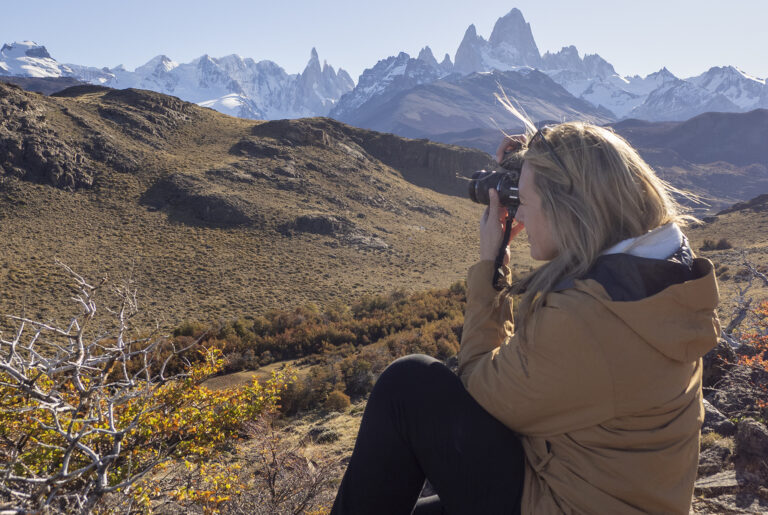
Prepare for your next Photography Adventure!
We’ve all got those dream photography missions that one day we’ll accomplish. It could be capturing the frozen beauty of Iceland (yes please!), or photographing gorillas in the jungles of Uganda (take me with you), or even just getting a decent angle of your local beach. Regardless, you can give yourself a little advantage by investing in some time spent planning just how you’ll make that epic shot happen.
When researching ideas for The Wandering Lens, I spend hours on the computer weighing up where to go and when. I’m a little sick of visiting the over populated tourist hubs and have resorted to scouring satellite imagery for hidden corners of the world that may be a bit trickier to reach. I’ve even started challenging myself to a daily hike or run (*fast walk) in order to increase the chances that I can physically make it to these places I find while sitting comfortably at home adding to my wish list.
There’s of course no real textbook approach for planning a trip but for photographers like me who love a good spot of travel strategising, I thought I’d pop together a little list of things I do when scheming up my next photography adventure.
#1 Research, research and more research
If you’re someone who flies by the seat of their pants and visits places on a whim then this is probably a step you’ll likely skip. But, I’ve always found that method only works out a few times in a row before you’ll have a massive travel fail and end up in the wrong place and the wrong time.
Instead, put in some time researching where it is you want to go and what potential subjects and landscapes exist both at that location, and surrounding areas. More often than not, I’ll see an amazing destination via Instagram scrolling or magazines and after a little research, discover that there’s another 20 places to visit close by that could result in even better photographs.
While it can quickly start to feel like you’re a control freak and risk analyst (or maybe I’ve seen Along Came Polly too many times), having the foundation of a little research will simply prepare you for the potentially unexpected or pave the way for an incredible shoot.
Places to research Photography Locations –
Google Maps (flick it to Satellite or Street View)
This is by far my favourite way to find new locations. When shooting my series ‘The World from the Water’, I would spend hours ‘travelling’ along various coastal routes looking for that ideal landscape to photograph. You can do street view and check out photogenic towns, city streets and where the best vantage points out if you’re planning a road trip.
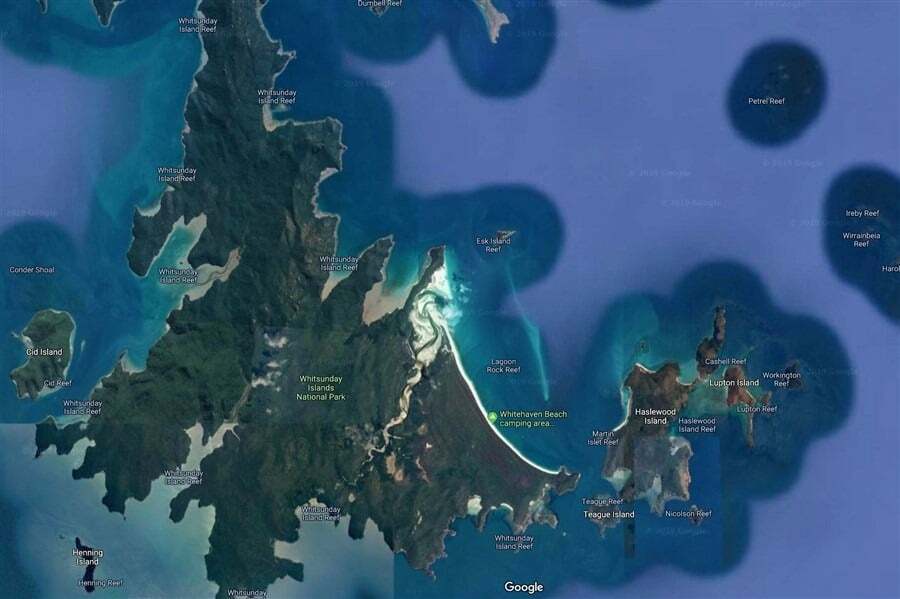
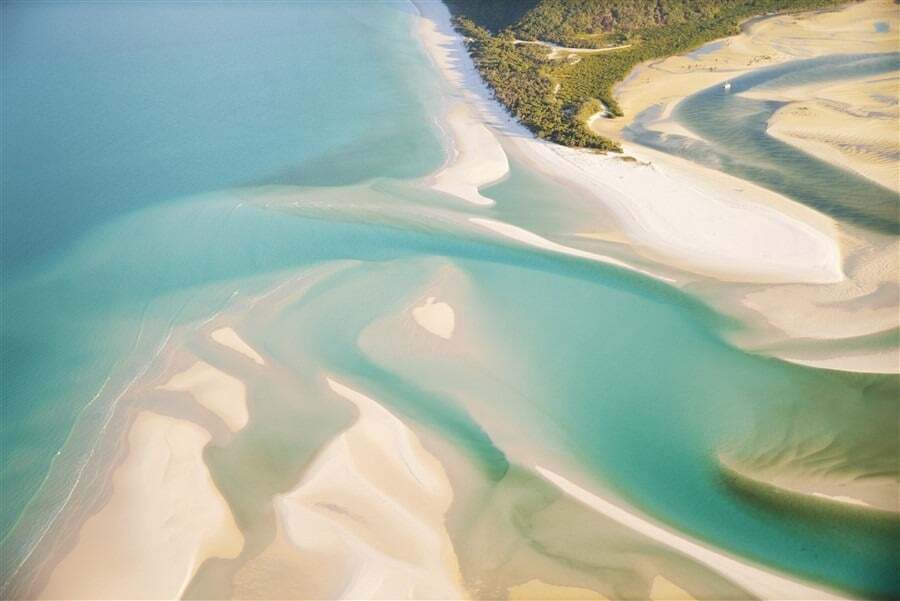
Google Maps Satellite Imagery – Can you see the world famous Whitehaven Beach? A photography location that stands out!
Street view is an amazing way to explore a destination before you arrive, seeking out different vantage points that would otherwise take you a lot of time to discover if you were roaming on foot all day. Take a peek at the below example, this is Rue de Monttessuy in Paris. When viewing via street view it’s easy to miss how great this angle potentially is…but if you spend time crawling along the streets you’ll discover some hidden gems! Use this link to open the exact location below and see how easy it is to play around and find new angles!
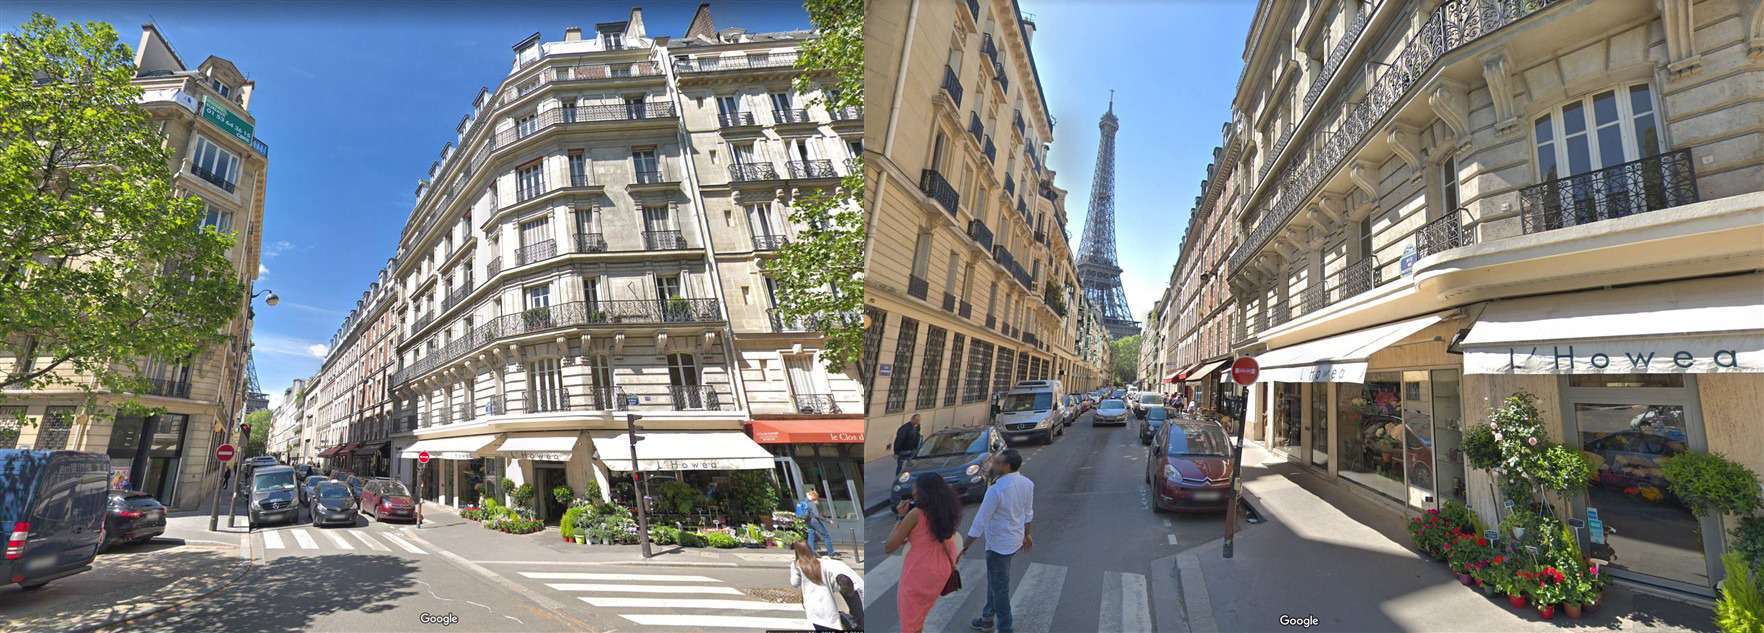
Street view on Google Maps is a treasure trove of potential vantage points!
Other Photographers
Word of mouth is a powerful thing and usually results in finding some of the lesser known scenic locations for landscape photos. Join photography groups online, whether it’s a private Facebook Group (have you joined The Wandering Lens private group yet!?), a local community group that meets monthly or even photo sharing sites like Trover.
Social Media
Well, duh, I know this one is a little obvious. Even though there’s the fancy new function that lets you time how long you spend whittling away hours on Instagram, I still spend about 40minutes per day browsing through photos on this visual app. It’s a total maze of inspiration and depending on who you follow, you’ll be updated daily on new places to potentially add to your current or future travel plans. It’s not all posers and food if you dig a little deeper 😉
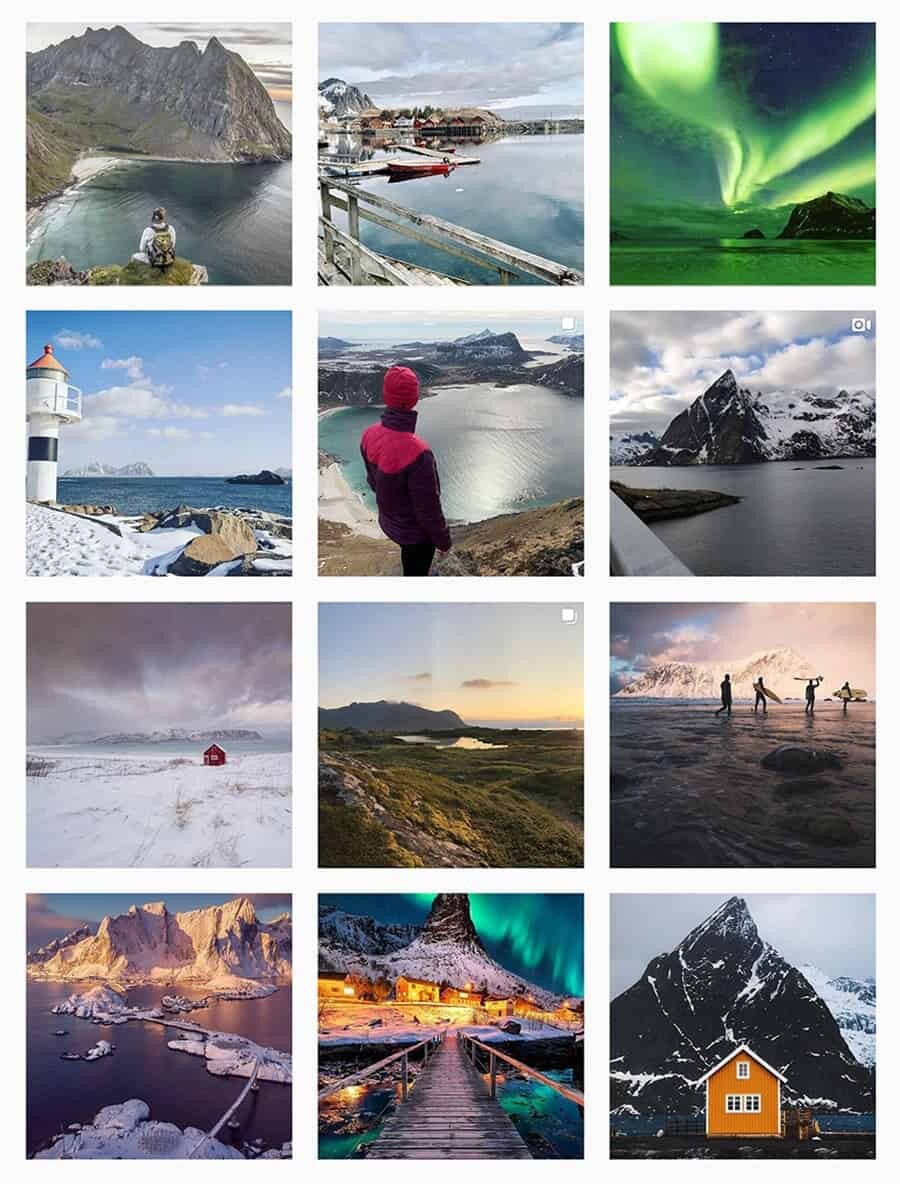
I love typing in a destination as a hashtag then searching through recent photos to get a good feel for what the place actually looks like…not the enhanced, unrealistic way they can sometimes be portrayed. Not everyone has access to Photoshop so this can be a great way to see what the true #nofilter version looks like! Also be sure to scroll back to the same time the previous year that you’re hoping to visit, this will shed some light on what your dream spot looks like in the same season.
The below grid is a collection of images found via searching #lofotenislands. You can see there’s a mix of locations, most scenic because those islands are a photographers dream but not over the top photoshopped or unrealistic. A great base for researching some places to visit.
#2 Finding a Base
Those serious about photographing a particular destination will want to base themselves nearby for at least a few days to account for any unfavourable weather conditions and to give yourself the best chance at beautiful light.
If you’re looking to visit somewhere like Iceland for example, finding a base can be a little difficult because there are simply SO many photogenic spots and you’re more often than not moving from one to the other. I’ve found the best way to map out a place to base yourself is to check (again) Google Maps and work out the driving distance and time between photography locations you want to visit. Say for example it takes 2hours to get from Reykjavik to Skogafoss Waterfall, you may wish to base yourself at Skogafoss or Vik (another 30-45mins) rather than continuing all the way to Hofn that day…a very risky move considering Iceland’s notorious weather. This will not only give you plenty of time to make those road side photo stops along the way, but also mean you’ll be in the best place for sunset and sunrise if you’re hoping to photograph Skogafoss. Two chances to photograph a location are better than one!
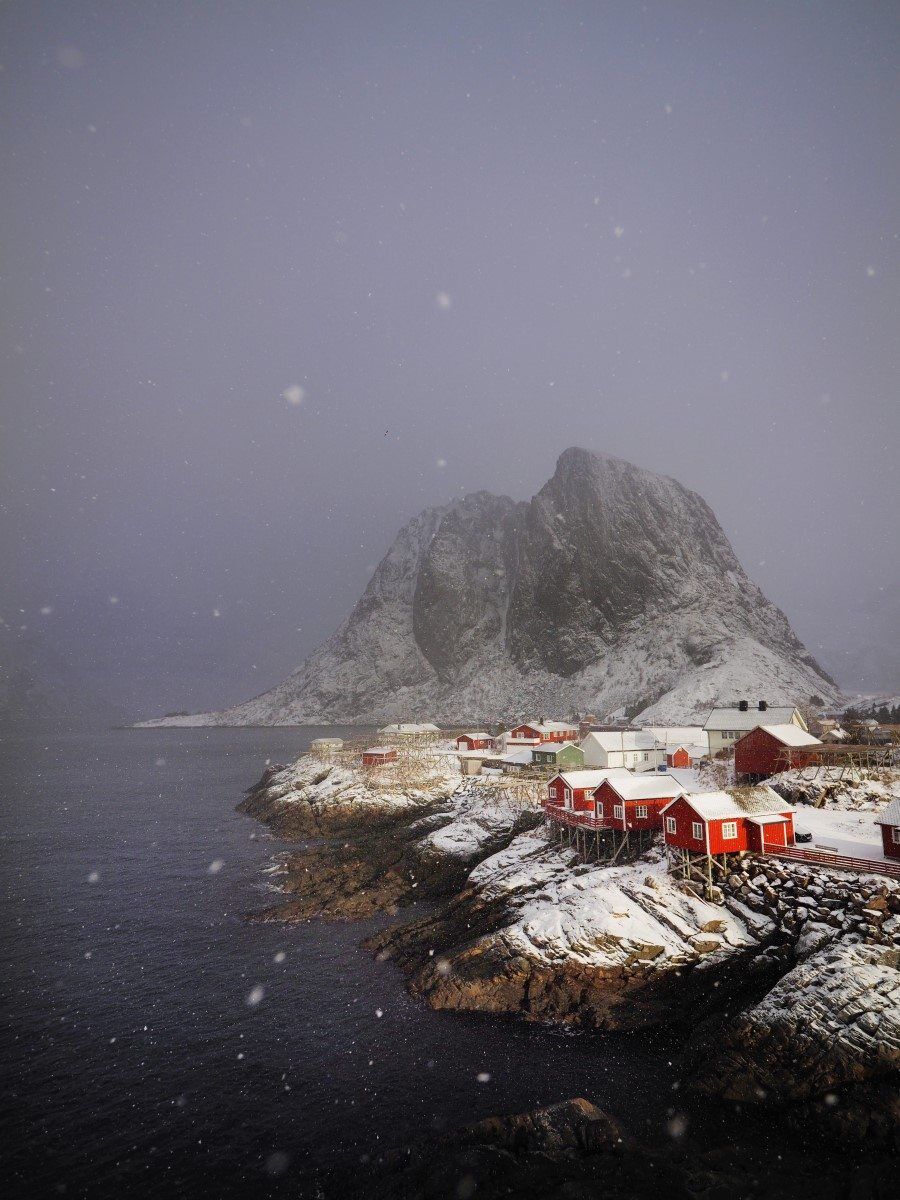
Red Norwegian Rorbuers at Eliassen Rorbuer, where you can walk outside your cabin and capture iconic landscapes of the Lofoten Islands!
Finding somewhere to stay should take into consideration the following factors…
- How far is it from your intended shoot location?
- Can you access the location at sunrise/sunset easily?
- Is it somewhere you can arrive after dark (once you’re done with sunset photos)?
- Some B&Bs or hotels will have a specific check-in time allocated so in rural areas in particular, be sure to check there’s a late option incase you get carried away taking photos!
Usually I’ll use Booking.com to research accommodation options, especially now that they not only list hotels and motels but apartments and B&Bs! Take advantage of the map option so you can zoom in to where you want to photograph and then find the closest place possible to stay…or the second closest if you find the best views also come with the $$$.
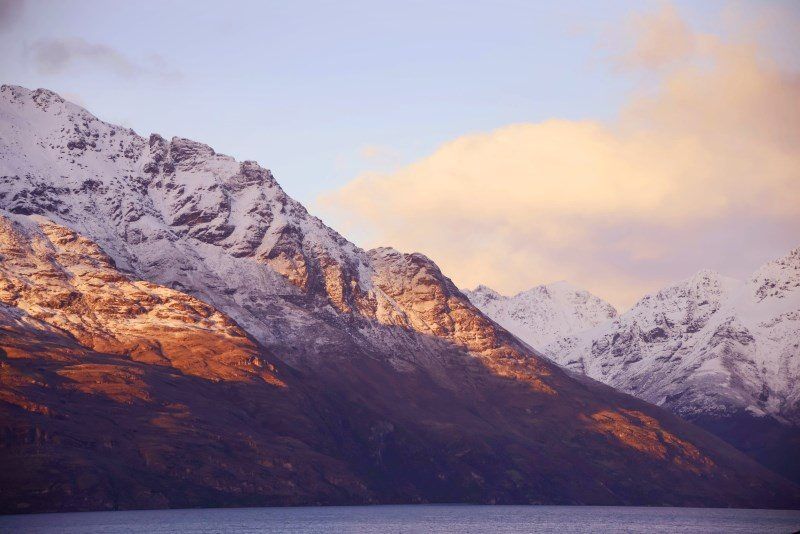
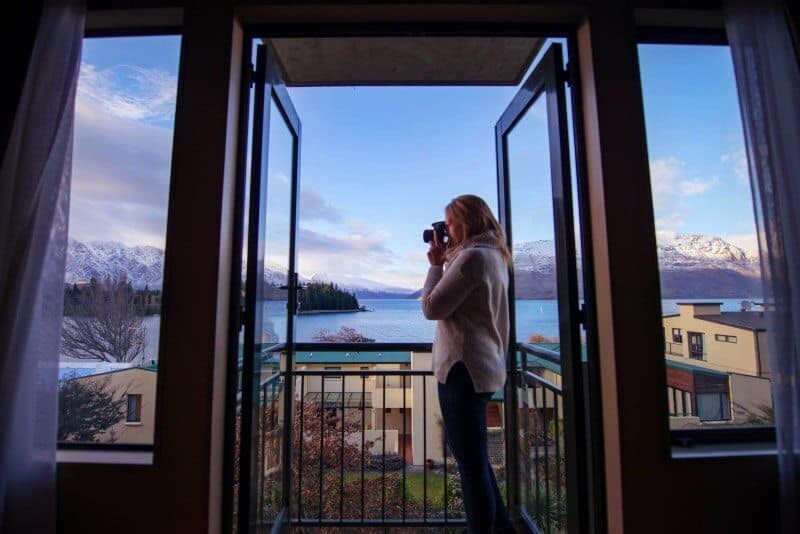
*Little tip – sunrise photography is SO much easier if you can nab yourself a room with a view so it’s worth researching to find that perfect base (if it exists), even if it’s not as comfy. In my lazy ass opinion anyway ha! The photos below were taking from the balcony of Hotel St. Moritz in Queenstown, NZ…amazing, take a peek at my review here!
#3 Preparing your Equipment
I’ve confessed before but I’m quite the simple photographer when it comes to my kit. I don’t find a need for lugging around chunky equipment, tripods and lighting aids, and opt to travel with lightweight and compact gear so I’m able to take almost everything I own in one bag…removing the need to think about what to pack for each photography mission. And because I can only carry so much!
However, that said, if you’re planning to go hiking or spend long days carrying your backpack around, it can be wise to minimize things even further, reducing your kit to just one camera body and 1-2 ideal lenses. The rest you can leave either locked in your car (at your own risk!) or tucked safely in your luggage back at the hotel.
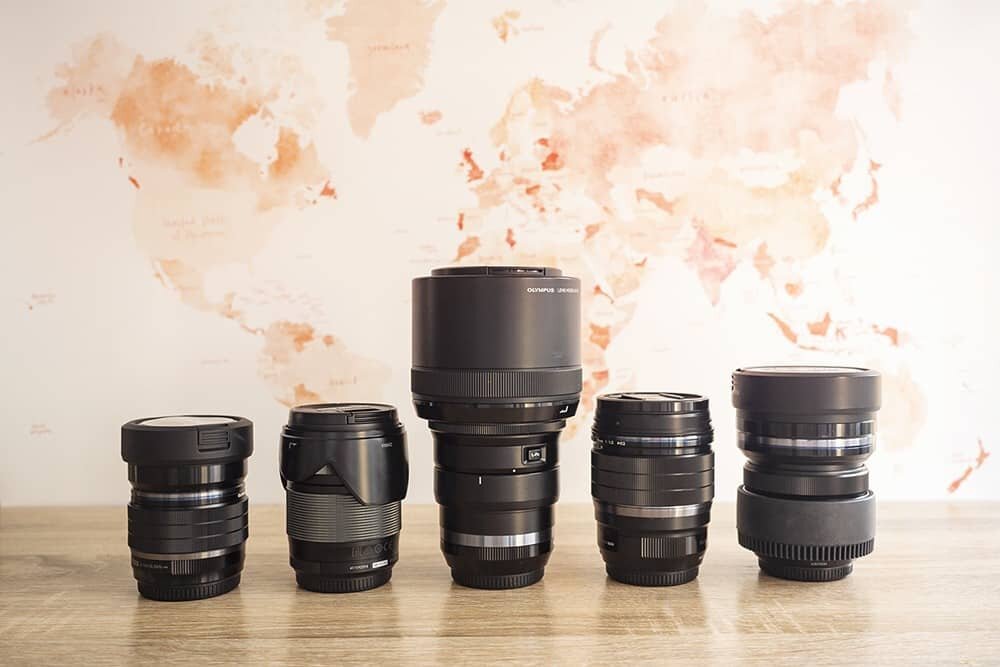
Currently my gear for a landscape shoot looks like this –
40-150mm M.Zuiko f2.8 PRO lens
7-14mm M.Zuiko f2.8 PRO lens
12-40mm M.Zuiko f2.8 PRO lens
This is my essential, reliable and versatile kit that never fails to help me capture exactly what I’m after at a location. If I’m shooting underwater I’ll also have my housing, but like to carry this in a beach day bag or something that doesn’t scream “I’ve got loads of expensive equipment, come and take a peek” while I’m in the water.

If I’m wandering around a city, usually I’ll create a challenge and simply take a 25mm lens and my OM-D E-M1 MKII which fits in my handbag. It’s all down to personal preference, your preferred style of photography and available equipment but keeping things simple I find always works best when it comes to travelling.
Ideally you’ll want to ensure you have a variety of focal lengths available to make the most of your time at a destination. Because you never know what you’ll find, it’s best to have a zoom lens available for those unexpected moments arising in the distance, or a wide-angle lens if a landscape turns out to be even more epic in person.
Preparing for a photography mission isn’t only about what you’ll be photographing with, you also want to make sure you have the following with you for a successful trip.
- Extra batteries! Especially in colder climates (read more about preparing to photograph in extreme climates!).
- Camera charger (we’ve all forgotten this at one time or another…right!?)
- A quick-dry towel, usually the tiny ones from camping stores are great to have in your bag just incase either you or your camera ends up a little wet.
- A lens cloth…I’ll confess to using my clothes or whatever soft fabric is nearby but having a nifty little lens cloth comes in very handy no matter where you’re photographing.
- A reflective surface, okay, this one is just for me but if I don’t have my phone with me, I’ll usually also carry a piece of reflective perspex to produce reflections. I’m addicted, no shame.
- Essential because if you’re anything like me, you’ll spend far more time than planned if the light is amazing and will need to power on with some kind of sustenance!

#4 Weather Forecasting
Hurrah, my favourite topic! When planning to photograph somewhere you’ll want to check what the average conditions are at various times of the year.
You may want to be in Tokyo when the cherry blossoms are in bloom, or this time of year, known for it’s crowds may be your worst nightmare and the winter time will work better. Check not only for what events are on, but what seasonal changes does to the landscapes or locations you’ll be visiting.
I’ve previously written a guide to ‘Weather Forecasting for Landscape Photographers’ which lists the sites I use, how to read charts and what to look for regarding wind speed, cloud cover etc.
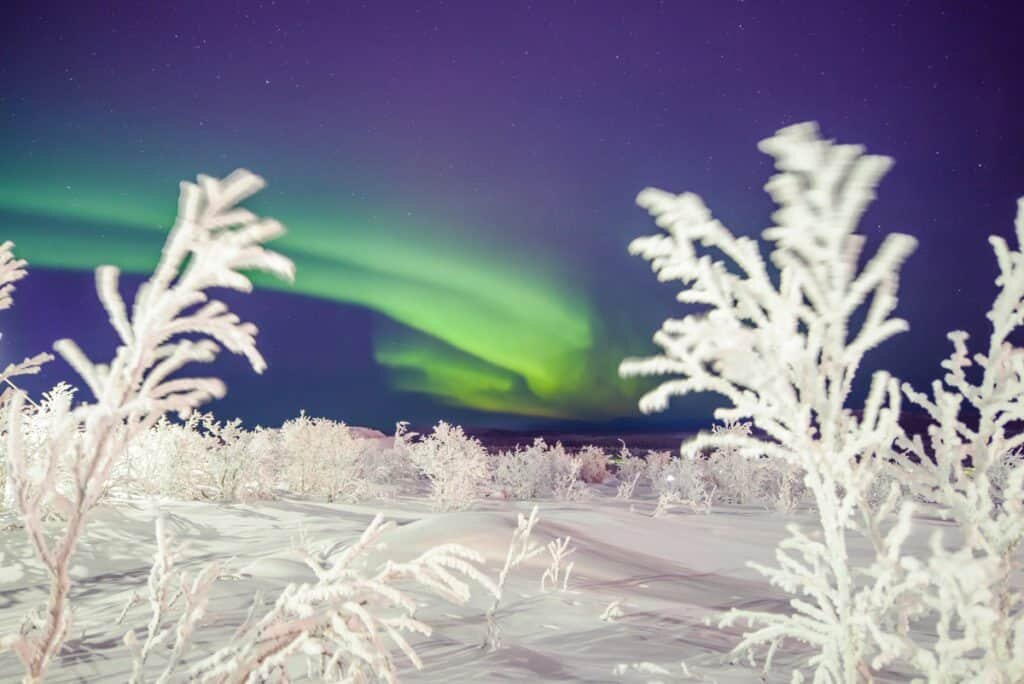
Places like the Lofoten Islands are affected by strong winds and whipped up seas so researching the best time of year to visit to achieve the shots you’re after is essential. You’ll find some destinations work really well in the shoulder seasons which are when I love to travel because you manage to avoid crowds, find cheaper accommodation and benefit from great light or the cusp of seasonal wonders.
I actually have an upcoming trip to Utah and Arizona in the USA and while I knew it would be early in the summer season, didn’t realise just how hot it gets out there until I did some research on Accuweather. I’d anticipated late 20s during the day but apparently things get a little closer to 35degrees Celsius which changes how many long distance hikes I’ll be doing and what time of day I’ll be venturing outside…hello sunrise!
Things you’ll want to research prior to arriving at your location are –
- Sunrise and sunset times (read more tips about Golden Hour Photography here)
- Average temperatures
- Are there any seasonal conditions you should be aware of (known strong winds in April, wet season, dry season etc.)
- Seasonal highlights: ie. Lavender fields in Provence bloom early July, if you miss it, you’ll arrive to fields of dirt.
- The busiest times for tourists and whether or not you can travel in shoulder season instead.
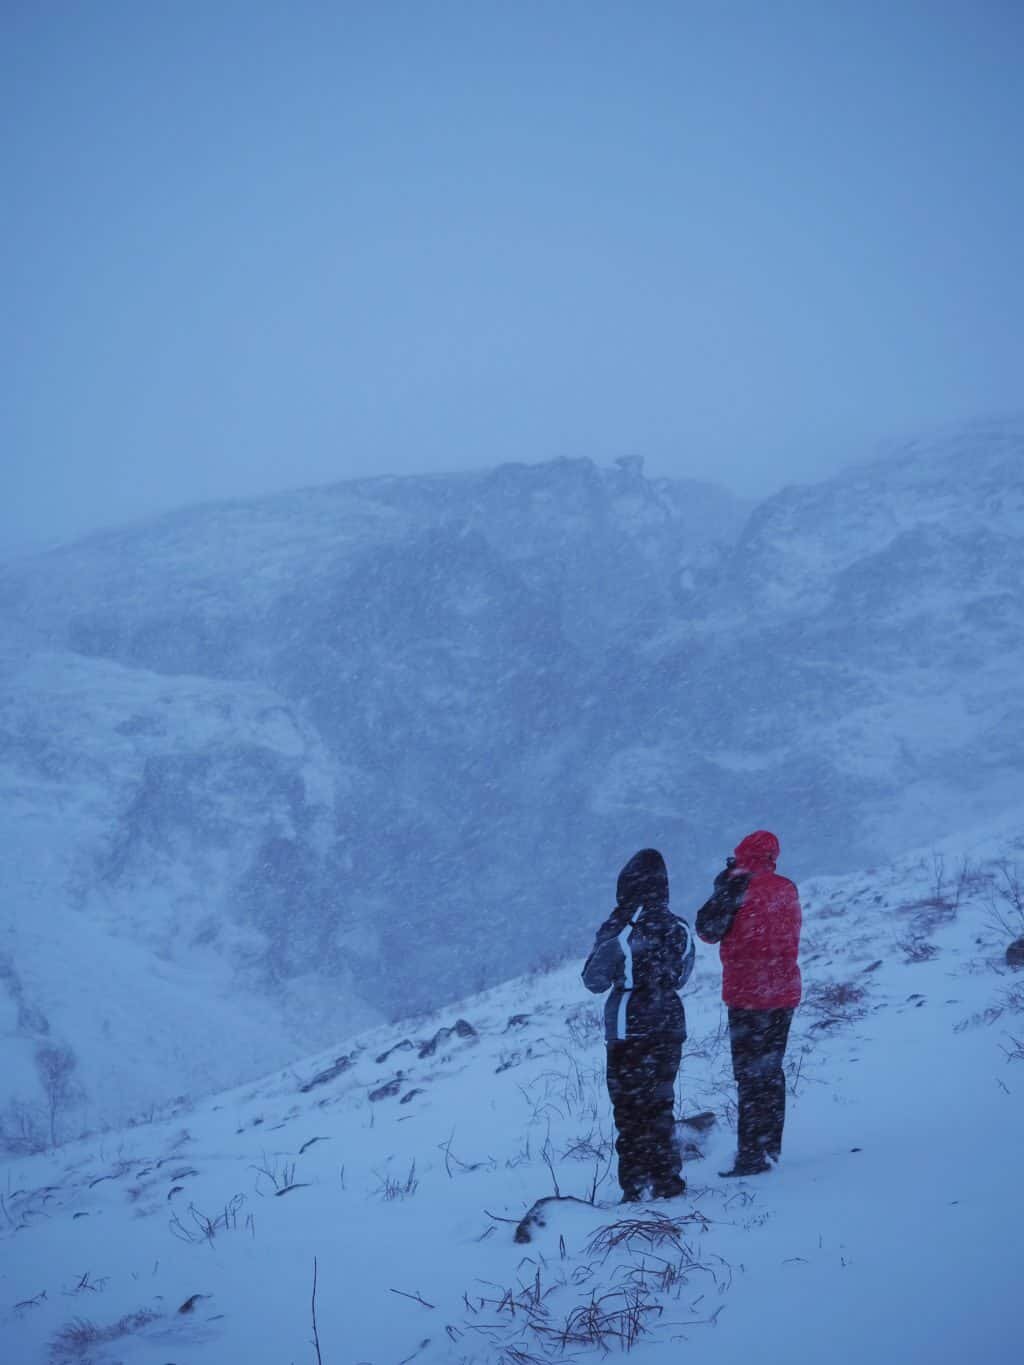
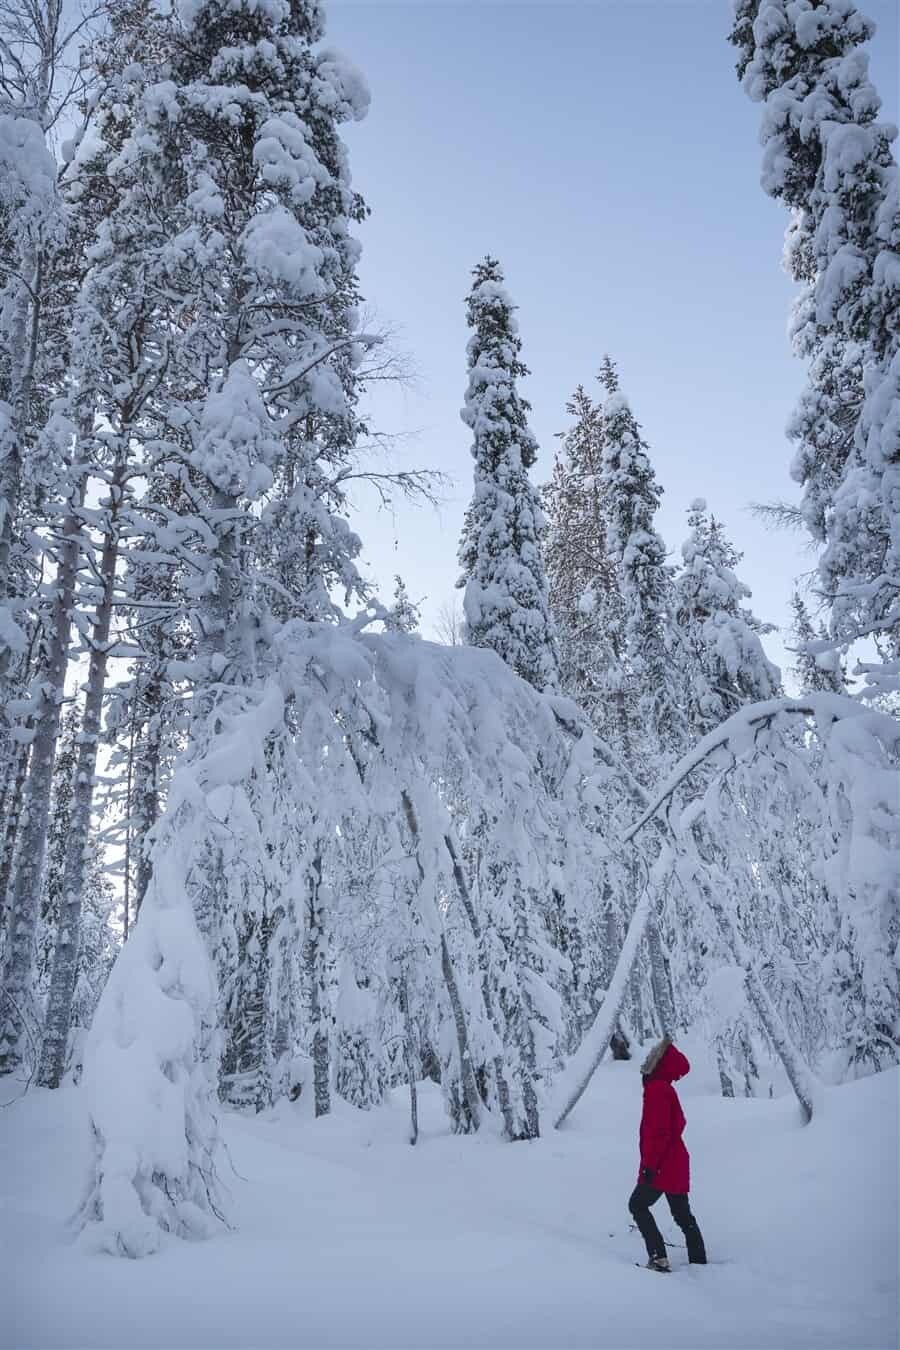
Failing to let the weather deter our plans, wandering in an Icelandic snow storm!
#5 Create a Brief for Yourself
When working with clients as a travel photographer (read more about creating a career in Travel Photography here), they’ll typically supply a creative brief that notes what type of shots they’re after and any specifics such as desired lighting/tone, subject matter, composition and location. Sometimes you’ll be left to your own devices and can happily snap away and make the shoot yours but it can actually be nice to have a bit of a plan of action in mind.
If I’m visiting a new destination, after conducting the prior research above I’ll prepare some ideas for creative perspectives and a set of key photos that I’d be looking to capture. Nothing to serious or stressful, just a way of having some ideas ready to go once I arrive somewhere.
Sometimes a location will blow your mind and the photo ideas will flow naturally, other times you may have a total blank as to where to begin. It’s on those occasions that you want a little backup in your mind to start with and get the creative juices flowing.
In a creative brief you’ll want to have the following –
- List of dream shots to capture
- Creative perspectives you’re hoping to try
- Any location tips like best vantage points, best time of day to visit etc. Anything that will clear your mind and help you focus purely on the outcome.
It can essentially be as detailed or streamlined as you like and I’m by no means suggesting that having a creative brief will make you take amazing photos every time. But it can be a nice piece of mind to have some thoughts jotted down about what you’re about to photograph.
*In total contrast to what I’ve just said above, it can also be amazing to simply arrive and get lost in a location. This works well with a city or vast landscape where you can wander without a set plan and see what happens. Of course this is best if you’ve got a lot of time too and can open yourself up to whatever possibilities come about!

Do you have any routines or planning processes you use when preparing for a photo trip?
I’d love to hear them in the comments below!
*Please note this article includes some affiliate links which means you’ll be taken through using a code that provides a small commission should you book a hotel via the site. These commissions are what help keep The Wandering Lens operating and I only recommend hotels, websites and places I personally approve of after doing my obsessive research as noted earlier 🙂

Hello! I’m the founder and photographer behind The Wandering Lens.
With 19+yrs experience as a professional travel and landscape photographer, all advice found on this site is from my personal experience, or that of contributors, on the road. I hope it’s useful for your own travels and would love to hear in the comments about your trips and experiences around the world.

Blog Comments
Kate Baumwell
January 15, 2020 at 4:34 am
I like to make a basic itinerary for the time I’ll be in a specific place, and then use that as a guideline. Obviously, things don’t always stay as written, but it’s nice to have to get things going. I also try to make sure to specifically look at sunrise and sunset locations ahead of time, or make it a point to ask locals their favorite sunrise and sunset spots once I get where I’m going.
Last thing I do is watch YouTube videos of other photographers/travel bloggers to get some ideas and inspiration. I don’t want to copy anyone, so I try to then think of some original ideas for that location.