
Showcase your work with a Wix website for photographers!
As a photographer today, you need to have your work available to view online. It’s as simple as that.
A well-designed online portfolio website will do wonders towards helping you approach clients, look professional and showcase your talents to the world which essentially is what we all want to do, right!?
Having a social media profile regardless of how many followers you have or how pretty it looks can only do so much. Sites like 500px are great for building a community and sharing your work but nothing can compare to customising and creating your very own website.
Looking professional as a photographer comes down to having a portfolio that represents what you do and if that’s easily accessible, it makes you immediately appear like you at least kind of know what you’re doing…even if you don’t, which is totally fine!
I know I like to change my online portfolio ALL. THE. TIME. Throughout a creative career you’ll no doubt have a roller coaster of various editing and photography styles which means that it’s important to keep your website up to date as you progress.
So, if you’re keen to develop a website for your photography I wanted to share my experience using Wix.com, one of the easiest platforms which can have you online within hours. This isn’t a sponsored advert, it’s created based on my own experience building my portfolio site lisamicheleburns.com.
Here we go, a set of steps towards creating a photography website with Wix…
#1 Curate your work
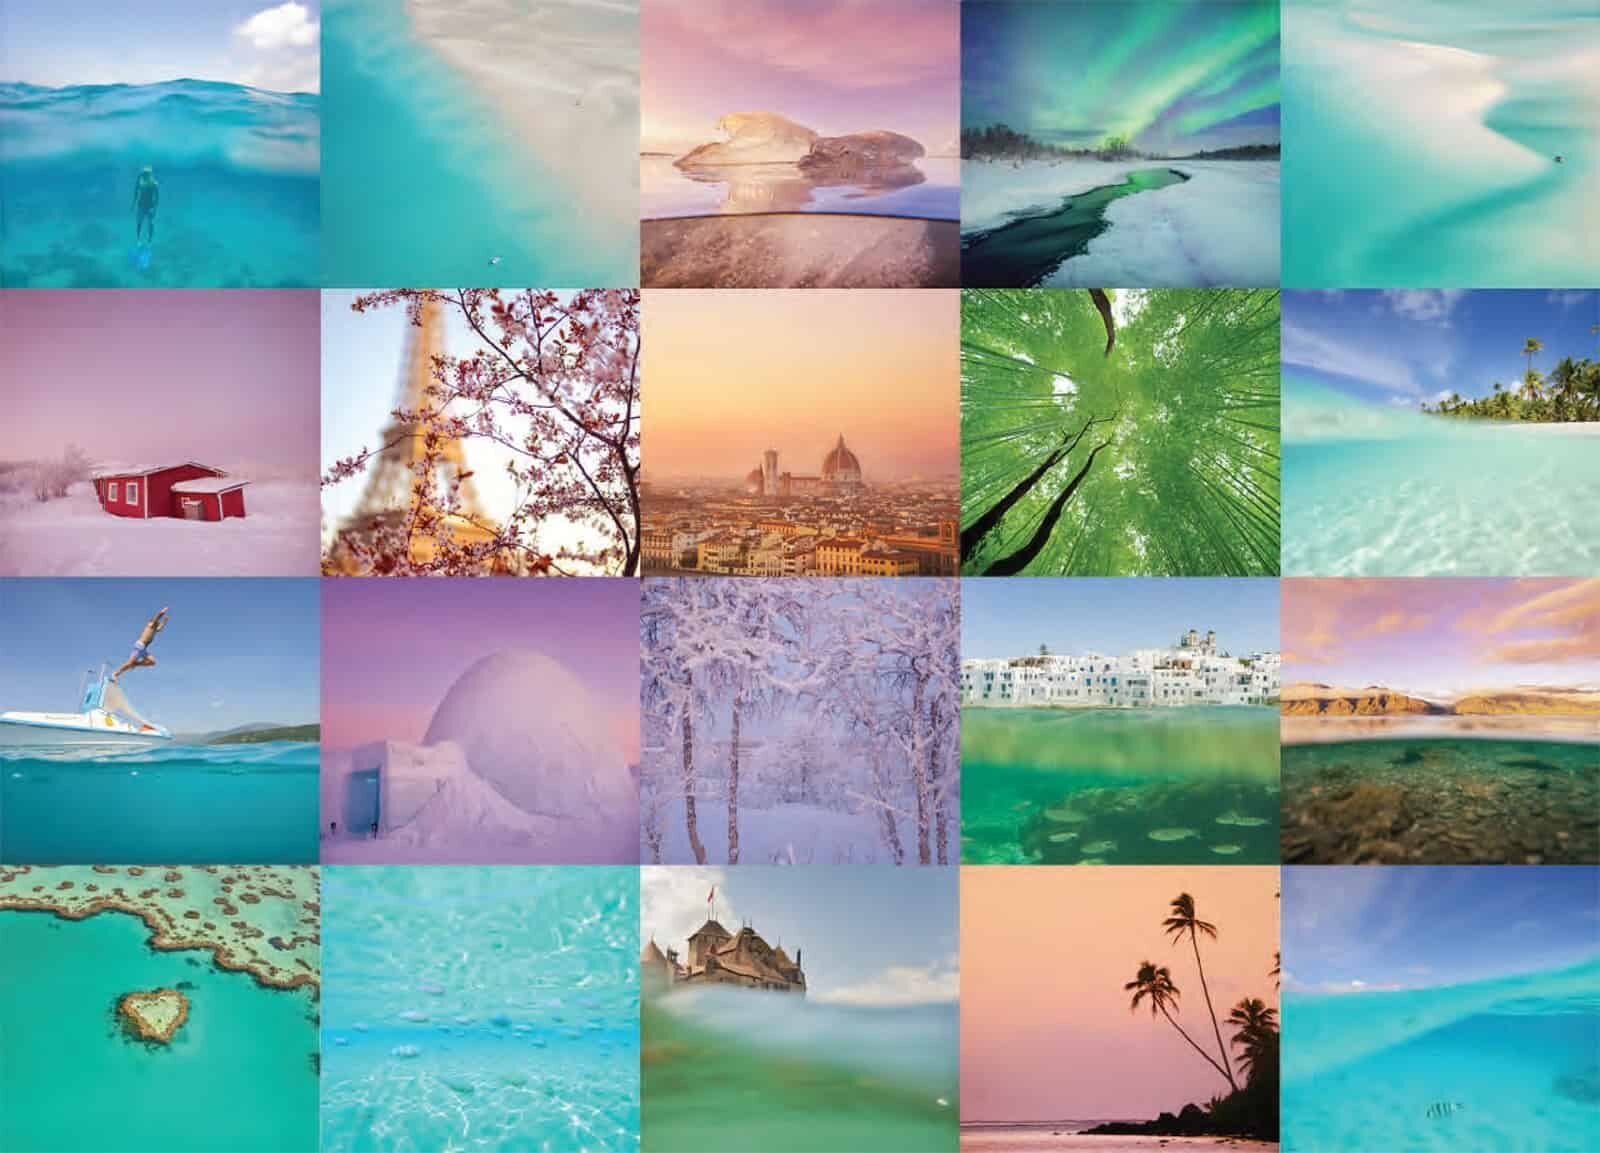
A website of your photography should showcase your very best work, not all of your work. Try not to cram in every photo you’ve ever taken and instead curate your images wisely in order to create a portfolio that represents your talents and avoids confusion.
One mistake a lot of people starting out make is that they want to prove how much work they’ve done by sharing every single image that has ever received praise. Now sharing a collection is fine, but you want to be careful you’re not accidentally overwhelming people who visit your site.
You need them to know very quickly what it is you do and whether or not it’s a good fit for them.
Tip – Read my guide to Curating Your Own Work as a Photographer, it’ll help narrow things down a little to get started faster!
#2 Play Around + Decide on a Template
Firstly of course, decide whether or not a Wix website is for you. I was immediately attracted to the Wix templates and how they celebrated imagery but weren’t tacky. They’re clean, professional and adaptable so you can design a site that’s uniquely yours. You can trial the Wix platform and it’s premium features for 14 days by the way…so if at the end of that time you’re not convinced you’ve only gained some snazzy web design skills!
You’ll find that wix.com has very visual templates which work perfectly for photographers and visual artists. Take your time to browse through and make sure you check the samples and live demos of each one before deciding as some can look a little different once you’re browsing through the pages and menu
They may scroll differently which will affect how your images are displayed so if you’re primarily shooting vertical images, a template focused on landscape shots with screen wide layouts won’t work for you.
If you’re lucky, one template may stand out immediately! For me it was the ‘Urban Photography’ template because I loved the grid approach which enabled me to blend the colours together and showcase how the images are cohesive. I actually don’t shoot any urban photography but it still worked 😊
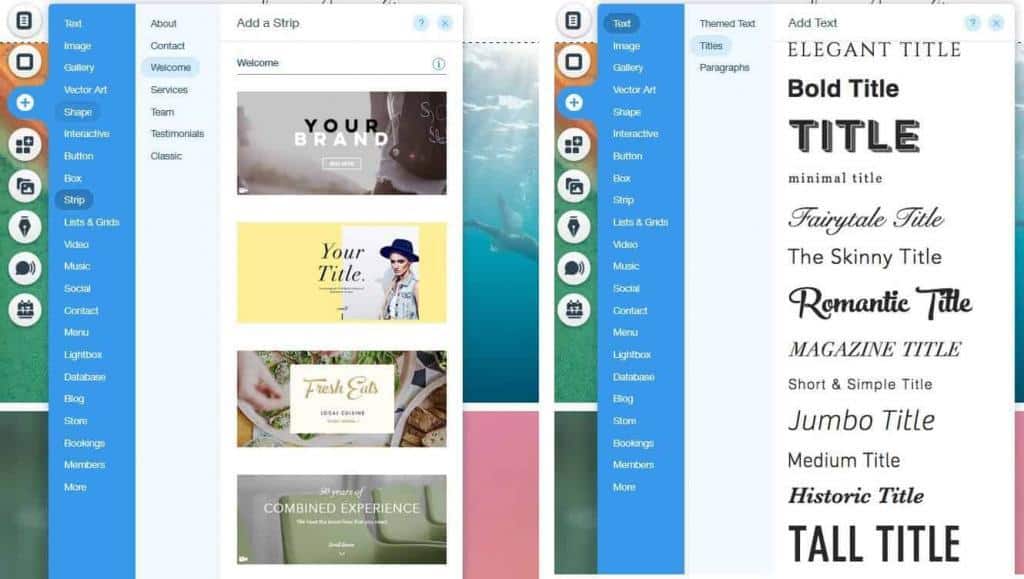
Tip – You can totally transform any template so don’t get too hung up on finding the perfect one. The Wix dashboard allows you to drag and drop elements into every single page! You can start with a great template then end up with something personalised to your own creative desires. Explore the menu to the left of your site to add various custom additions!
#3 What do you want to portray?
Once you’ve got the collection of images together that you want to publish on your site, now it’s time to decide what you want to portray with your portfolio.
Is the aim to attract clients, write a blog, sell prints, create client galleries or simply have somewhere to send people if they want to see more of your work?
You can of course do all of this with a Wix website however when starting out, I suggest focusing on one of them to get your site up and running. It’s always possible to develop and update your site once it’s live so spend your time getting used the Wix system and gain a better understanding of the possibilities, then you can explore them further!
Tip – An attractive homepage will draw people to explore your site further. Showcase your best work here whether it’s via one killer image or a small cohesive collection. And ALWAYS make sure your contact information is easily accessible from the homepage, you don’t want people getting lost on their way to getting in touch!
Read more – “How to Become a Professional Travel Photographer“
#4 Make your style evident
This can be done visually or you can actually spell it out…”I take photos of mountains”, for example…maybe in a slightly more creative sentence. By making it obvious from your homepage what is it that you do it helps let viewers know, that for example Bob Smith focuses on architectural imagery or that Lilly Peters is a professional underwater portrait photographer.
Relating back to the initial curation of your work, you want your style to be obvious and stand out as uniquely yours. Perhaps you love working in grungy city streets and pairing music to your site would help tell the story of how you work? Or, does a website with darker tones match your moody images?
You can use a number of elements throughout the website design process to help showcase your style and by all means, play around and test out all the options!
Tip – Take advantage of the many design options available on the Wix platform. Despite starting with a template, you can drag and drop new elements into your site! Explore the Strips, Galleries and Heading/Font options to give your site some extra oomph.
#5 Check Image Settings
Because photography is your passion or profession, you want the images on your site to leave little doubt that you know what you’re doing. No one wants to open a website and see blurry images or images that crop badly due to poor web design.
Ensure you are uploading images that fit your template or gallery so they display well on both phones, tablets and large computer screens. Uploading a 400px wide image for a 1000px space will create an unprofessional look and no doubt, instant clicks away from your site.
Tip – A general rule of thumb is to upload your image with 96dpi (some say 72dpi is enough) at a size of 1250 × 800px, which is the standard size for a background image on Wix. As this is the largest space to fill on your website, it’s a size that should work well with anything smaller too!
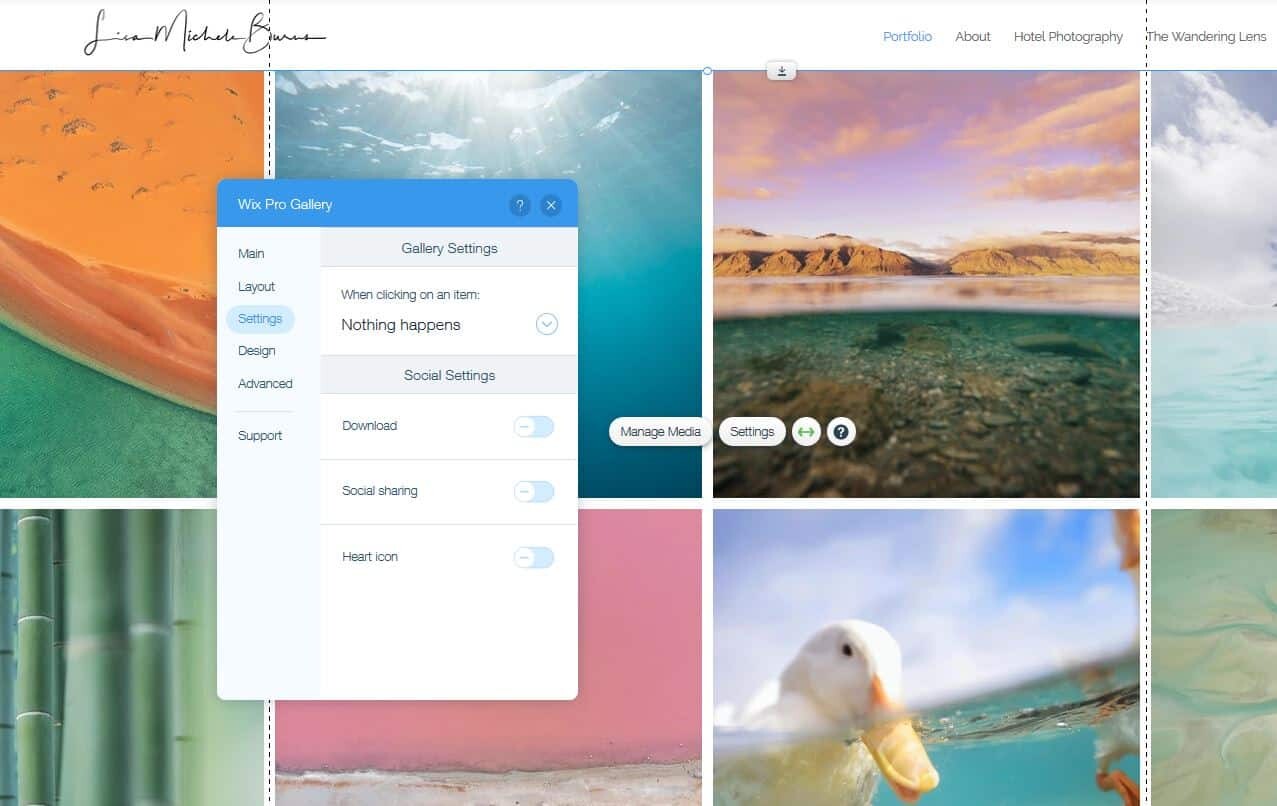
When creating an image gallery or uploading a photo to your website, there are settings available to change how it performs on a working site. You can opt between making it never open upon being clicked, to open into a larger version or open onto a custom URL.
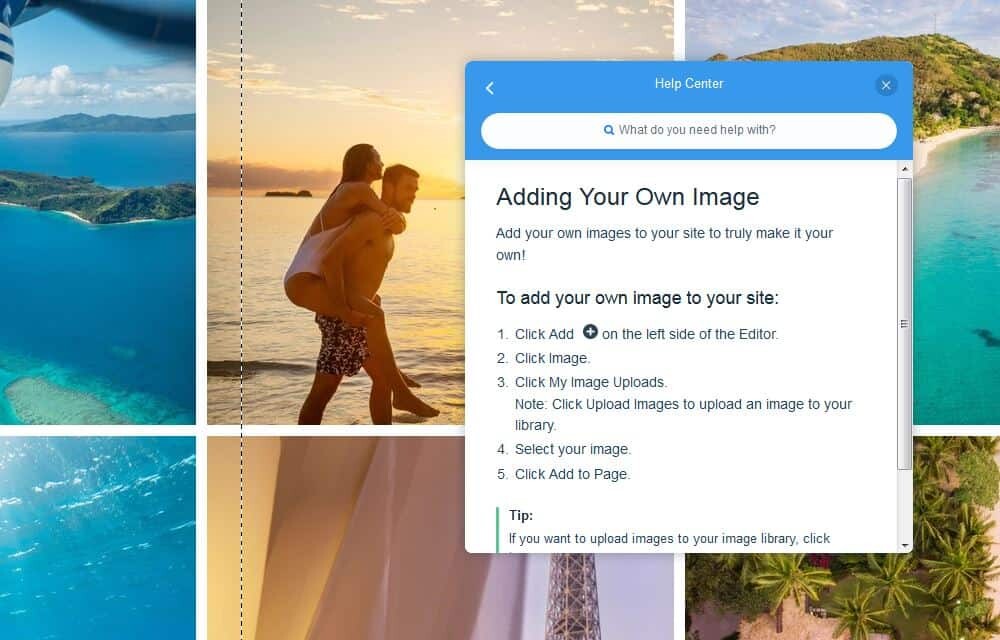
Your decision can change between image and/or gallery allowing you to make your homepage lead through to other areas of your site, or keeping the homepage more static and having a collection of gallery pages that then open into larger displays. The Wix Help Centre has easy to follow guides for every step of the web design process. There are video tutorials, step-by-step tips and links to view other photographers websites based on the template you’re using.
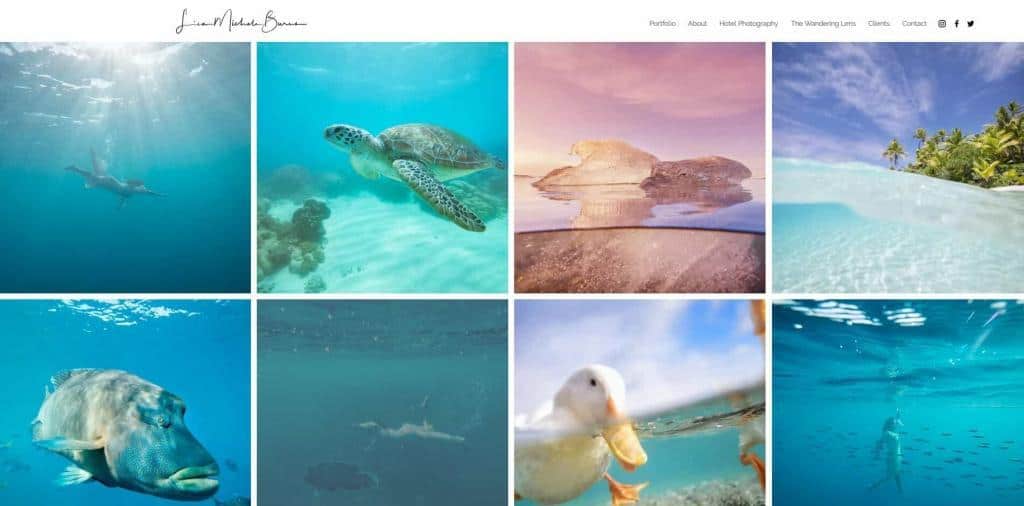
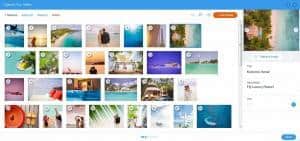
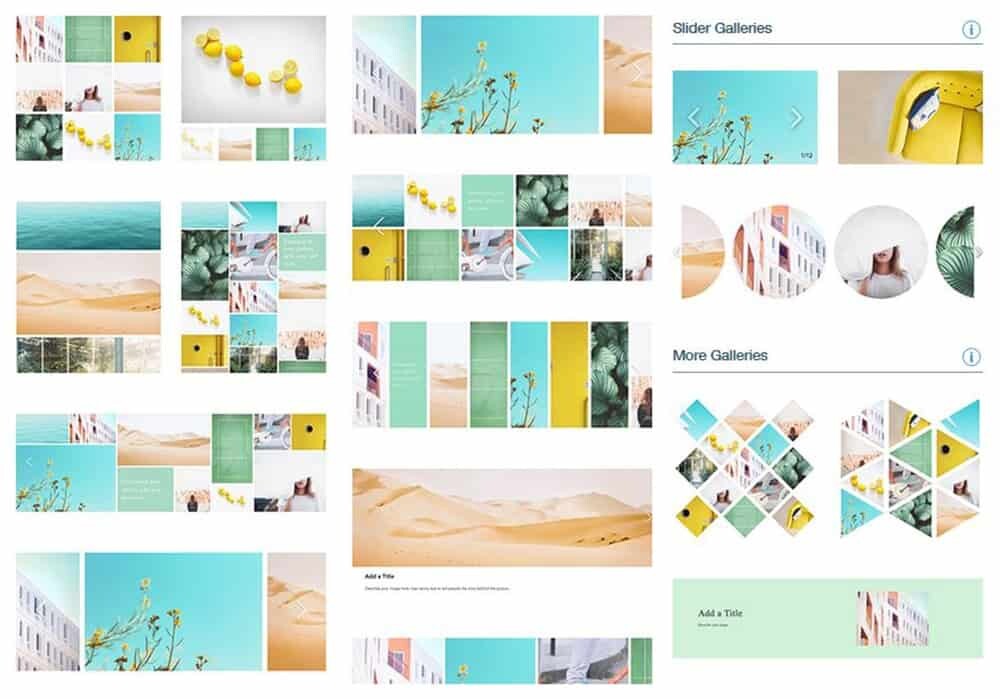
#6 Create a gallery of your best work
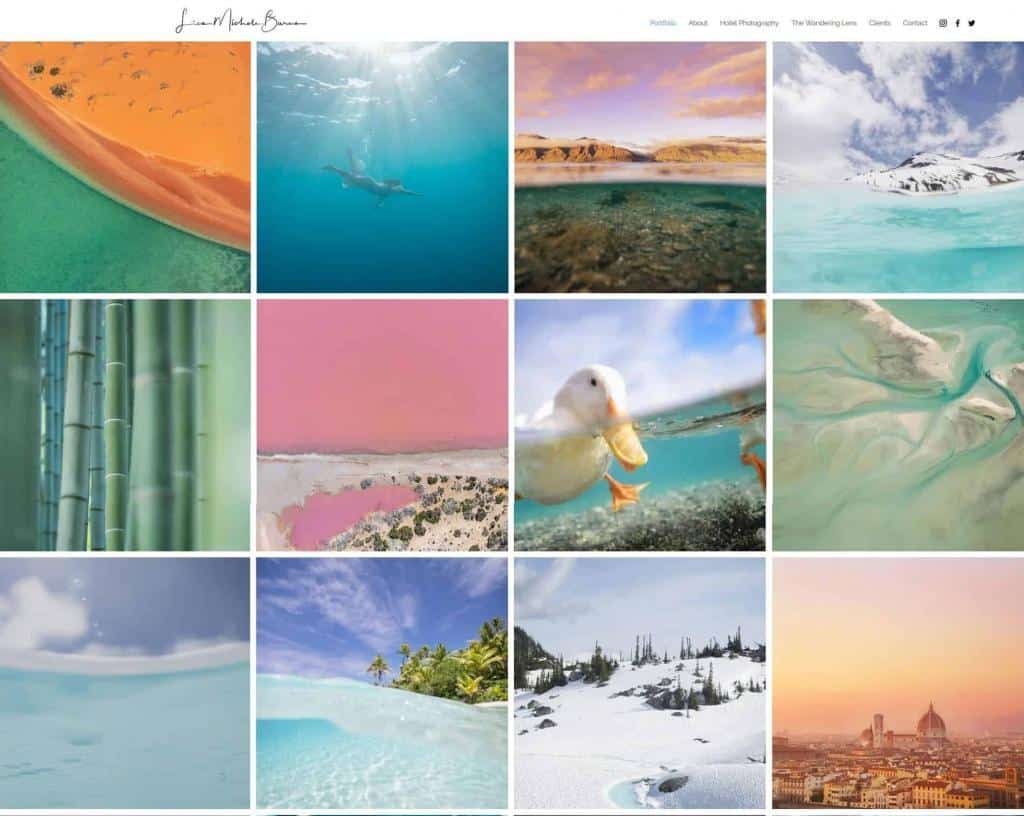
My favourite element of the Wix platform is the image galleries. They’re SO functional and easily adjustable that it makes showcasing your work a total breeze.
On my website, most pages have a collective grid of my work relating to a single genre. There’s a page for commercial tourism work, for underwater images, for aerial work and so on. You can discover what works best for your own images and know that it’s possible to add text if they need an explanation.
The galleries are available in a number of styles that, like most features of Wix can be customised to suit. You can connect your Instagram feed within a gallery, have images link through to a collection of prints for sale, have moving galleries, 3D galleries or just beautifully curated and clean layouts of your work.
Tip – When uploading work into a gallery, you can drag and drop the images into an order that displays best. Look for colours that compliment each other!
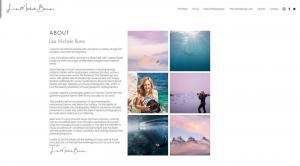
#7 Inject some personality into your portfolio
There is a tonne of content out there in the online realm, you want to ensure yours stands out somehow. To create an immediate impact feature your best work straight up but also show who YOU are as a photographer.
Use the bio section to share your story and rather than waffle on for paragraphs, keep it punchy, compact and informative. For a lot of potential clients, they want to browse your work quite quickly and also read about what you offer. By injecting both personality and highlighted information you’re giving them what they want straight up.
It’s possible to incorporate video into your website if that’s part of your services or if you’re a star in front of the camera and think that may give you the edge. Personally, I shy away from being in front of the camera so tried to build my site about a cohesive editing style focused on pastel colouring which is what I offer clients.
#8 Get Feedback
I can’t stress how important this is! We all think our work has a certain appeal or that we’ve done our best to showcase our talents but sometimes, when you show a friend or family member they just don’t get it.
Having people take a peek at your website before going live is a great step to making it the best it can be. Send them a link to view it and ask for their honest feedback! They might say they hate it…great, it means you can ask them what’s wrong with it. If they say they don’t like the colour blue then you know not to really rely on their advice. If however they mention the images are cutting off on their screen or that it was hard to navigate from page to page, it’s VERY useful to know before you release your site to potential clients.
Tip – Ask a variety of people to take a peek at your site. Your family and friends will probably always offer praise (unless you have really mean friends!?) but share with other photographers or people in entirely different industries to see if they are attracted to your site.
Fun fact: I was teaching a group of photographers about how to use Photoshop when someone asked about building a website. Taking the opportunity to show them my new site, I proudly opened the site and let them have a play around…then someone said “your contact page doesn’t work”. Ha, oops! Always check, every element 🙂
#9 Why upgrade to Wix Premium?
If you’re hoping to conduct business from your site, sell prints or have a custom domain name, it’s worth looking into Wix Premium. I upgraded from the very start in order to connect my custom domain because I believe it’s extremely important as a professional photographer to own a little part of the world wide web rather than having wix.com/lisamicheleburns.
Some benefits of Wix Premium (check out the plans here) include the following –
- Removal of Wix Ads
- Connect your own domain
- Additional storage and video options
- Google analytics (on the Business plan to see traffic stats of who’s viewing your site and where)
- Accept online payments (sell prints, create an online store etc via the Business plan)
- VIP Support (handy when you’re stuck and just want a quick fix!)
#10 Quick Tips to a Great Photography Website
- Showcase your BEST images on the homepage to entice people to explore your site
- Curate your images to avoid overwhelming viewers with hundreds of photos
- Customise a template to create something unique to your work
- Connect your social media accounts!
- Ensure the contact form or contact details are easily accessible
- Create beautiful galleries that display what you can produce as a photographer
- Write an informative but compact bio sharing who you are as a person and professional
- Design with complimentary colours and fonts to blend well with your style
- Get feedback – ask friends, family and fellow photographers to browse your site and check everything looks good!
- Lastly, check your website fits a mobile layout too! On Wix you can switch between Desktop and Mobile view to check they’re both looking fantastic 🙂
To trial and build your own photography portfolio with Wix click here to discover how easy it is.
*Please note while this article is not sponsored in any way, there are affiliate links included which allow me to continue sharing these tips for free!


Hello! I’m the founder and photographer behind The Wandering Lens.
With 19+yrs experience as a professional travel and landscape photographer, all advice found on this site is from my personal experience, or that of contributors, on the road. I hope it’s useful for your own travels and would love to hear in the comments about your trips and experiences around the world.


Blog Comments
Marco Joe Fazio
November 4, 2019 at 9:24 pm
Thanks for sharing an informative post. I have my official photography website. Yes, I read some where that web 2.0 is also a best way to attract new people. I think, I should also need to create an sub domain. Keep sharing new posts.
Home Shots
August 11, 2020 at 10:33 am
Very helpful Lisa! As real estate photographers, we always are thinking of new and different ways to display our portfolio of work. I enjoy playing around with different web builders as well so need to check out Wix. Thank you!
James
April 8, 2021 at 6:37 am
Great article Lisa! I’m currently building my website and I’m having a couple of issues that it looked like you solved with your website. Hopefully you’ll be able to answer them!? My main issue is that the product description area is really small. On your website your product page is really wide and you have a huge product description. I tried all the different page layout settings and I tried the stretch to full width but to no avail. You also have multiple images stacked, rather than the typical product images that you can cycle through. Was curious how you can alter each product page without changing the others.
Lisa Michele Burns
April 11, 2021 at 1:12 pm
Hi James, exciting to hear you’re creating your site! If you’re designing on Wix it does tend to have global site adjustments unfortunately for most product changes. You can change up the image sizes to crop to a set ratio or fit a particular area but might need some code to insert a gallery of sorts. If you’re looking at my print store, that’s actually designed in Squarespace. I get a little design happy with my websites and they’re each hosted on a different platform for various layouts/features. The blog you’re reading is designed with WordPress, my portfolio site (www.lisamicheleburns.com) is Wix and the store (store.thewanderinglens.com) is Squarespace which I’ve found great for product layouts. I’ve heard great things about Shopify for product layouts too but that’s my next attempt perhaps 🙂
Carla Sanchez
May 21, 2021 at 5:31 pm
Interesting blog! Aside from Wix, I recommend using Snapps or WordPress, they are easy to use like a Wix. Having a website really helps to promote your business to greater people. Start building yours!