

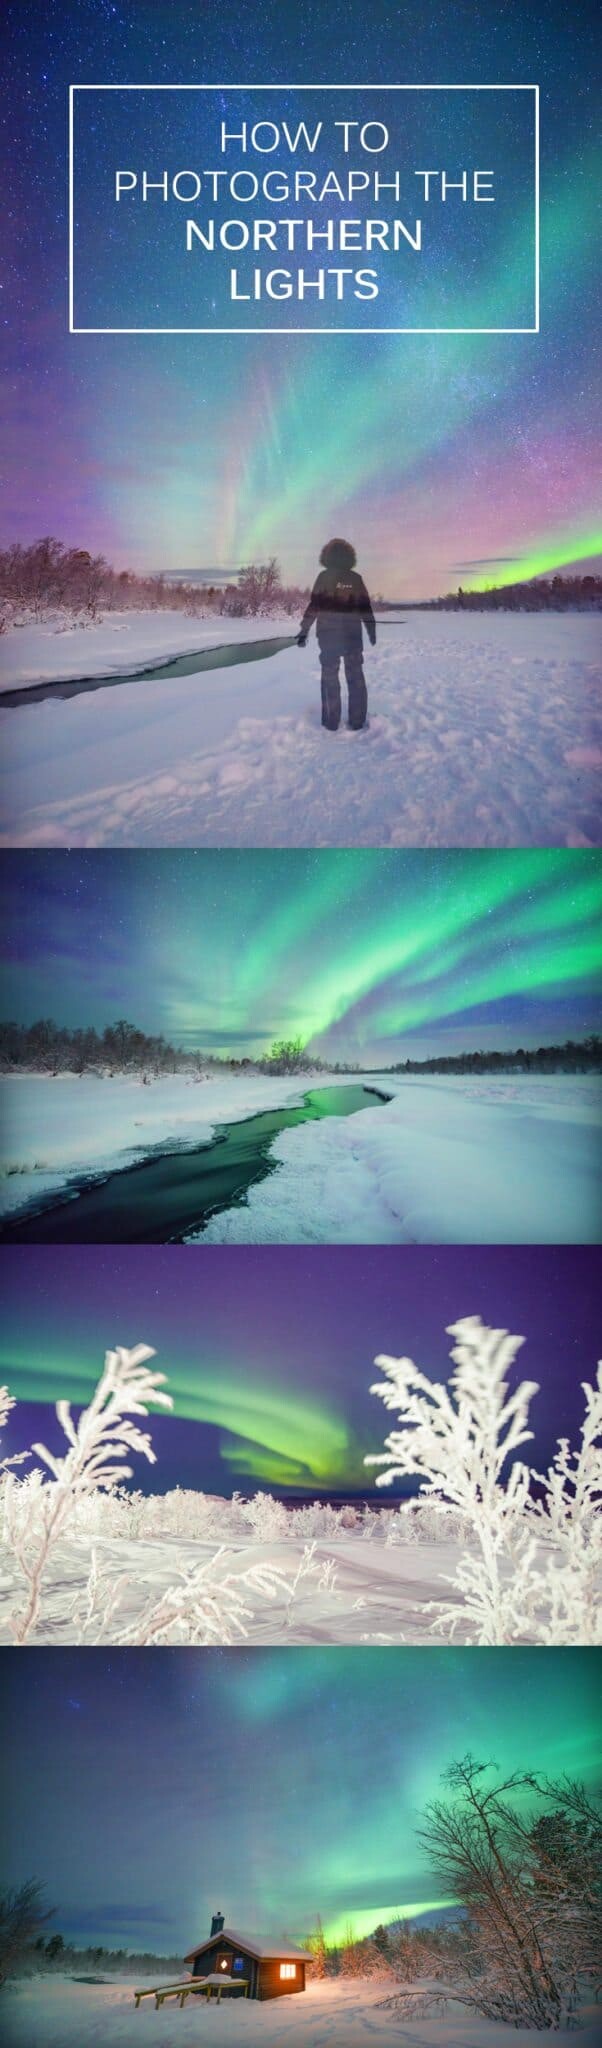
Learn how to Photograph the Northern Lights
Photo Tips for Photographing Aurora + Astro
When the green waves of the Northern Lights dance in the sky or the stars twinkle on a clear night, you’ll want to know how to photograph this incredible natural phenomenon.
Taking a photo with the wrong settings will result in a black image that doesn’t show any of the magic that’s visible through a long exposure.
While everything below might sound technical at first glance, fear not. Once you’ve got the right settings for your camera and the focus is set properly then all you’ll have to do is stare in wonder at the sky and click the shutter.
To photograph the northern lights or even just stars in the sky, you’ll need to prepare a few things in advance to ensure you’ve got the best equipment and conditions.
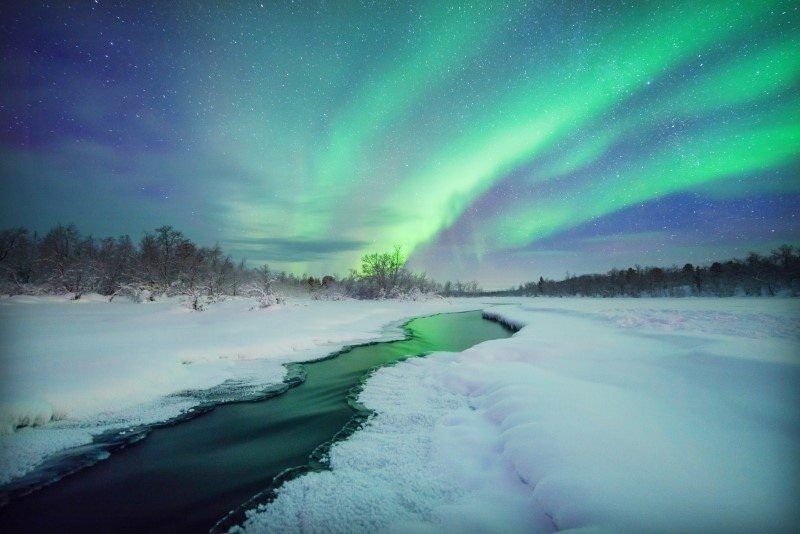
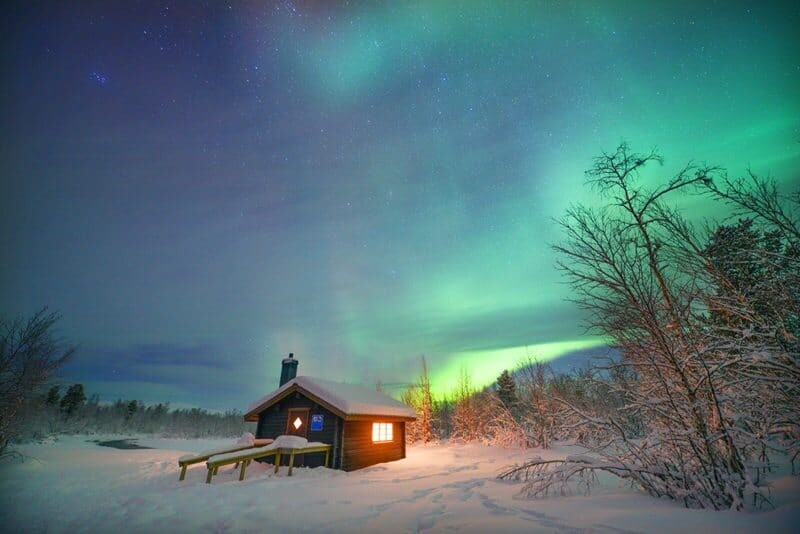
Photographing Aurora – Settings: ISO 1600, f/2.8, 25 second exposure.
The techniques mentioned in this post can be used for photographing stars, the night sky, the Aurora Australis (Southern Lights), basically any dark sky astrophotography.
Equipment for Night Photography
A Tripod
Camera with manual setting ability
Wide-angle lens
Extra Batteries
These are explained in more depth below…
Tripod – having a sturdy tripod is essential when photographing the night sky. During a long exposure the camera has to remain completely still for the total duration of the shot. Be sure to find a stable place to put the tripod too so it doesn’t fall in a hole or off a cliff…I can be a little clumsy so always prepare for worst case scenario!
Camera –
Any modern camera with manual settings should be able to create beautiful photographs of the northern lights. While I usually say it’s not about the equipment it’s about the eye, when it comes to photographing in very dark conditions, quality of your camera sensor and lens play a big part in the final result.
For best results use a camera that has a high ISO capability and noise reduction. Being able to adjust the manual settings to control the ISO, exposure time and aperture is very important.
Lens –
Fast wide-angle lenses with a minimum aperture of f/2.8 – f/4 are best for astrophotography. I use a 14-24mm f2.8 Nikon lens and always shoot the night sky using it at full width of 14mm to capture as much of the scene as possible.
Accessories –
Batteries
Take extra batteries. Typically it’s always freezing when you’re photographing the northern lights so your camera battery will deplete a lot faster than usual. Take 2-3 batteries if you plan on being outside for a few hours, it’s a lot easier having extras than to be forced to stop taking photos when an amazing aurora display appears.
A cable release or wireless remote
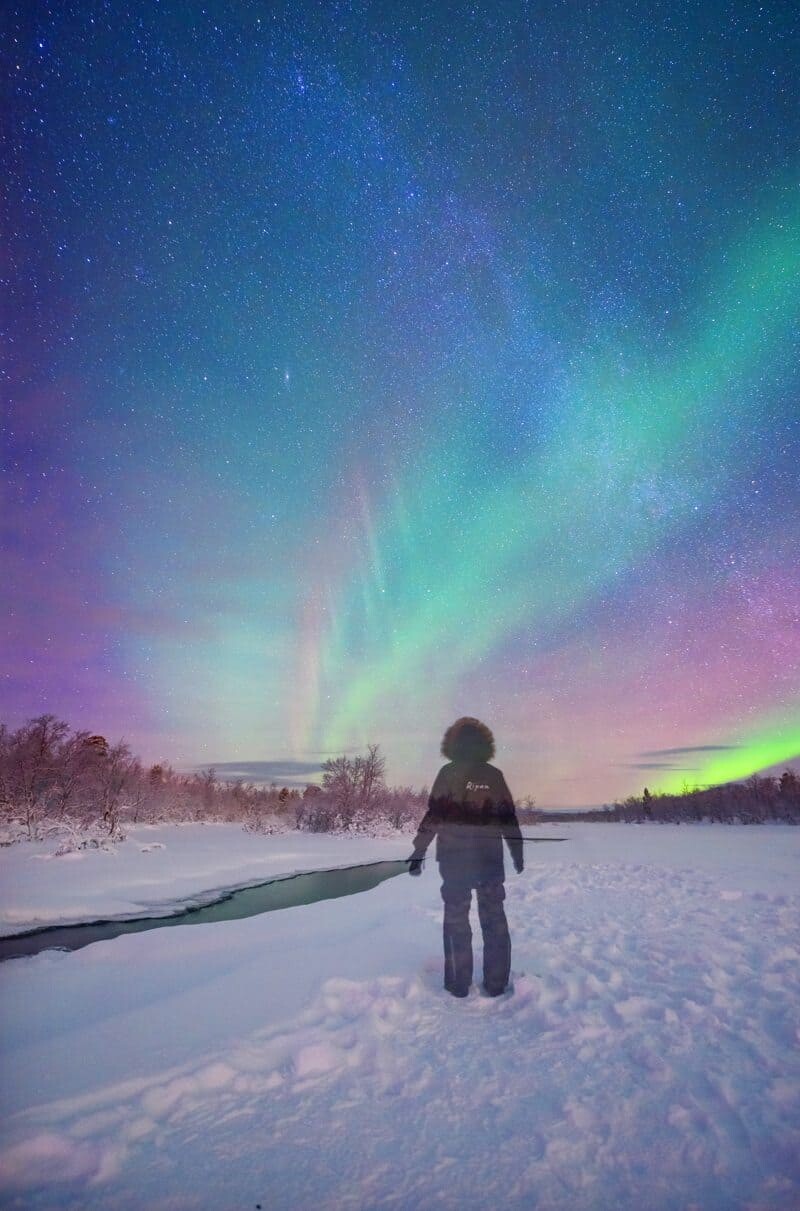
Doing everything possible to avoid camera shake is recommended when photographing the northern lights. Using a cable release or wireless remote will mean you don’t even have to touch your camera to take the photo, just click the button and watch the sky. They’re also great for including yourself in images…depending on your remote you can stand up to 160m away from the camera and still take a photo!
Heat Pads
If you’re out in below freezing conditions pack some disposable heat pads in your bag to keep warm. Having them in your shoes and your gloves will keep you much happier throughout the evening and will let you continue to focus on your photos rather than how much you’re shivering.
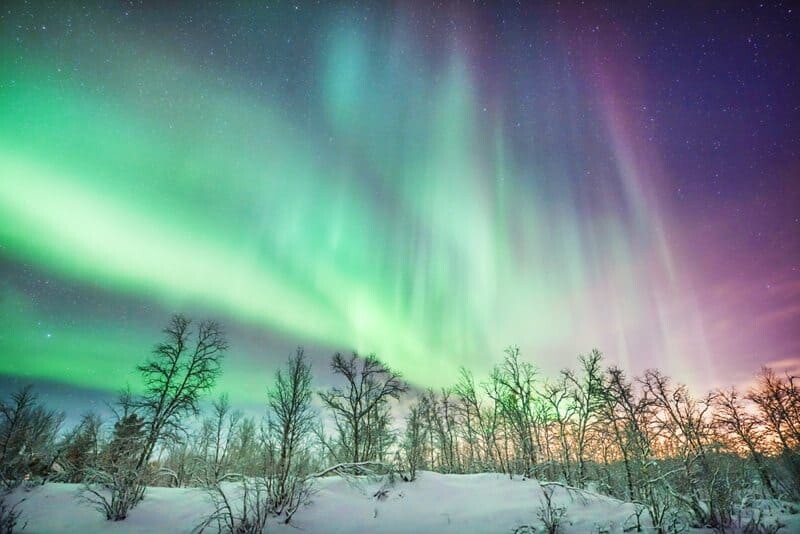
Photographing the Northern Lights – Settings: ISO 1600, f/2.8, 30 second exposure.
Preparing to Photograph the Northern Lights
Check the weather forecast
The best conditions to photograph and see aurora are cloud free skies with a small moon. Be sure to check the weather conditions before heading out especially if you are venturing into the mountains or a landscape far from anything.
I always use Accuweather and have found it to be very accurate in predicting when clouds will appear, how much cloud cover there is and when they will disappear again. It can save you hours of waiting in freezing conditions if you check to see what your chances are beforehand.
If you’re only chance is during a full moon, you can still take great photos and sometimes can even use the shining moon within the composition of your image.
Also if the aurora is strong enough, it can be seen through clouds…it’s all down to the conditions on the day.
Check the aurora forecast
This is a little hit and miss in my opinion. The Space Weather Live website along with many aurora apps predict the strength of aurora for upcoming dates and sometimes even to the hour. While it’s fun and can get quite addictive to check the possibility of seeing aurora, they also can be quite unpredictable.
On the night I saw the strongest displays of aurora, there was only a reading of KP1. Aurora readings range from kp0 to kp9 with kp9 being an out of this world display of rainbows and unicorns. Typically an average aurora ranges between 2-5kp but like I mentioned, don’t put all your hope into the forecasts…you could get lucky!
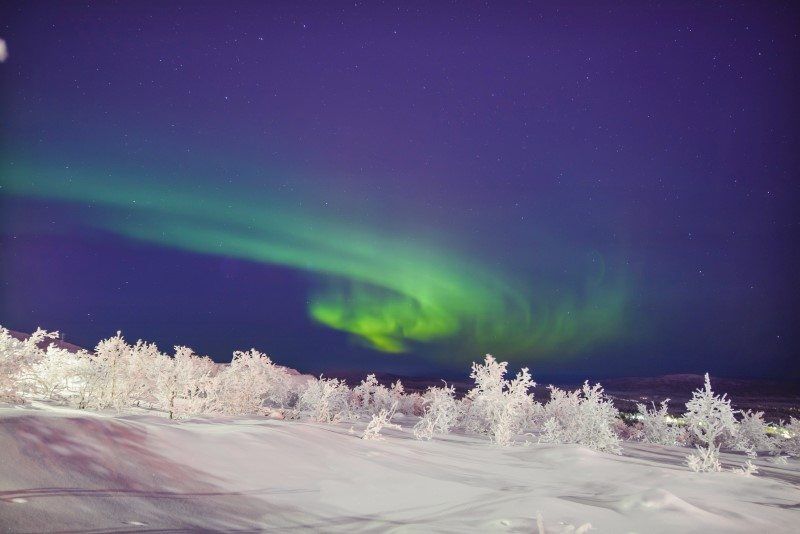
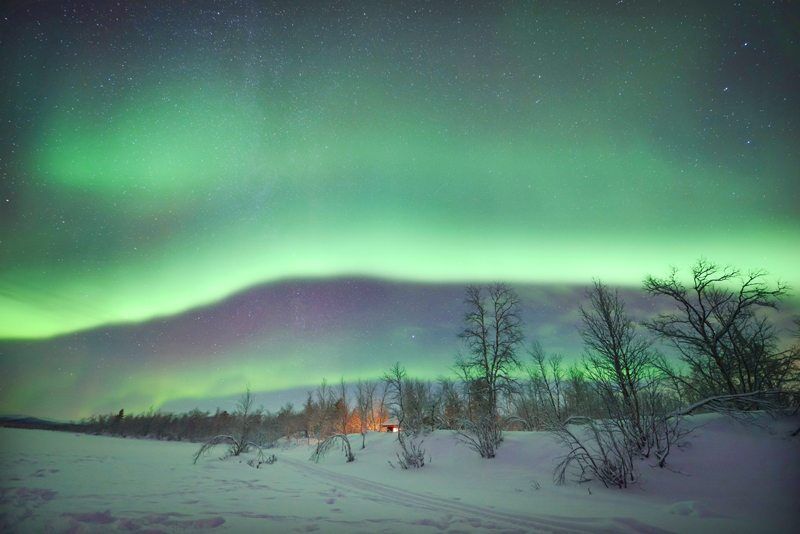
An aurora display when the forecast was only at kp1…always keep your eyes open just incase! Settings: IS0 800, f/2.8, 10 second exposure.
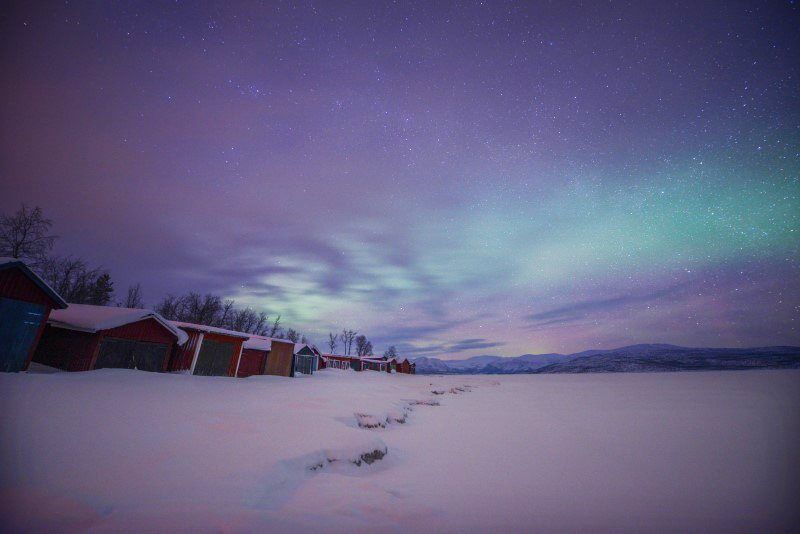
This was taken when nothing could be seen with the naked eye…Settings: ISO 1000, f/2.8, 30 second exposure.
How to Set Up Your Camera to Photograph the Northern Lights
Focusing on the Night Sky
The aim of astrophotography is to capture tiny details in the distance so the stars and aurora displays are sharp and clear. To do this you need to use your ‘infinity’ focus which you’ll find on your lens with the symbol “∞”. This will ensure your photo is sharp in the foreground and distance. Unfortunately this is the first tricky part as not all lenses are created with a perfect infinity setting and you’ll need to find the sweet spot that is unique to your lens. Simply finding the icon on your lens and choosing the middle won’t always work.
Before you go out to photograph the northern lights do a test shoot first to learn where your lens works best to create super sharp images. There is nothing worse than going out, seeing amazing aurora displays only to find the images on your computer are all out of focus.
To do a test shoot, set your camera up on a tripod with the settings below for night photography and move the focus along the infinity symbol until you find the spot that produces a sharp image. Use image preview after each photo and zoom all the way into the stars to check how sharp they are.
Usually the sweet spot is just to the left or right of the centre of the infinity symbol although I have heard of some being right on the edge.
Experiment until you notice the images are completely sharp. You can do this during the day or night, just be sure to zoom all the way in to check the distant subjects are all in focus too.
Best Settings for Northern Lights + Astro
Manual mode
ISO 1600
Exposure +1.0
Aperture f/2.8 – f/4
Shutter Speed 15/1 – 30/1
Notes on Shutter Speed: It depends on how fast the aurora is moving. If they’re dancing across the sky you’ll want to keep it to a shorter exposure time to avoid it being a green blurry mess in the sky and to ensure the patterns stand out. If it’s a general green glow or you’re just shooting stars then take a 30 second exposure so you can illuminate as much detail as possible.
Notes on ISO: Using a camera that has a high range will create better images and reduce noise. Adjust your ISO depending on how much light there is around you, starting your ISO around 1000 and then raise it if needed. Typically I shoot at 1600 for astrophotography so see how your camera reacts and adjust accordingly.
ISO for Stars: If you’re just shooting the stars and the sky is particularly dark then try to boost your ISO a little higher than you world use for the northern lights. For the shots below of the Milky Way I used an ISO of 2500 to keep the stars nice and sharp.
Notes on Aperture: Think of a fast wide-angle lens as your best friend when it comes to photographing the night sky. Having the ability to use an aperture of f/2.8 will work wonders on your images!

Settings: ISO 2500, f/2.8, 25sec exposure. Photographed with a Nikon D800 + 14-24mm 2.8 Nikon Lens.
Settings: ISO 1000, f/2.8, 30second exposure. Photographed with a Nikon D800 + 14-24mm lens.
When the aurora display is moving fast reduce the shutter speed, for this shot it was 15 seconds in comparison to 30 seconds when the lights aren’t moving much. Settings: ISO 1600, f/2.8, 15 sec.
Settings: ISO 1600, F/2.8, 15 second exposure shot with a Nikon D800, 14-24mm lens.
Taking The Photo
When you’ve got everything set up, your tripod is secure, the settings are good to go…now it’s time for the fun part!
Once the northern lights appear you may not see their full beauty with your naked eye. Point your camera in the direct of any colour change in the sky and take a 30 second exposure to see what is out there. Sometimes you’ll just see just the slightest glow or may not even see anything, but a long exposure will reveal the lights that may have been above you all along. Most times though, during aurora activity you’ll see them with your eyes and will be able to aim your camera and compose your image accordingly.
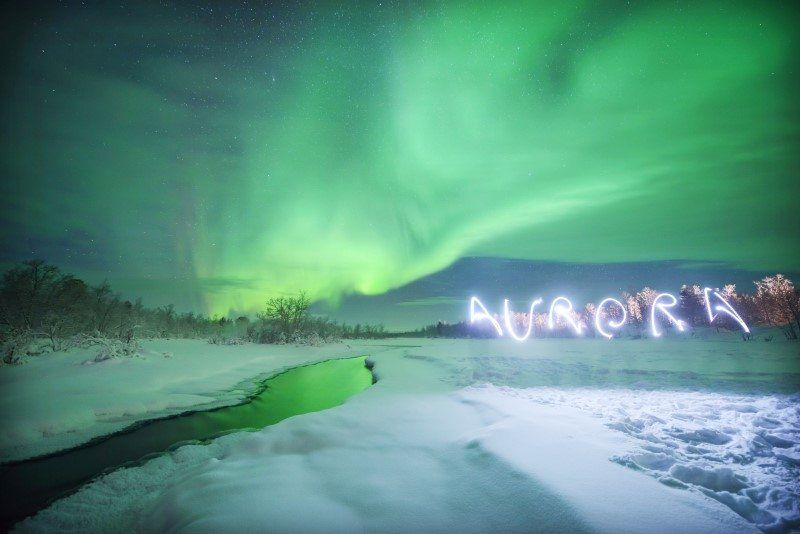
A little light writing – Settings: ISO 1600, 15 second exposure, f/2.8, photographing with a Nikon D800 + 14-24mm lens.
To read about how to handle your camera in cold conditions and what to do if it freezes up, have a little read of ‘How To Use Your Camera in Extreme Conditions’.
Have you taken photos of the northern lights, stars or just a cool shot of the sky you’re proud of? Be sure to share it on Instagram using the hashtag #thewanderinglens
If you’ve found this article helpful please share the love on Pinterest with the below pin ready to go…

Hello! I’m the founder and photographer behind The Wandering Lens.
With 19+yrs experience as a professional travel and landscape photographer, all advice found on this site is from my personal experience, or that of contributors, on the road. I hope it’s useful for your own travels and would love to hear in the comments about your trips and experiences around the world.
Blog Comments
Laura
February 16, 2016 at 12:10 am
Amazing!
ABRIANTINA
February 19, 2016 at 1:24 pm
Genial!!
Tomas
February 16, 2016 at 10:40 am
Exactly what I needed for my trip to Norway in two weeks, thanks for sharing!
thewanderinglens
February 18, 2016 at 11:09 am
Great to hear Tomas! Enjoy your trip to Norway 🙂
Arctica
February 17, 2016 at 2:00 pm
Thank you very much! Your pictures are undescribably beautiful – I hope with the description I’ll be able to capture something half as nice when I go up north in a few weeks!
thewanderinglens
February 18, 2016 at 11:08 am
You’re welcome! Best of luck for your trip! Where are you heading?
Girija
December 25, 2017 at 5:13 am
Thank you so much for breaking it down into understandable bits! Phew! There’s so much to it. Am headed there in a day and the forecast seems cloudy ☹️ Anyway fingers crossed!!
Lisa Michele Burns
January 4, 2018 at 8:31 am
You’re welcome Girija! I hope you got to see some magic on your trip? If you did and would like to share your photos, you’re welcome to join my photography group on Facebook – https://www.facebook.com/groups/thewanderinglens/
Lynne Grebenik
January 2, 2018 at 9:45 pm
Thank you so much for your tips etc. I’m off to the Lofoten and Vesteralen Islands at the end of Feb for 2 weeks so hope to get some good shots. Thank you gin.
Lisa Michele Burns
January 4, 2018 at 8:29 am
Thanks Lynne! Very exciting to hear you’ll be visiting this beautiful part of the world soon. Winter is the perfect time to visit, fingers crossed the northern lights dance for you! If you’d like, you can join my Facebook Group and share some photos from your trip once you return…the link to join is – https://www.facebook.com/groups/thewanderinglens/
Judit Fabian
April 25, 2018 at 12:06 am
Great article! Can you tell me where you got the image of the Milky Way with the aurora and the Magellanic Clouds?
Lisa Michele Burns
April 25, 2018 at 10:01 am
That was taken in Wanaka, New Zealand, I got very lucky with the magic that appeared that night 🙂
Stephen Roberts
January 3, 2020 at 5:28 am
Hi Lisa,great article and images. My wife and myself have just booked a northern lights cruise from Newcastle,UK in march 2021.I would love to be able to come back with some nice images too remember our trip. I have recently upgraded to a canon 7d mkii, any advice you could give regarding suitable lens and shooting from a moving vessel would welcome
Lisa Michele Burns
January 20, 2020 at 4:13 am
Hi Stephen, very exciting you’ve booked a trip for next year! They’re such a natural wonder and definitely a once in a lifetime thing to see. Regarding photographing from a moving vessel, this will be tricky as the lights are also moving so you’ll struggle to capture something super sharp. However, if you get a really good light show, they should be bright enough that you can shoot with a fast shutter speed and hence avoid as much motion blur as possible. The lens won’t change the movement of the boat however it you have a fast lens that’s capable of f1.8 or f2.8 then you’ll give yourself a better chance.
Claude
February 9, 2022 at 5:50 am
Hello,
Great post about aurora shooting !
I’ve already taken some aurora pictures in Lapland, I would add the advice not to increase exposure time over 20s otherwise you’ll get star trails or at least small dashes instead of star points…rule of the thumb is 600/aperture so 600/2.8 = +/-20s.e.g.
Also, instead of focusing on infinite, it’s better to include some element in the picture (house, rock, tree…) and focusing on it.
Cheers,
Claude