
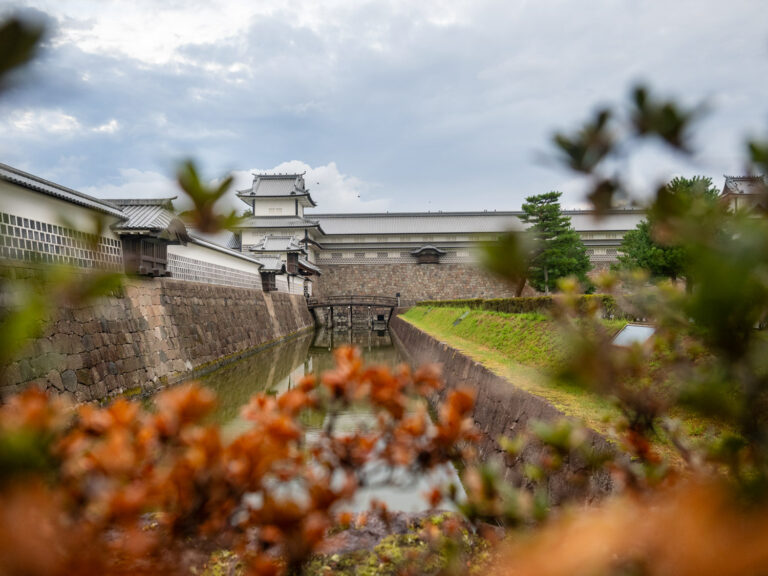
Queenstown Photography Locations
Queenstown, New Zealand is somewhere I’d usually recommend you spend a lifetime in preference to a weekend.
It’s the kind of place you arrive and instantly realise you’re somewhere special.
That said, if you’ve only got a few days to explore then don’t fear, you can still cover a lot of ground! One of the beautiful things about Queenstown is that upon arrival you’re already somewhere photogenic. The airport sits beneath the spiked peaks of The Remarkables so even the first photo you take is going to be a keeper, not to mention the shots you’ll capture from the flight!
Back in October I spent 48hrs on a photography adventure with Olympus Australia and the new OM-D E-M10 Mark III camera for the #NeverStopTheJourney campaign. We set out with an itinerary to hit up as many photogenic locations as we could to showcase not only the capabilities of the camera, but the beauty of Queenstown and its surrounding photo spots all the way from Glenorchy to Wanaka…so way more than just Queenstown alone.
So… if you find yourself in Queenstown with just 48hrs to capture as much as possible I wanted to share our itinerary and locations.
Side note – I’m a total wimp so things like bungee jumping, river rapids, fast boats or fast anything aren’t included in this list. You might have to check out the Destination Queenstown website for adrenaline junkie activities…I like to use the excuse that I can’t do a lot of activities with my camera but we all know that’s just a big fat lie, action cameras do exist haha.
Let’s kick things off with a map! Below you’ll find an interactive map listing everywhere we went within 48hrs so you can either follow along, or create your own photo adventure.
Now, here’s a list of the places we visited if you’re not keen on details and just want to jot down the locations –
Lake Wakatipu Sunset Cruise (Frankton Arm + Bob’s Cove)
The Remarkables (via helicopter)
Gibbston Valley Winery
Wanaka Lavender Farm
That Wanaka Tree
Wanaka Lake Front
Crown Range
Arrowtown
Sunrise overlooking Deer Park Heights + The Remarkables
Wilson’s Cove
Bennett’s Bluff
Glenorchy
THE 48HR QUEENSTOWN ITINERARY
Arrival into Queenstown Airport @2pm Friday
Time wise for a 48hr photo trip, I always like to time my flight with sunset in mind. Having the possibility of two sunsets and two sunrises in your short trip is essential to covering more ground and capturing more landscapes.
- A little tip on sunrise photos, if you can, try to secure a hotel room with a balcony and views over Lake Wakatipu or The Remarkables. This means all you’ll have to do is stumble out of bed and put on your dressing gown in order to photograph sunrise! In Queenstown you’re spoilt for choice with hotels offering this option so it’s really just a matter of your budget and how far you want to be from the centre of town.
- We stayed at The Rees Hotel which is a 20-30min walk from Queenstown’s centre but…it meant waking up to views looking directly over Frankton Arm toward Deer Park Heights and The Remarkables. You can either photograph from your balcony or take the stairs down to the shores to compose your images right on the waterline.
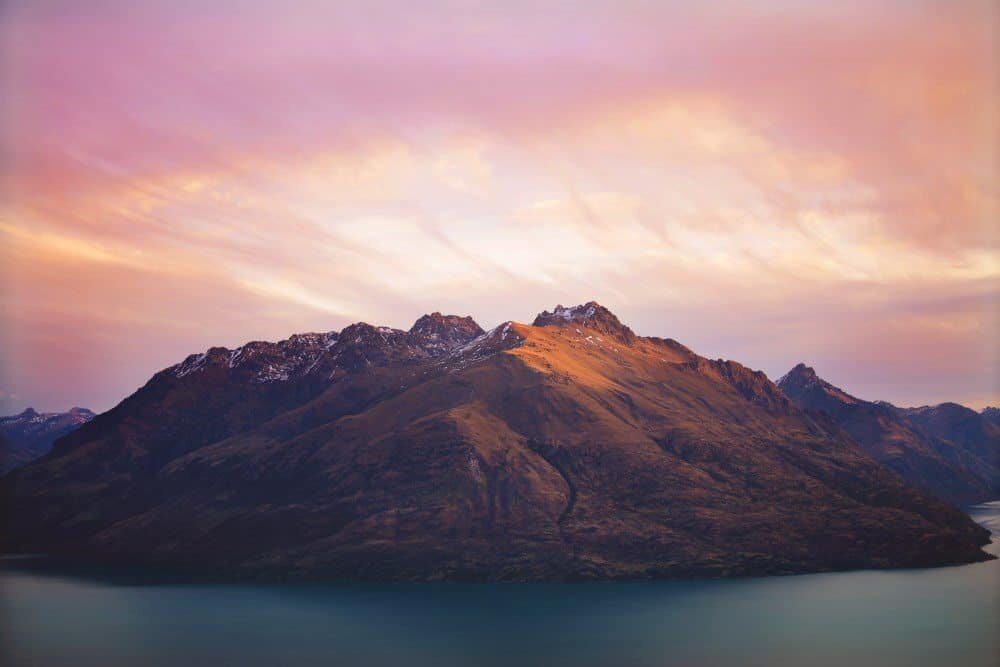
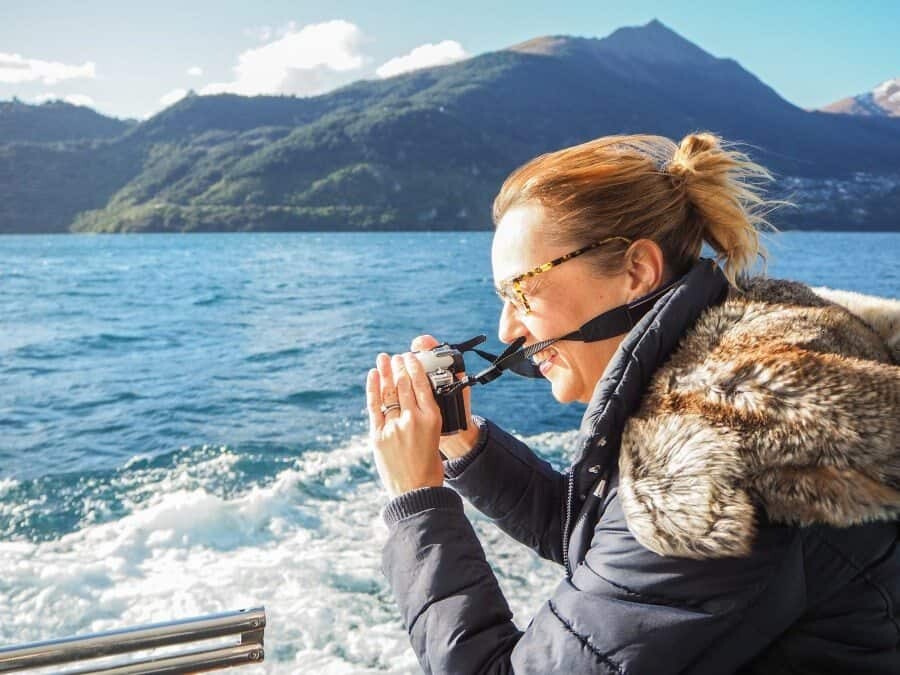
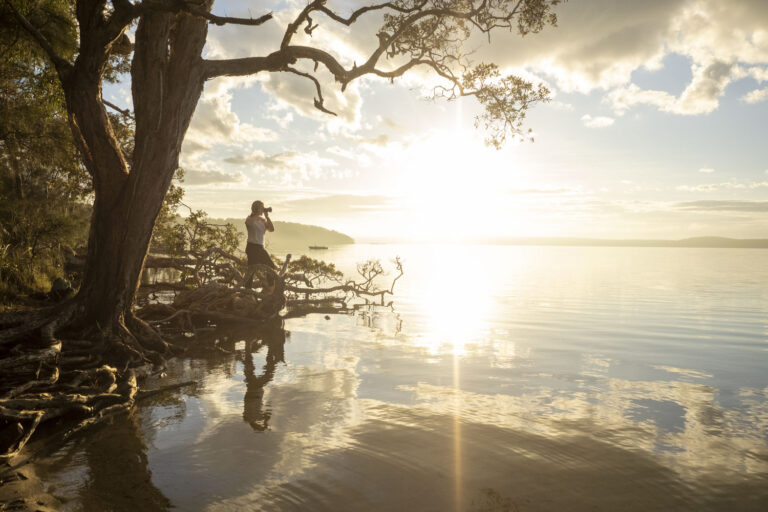
5pm – Sunset Cruise on Lake Wakatipu
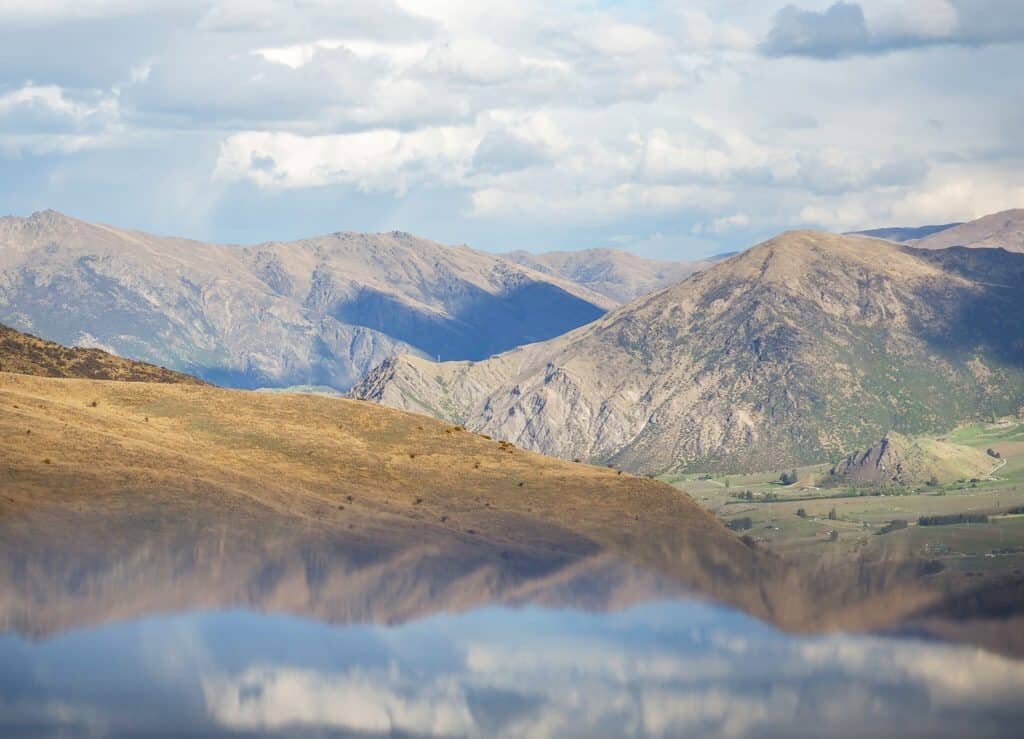
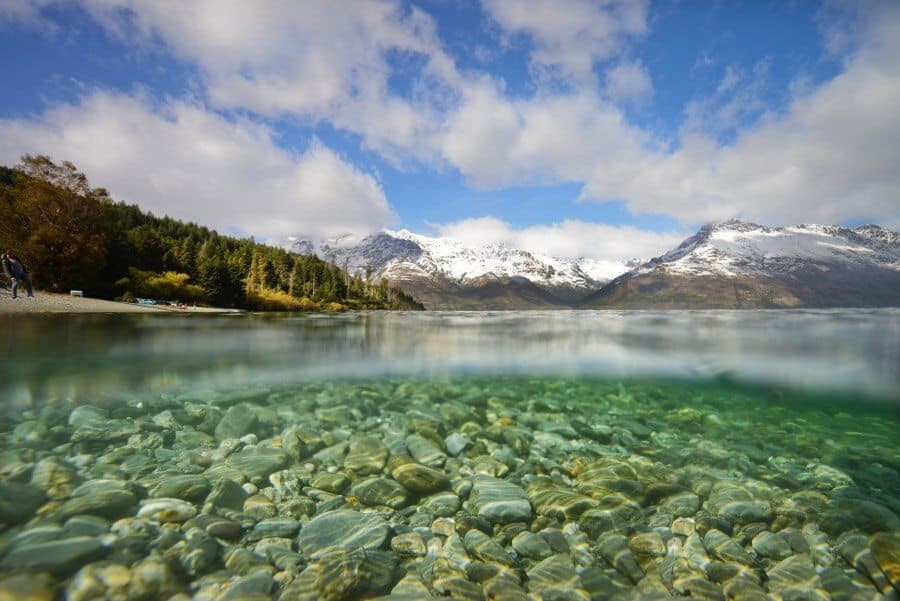
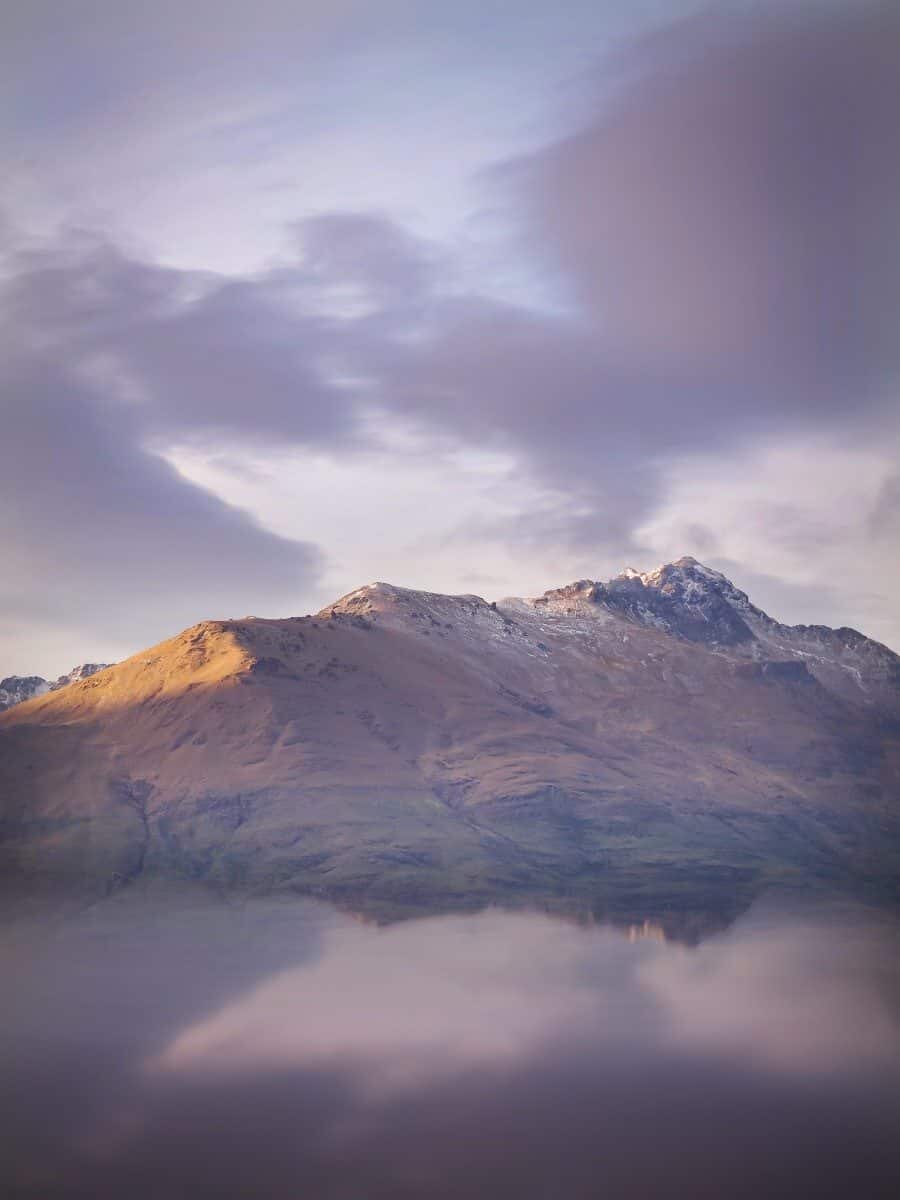
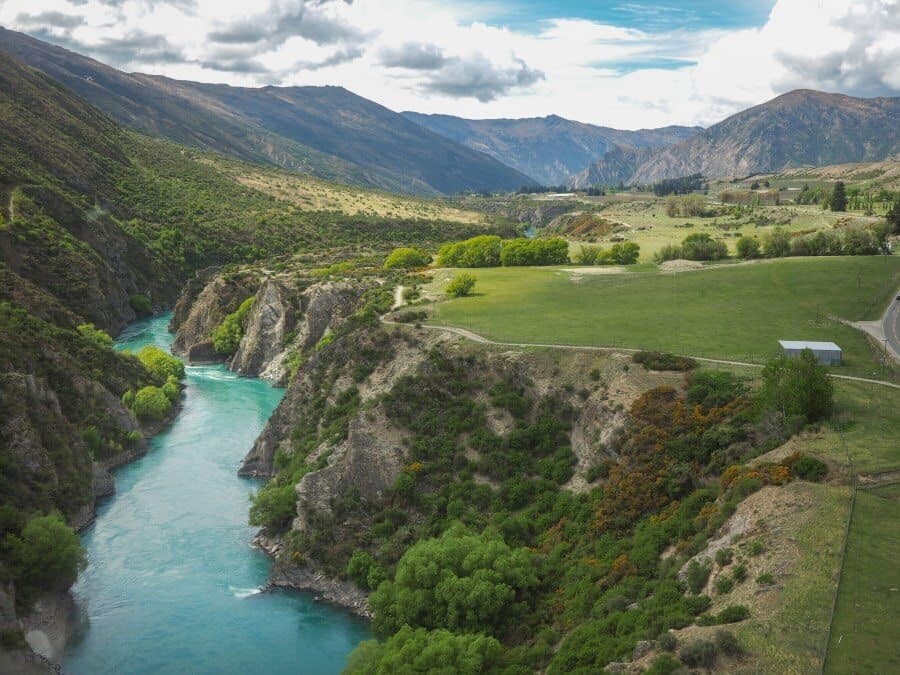
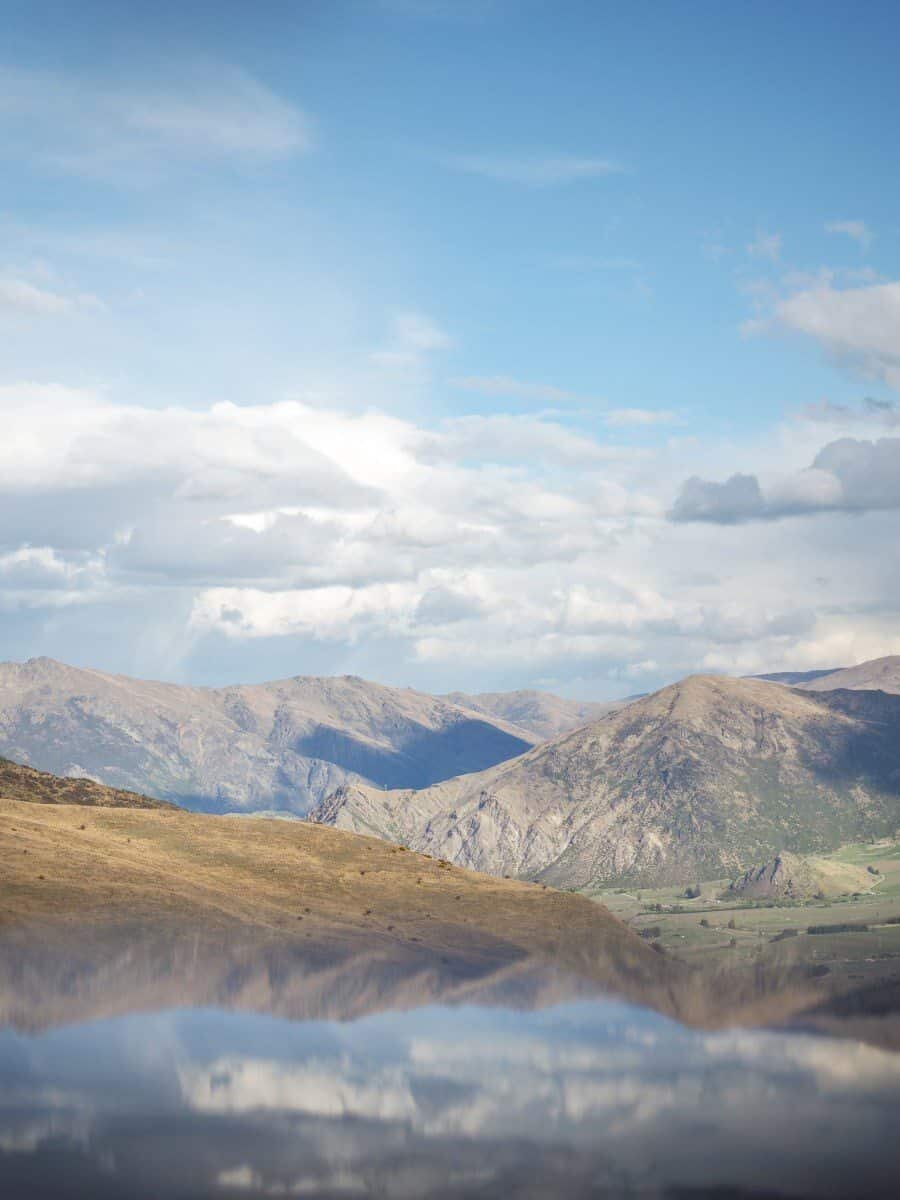
Queenstown is blessed with a foreshore similar to those quaint fairytale villages found in the Austrian or Swiss Alps. Lake Wakatipu will feature in a lot of your photographs when you’re exploring Queenstown because it’s immense size means it’s hard to avoid it!
Stretching a massive 80km in length, the lake is framed by alpine scenery, offering photographers a seemingly endless canvas of scenes to capture.
Getting out onto the lake offers alternate perspectives that you can’t get from the shore. Cruising beneath mountains like Walter Peak and Mount Nicholas the rugged patterns of rock formations, crevice’s and snow sprinkled peaks are awe inspiring.
The quiet coves found on the lake’s northern side are a haven for reflection hunters! With the boat gliding ever so slowly, gentle ripples help with composition of reflecting forests, pine trees and of course the ever-present mountains.
Be sure to explore places like Bob’s Cove and then Frankton Arm which is found a little closer to the airport, is a great spot for watching sunset from the water!
Photo Tip: Because the boat will be moving, keep an eye on your ISO and shutter speed settings to avoid any accidental motion blur. With the OM-D E-M10 Mark III, the 5-axis stability system makes it nice and easy to capture shots without the need to compensate with settings too much.
If you’re shooting at sunset you’ll find settings tips here ‘Setting the Scene – Golden Hour’.
Day One –
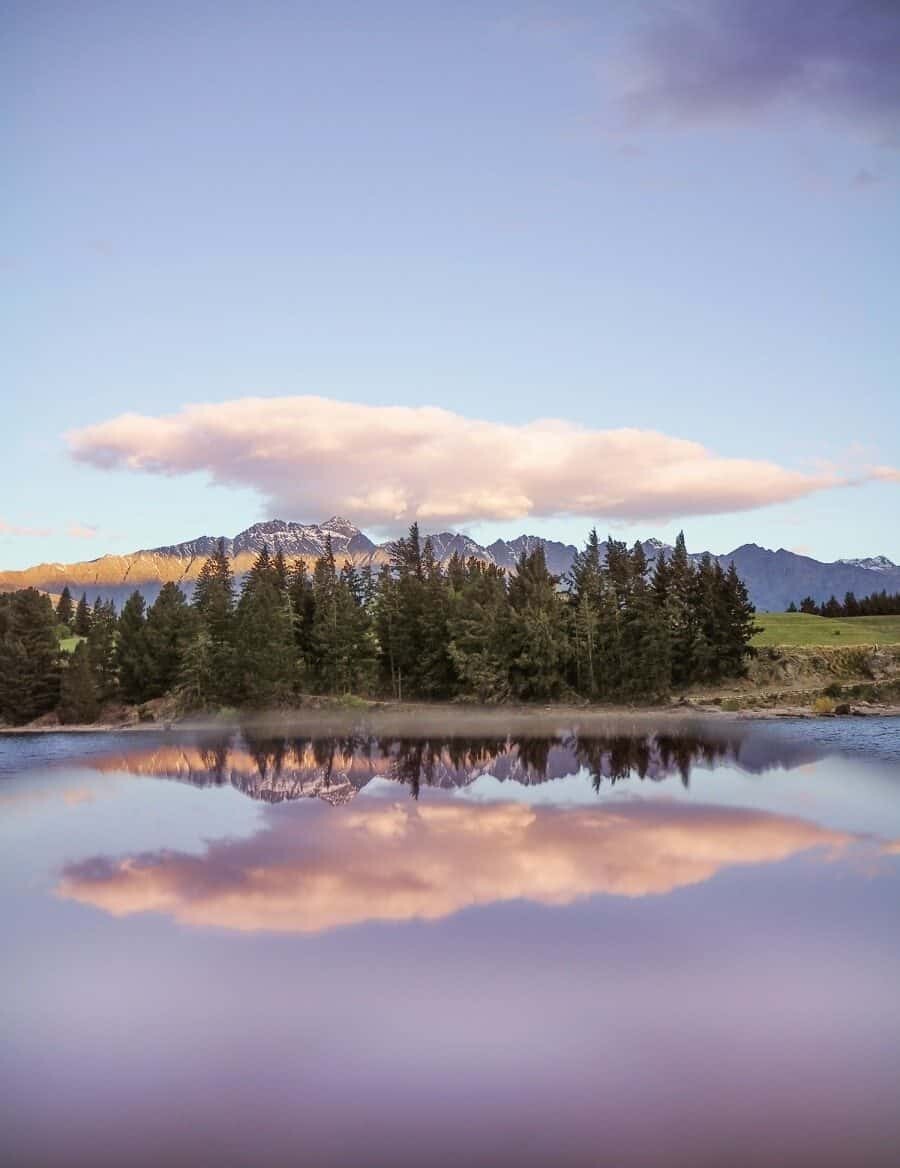
Sunrise 7am – I photographed sunrise from the balcony of my room at The Rees Hotel. As I’ve mentioned above, if you’ve managed to book a hotel with views over Lake Wakatipu, The Remarkables or Deer Park Heights there’s no need to even put shoes on (except if your feet are freezing!). Watching as the sky lit up behind the mountains, as the day began with a purple tinge then progressed to pink, orange and onward to a beautiful baby blue.
It really does pay to check which way your hotel room will face! The hotels here are more than used to photographers staying so be sure to ask upon check-in if you’ve got a good view for photographing sunrise!
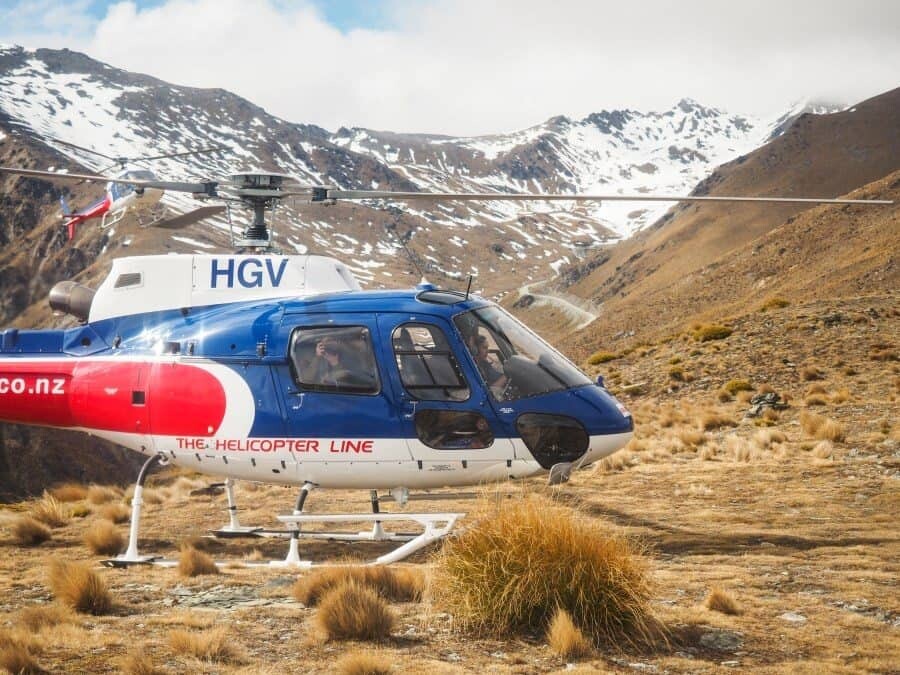
10am – The Remarkables (via Helicopter)
This might sound like a pretty fancy way to get the morning started, and of course it is but…there’s a reason. The helicopter flight linked us to our second photo spot and surprisingly due to the amount of heli operators, you can snare a scenic flight for around $150-$300NZD per person for 20-40mins including an alpine landing.
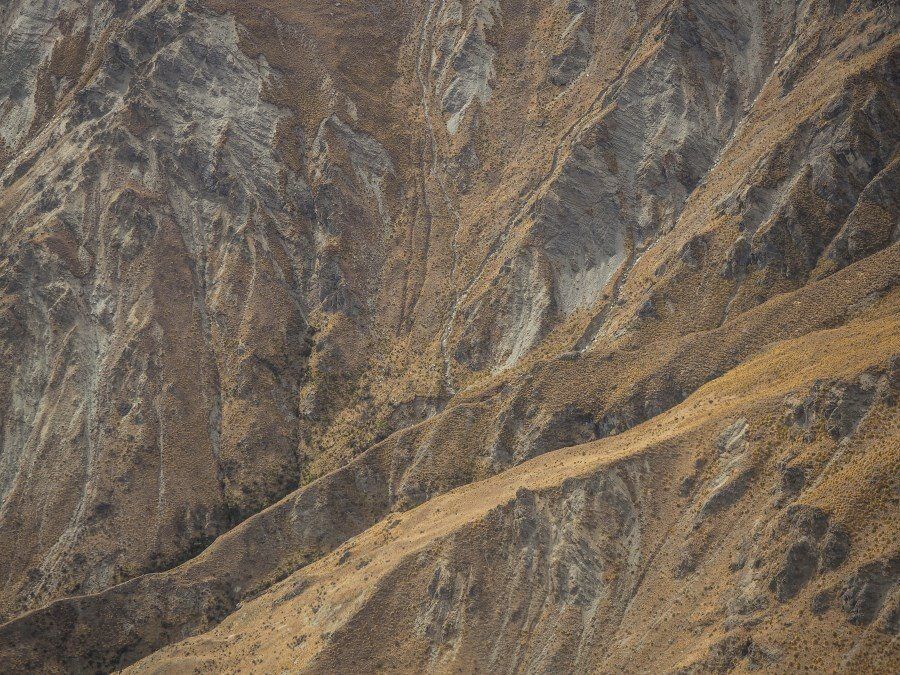
The alpine scenery is SO photogenic from the sky. Taking off from Queenstown Airport with The Helicopter Line, we rose above the Kawarau River and onwards up to The Remarkables. The ascent took only 5minutes and soon enough we were high above Queenstown with views our cameras were almost jumping out of the bag to capture.
With the OM-D E-M10 Mark III being designed as a travel savvy camera, it’s small enough to have on your lap in the helicopter to take shots on route but then strong enough to have the M.Zuiko 40-150mm zoom attached to get closer and creative with composition.
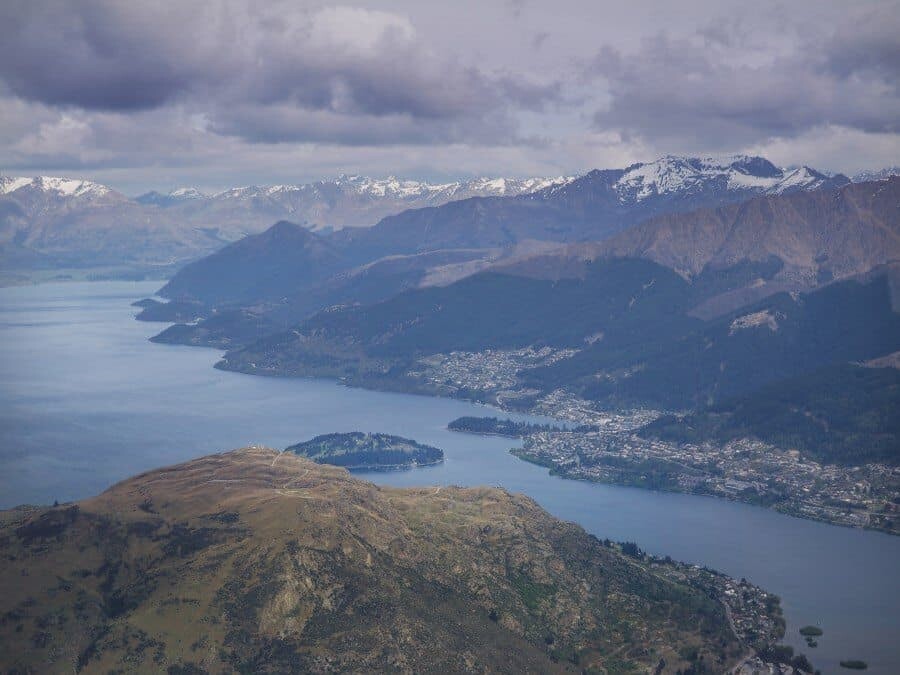
The views from on top of The Remarkables are hard to beat. With Queenstown below, Lake Wakatipu wrapping around beneath the mountain ranges and snow capped peaks leading off into the distance.
Photo Tip: Take a few lenses with you for the helicopter trip. While in the air it’ll be best to have a versatile zoom lens like a 12-40mm because you’ll want to capture both wide angle landscapes and then also zoom in to capture the patterns beneath you. Once on top of the mountain, having a zoom lens like the 40-150mm offers the ability to capture scenery far off in the distance, or to compose a subject against the surrounding landscape and create perspective.
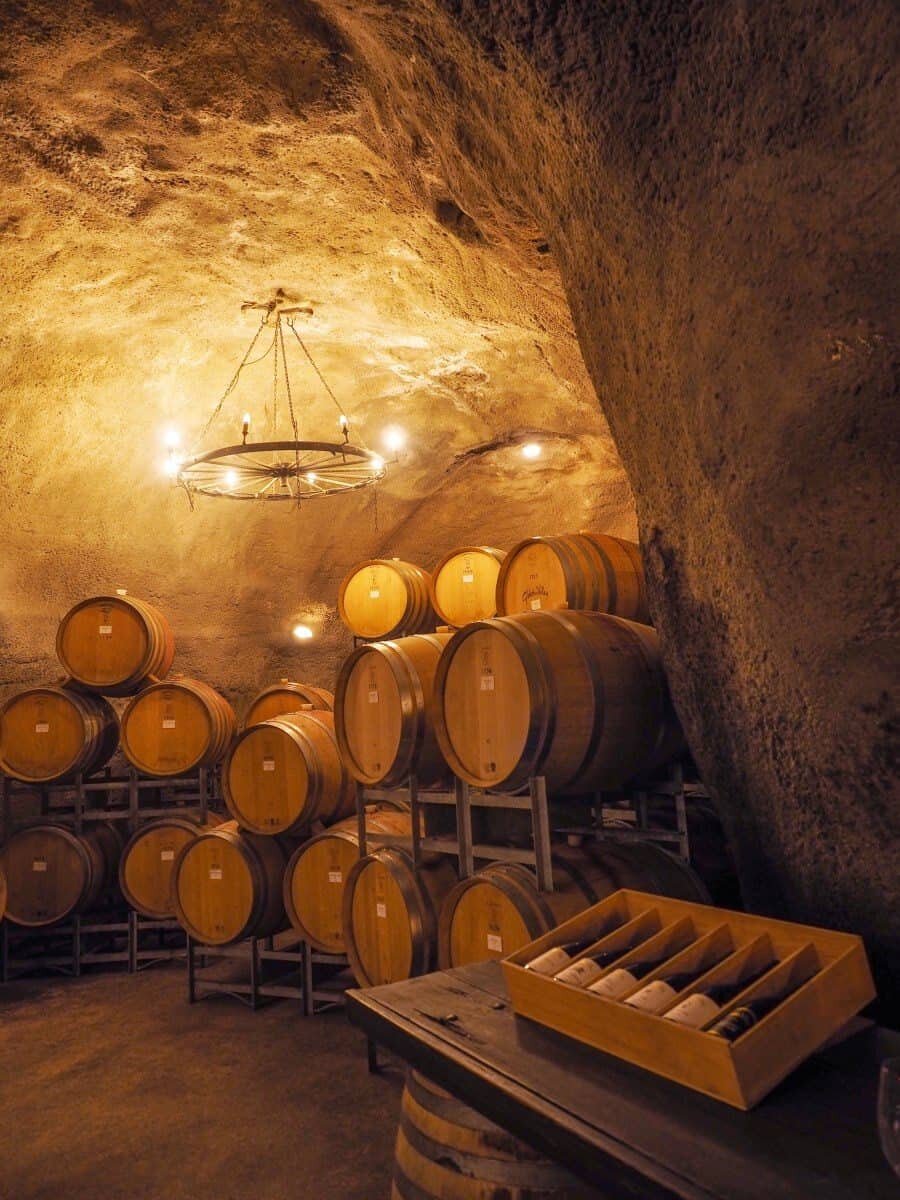
11:30am – 1pm: Gibbston Valley Winery
Flying in like celebrities, our helicopters landed beside the vineyards dripping with fresh little buds. Normally on a trip stopping for lunch let alone wine would be one of the furthest things from my mind but this was quite an interesting photo spot.
Upon arrival our host mentioned that the following morning, helicopters would be returning to hover about the vineyard in order to disperse fog and stop it from settling and ruining the new seasons crop. Who would’ve thought helicopters were involved in the grape growing process!
Something I wasn’t expecting was to step inside New Zealand’s largest wine cave that’s located within the mountain behind the winery. With a consistent year round 14 degree temperature, the barrels are kept in mint condition, enabling the wine to mature and taste incredible!
Also, the wine cave makes for a fantastic photo spot.
Photo Tip: Due to the low lighting inside the cave, you’ll need to increase your ISO in order to capture the scene. Using Aperture mode, balance your ISO and exposure while shooting with an f-stop of around f/2.8 to create a beautiful bokeh of the rows of wine barrels.
1:15pm Roaring Meg
This was just a quick stop but is always one of my favourites on the drive between Queenstown and Wanaka. Located beside Kawarau Gorge Rd, Roaring Meg is actually a power station that creates a giant waterfall that gushes out from the side of a mountain. Spilling over into the Kawarau River it’s a great spot to capture semi-long hand-held exposures of the moving water.
With the built-in 5-axis stabilisation system inside the Olympus OM-D E-M10 Mark III you can actually capture long exposures without a tripod.
Photo Tip: A quick way to slow your shutter down is to shoot on aperture mode, drop the ISO to LOW or 64-100, increase the f-stop to f/22 then watch as your shutter speed slows down.
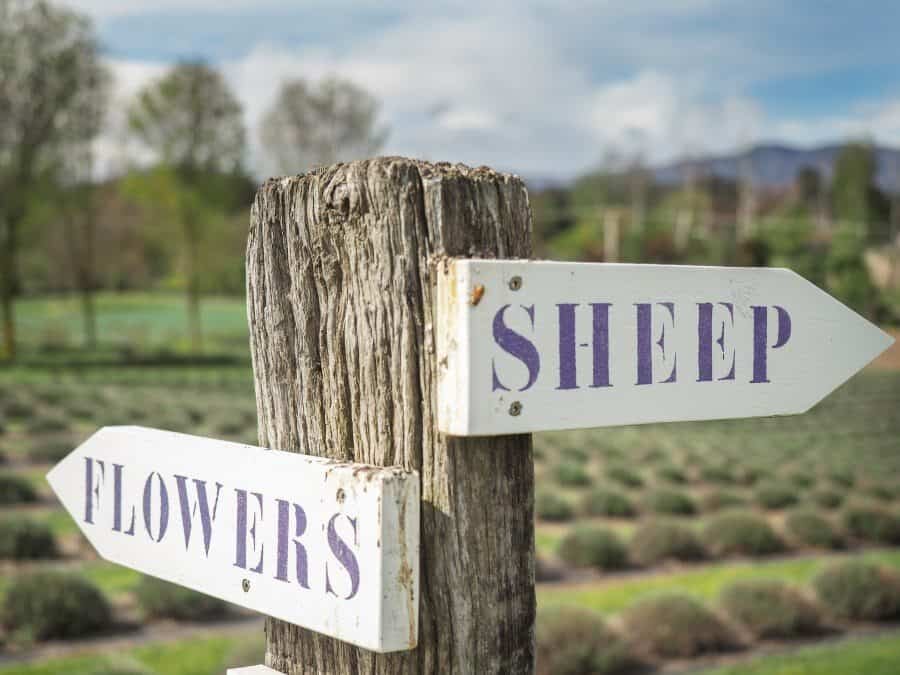
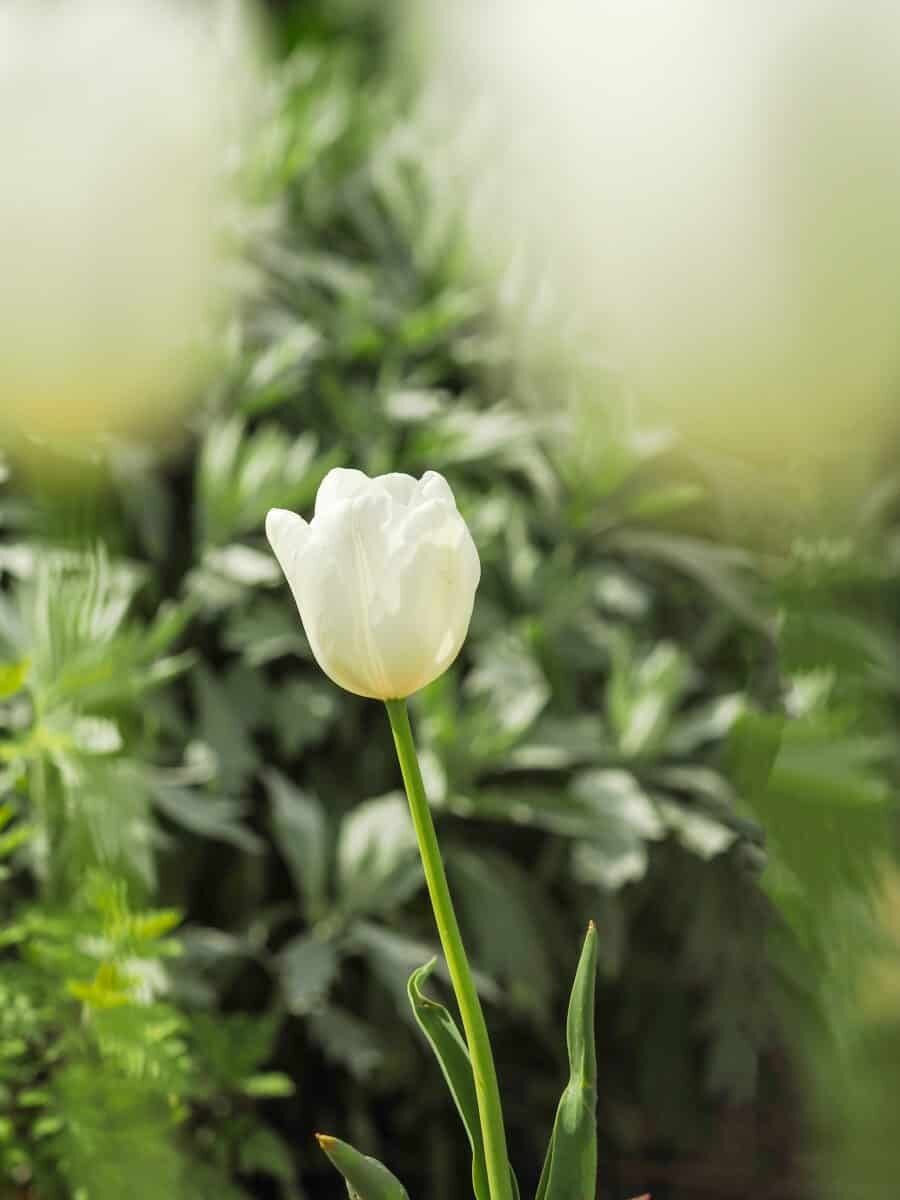
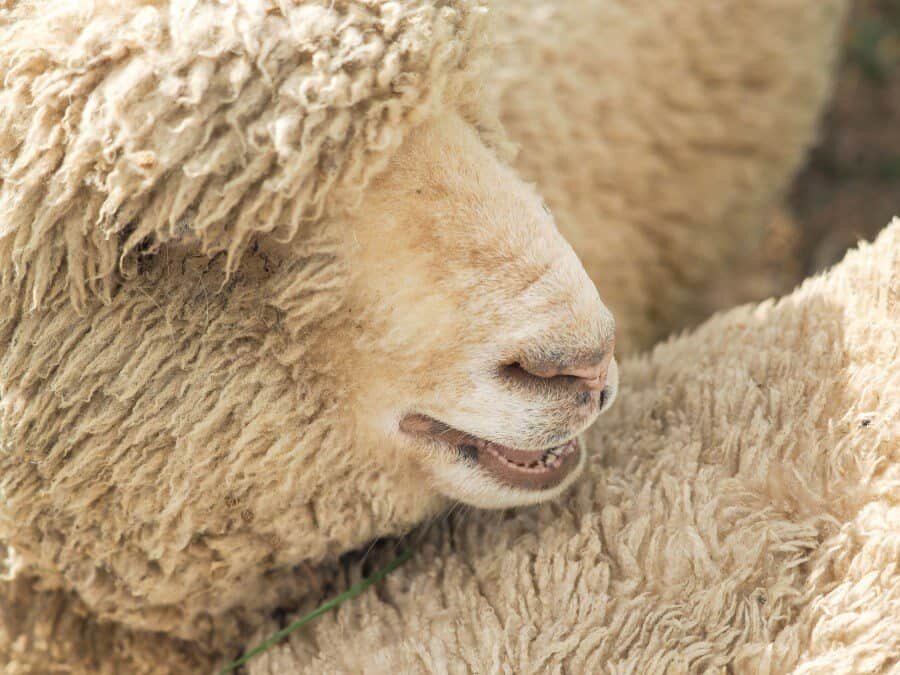
2pm Wanaka Lavender Farm
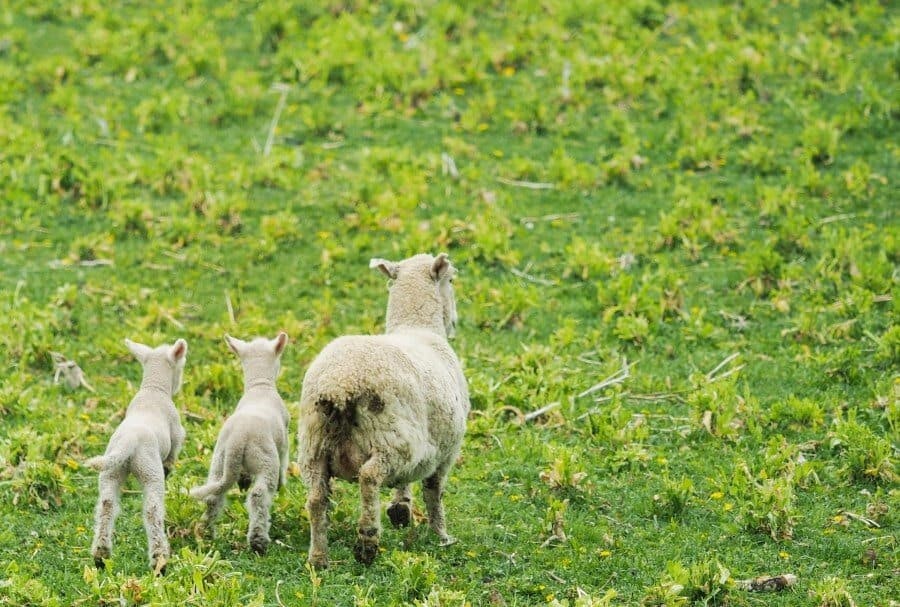
For a break from mountains and lakes, we stopped off at the Wanaka Lavender Farm to photograph some cuties. While it wasn’t lavender season, the farm is a great place to get up close and person with locals like Koko the Pig, friendly alpacas or work on perfecting sheep portraits.
The farm has over 10 hectares of gardens to wander through with tulips, lavender of all varieties and other gorgeous flowers to photograph.
Photo Tip: Using a prime lens like a 25mm will allow you to create beautiful bokeh (background blur) behind your subject. Particularly great for capturing close details of flowers and fluffy animals!
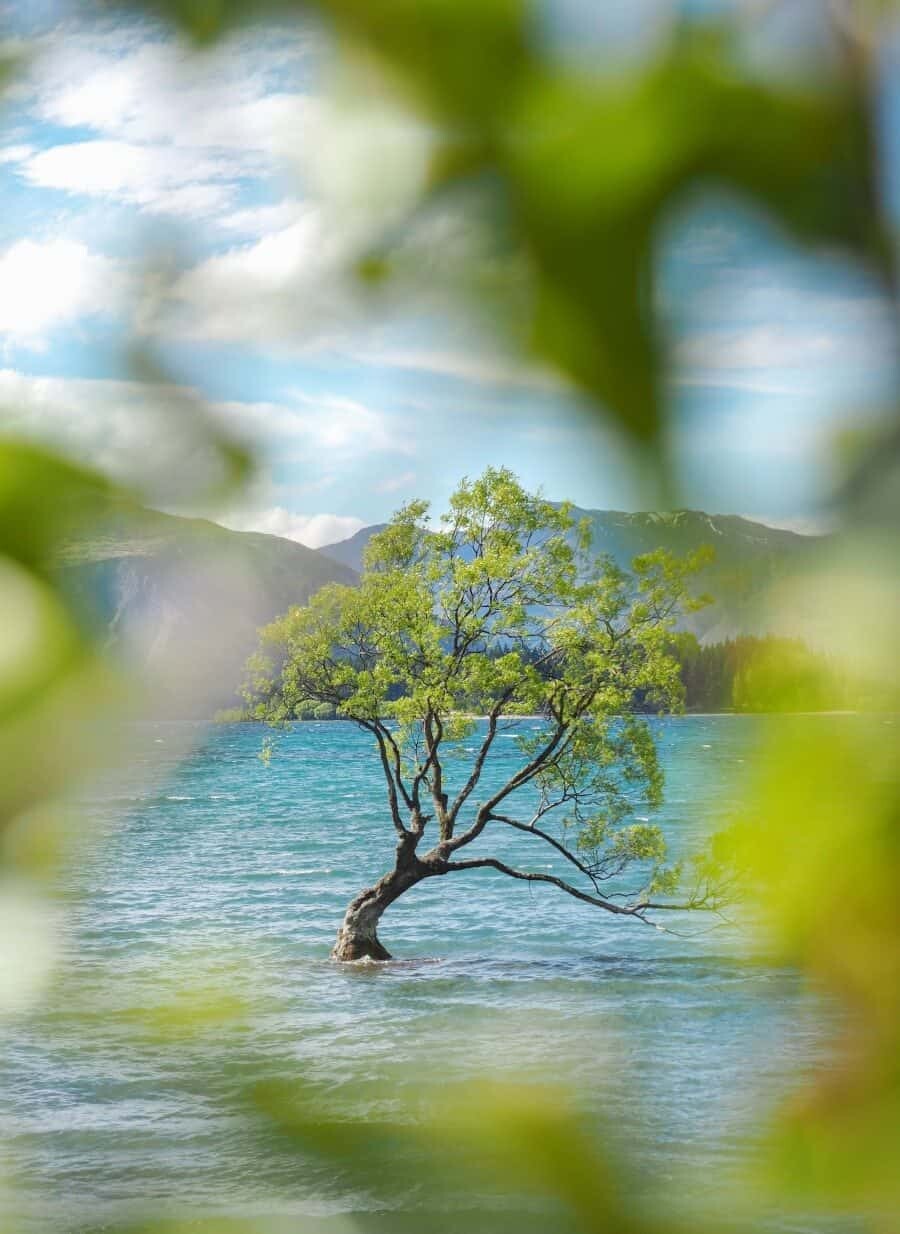
3pm That Wanaka Tree
Technically this spot isn’t in Queenstown, it’s actually Wanaka’s most famous tree…perhaps even New Zealand’s!? But, because it’s just a 1hr drive from Queenstown, it’s silly not to include a visit north to the scenic smaller town of Wanaka and photograph all it has to offer.
Ideally, I would suggest spending at least a few days here, taking time to hike Roys Peak, explore Lake Hawea and the Aspiring Mountain Range.
If though you’ve just got an hour or so, head for the foreshore of Lake Wanaka. With Mount Aspiring looming in the distance and the surrounding alpine scenery framing in all directions, it’s picture perfect.
That Wanaka Tree can be found just in front of the Wanaka Rotary Playground on Wanaka-Mount Aspiring Road. It’s usually swamped with crowds around sunset so it can be worth arriving during the day and getting creative with your composition instead.
Photo Tip: That Wanaka Tree has been photographed from almost every angle. Get creative to seek out a fresh perspective whether it’s in the trees, in the water or by creating an alternative foreground using fairy lights, reflections or flowers.
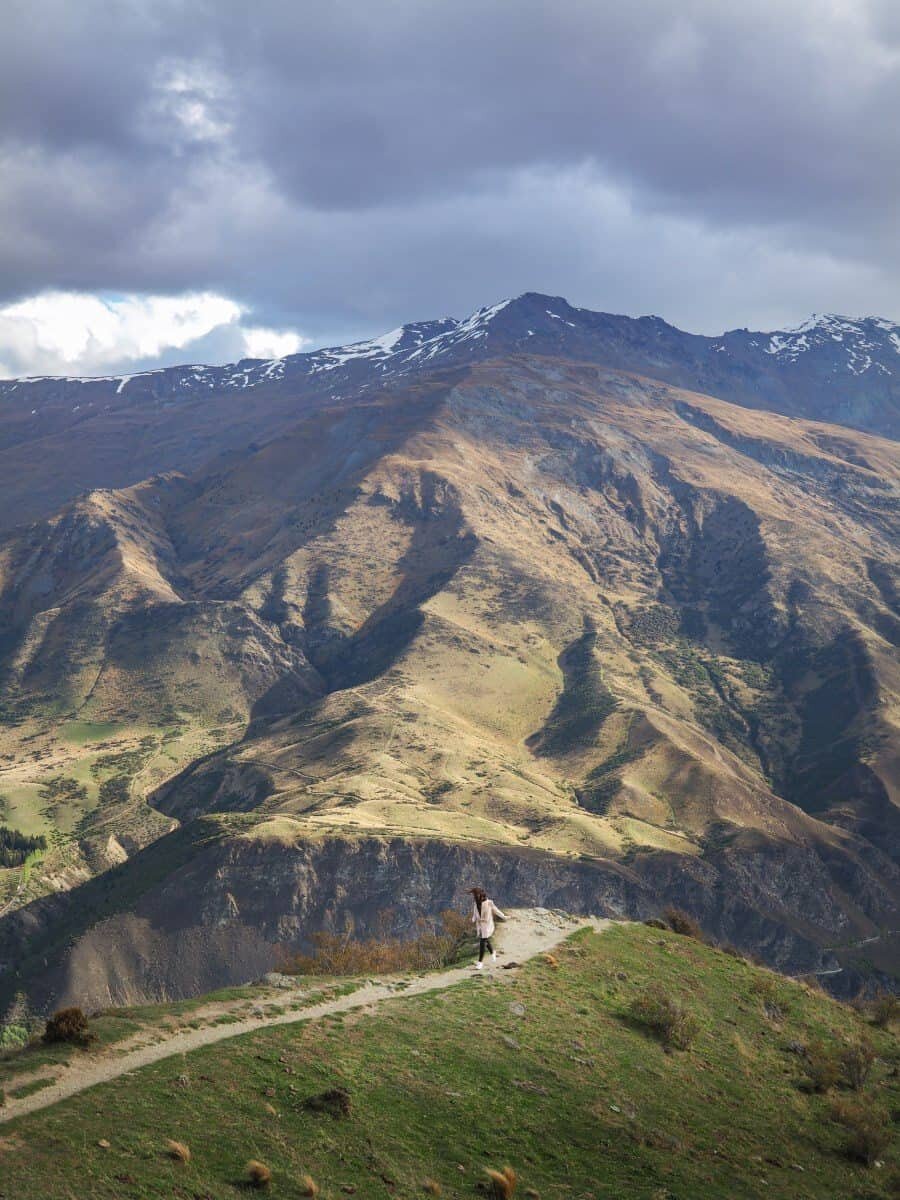
5pm Crown Range
Driving back from Wanaka to Queenstown, there’s perhaps one of the most scenic roads in New Zealand. The Crown Range is covered in snow during the winter months so can be a little tricky to cross but if you can make it over, the views are well worth the effort!
Because we were there in late October, there was no snow, only epic mountain views in every direction. As you drive over the range the winding roads are an image waiting to happen with a natural perspective already happening before you.
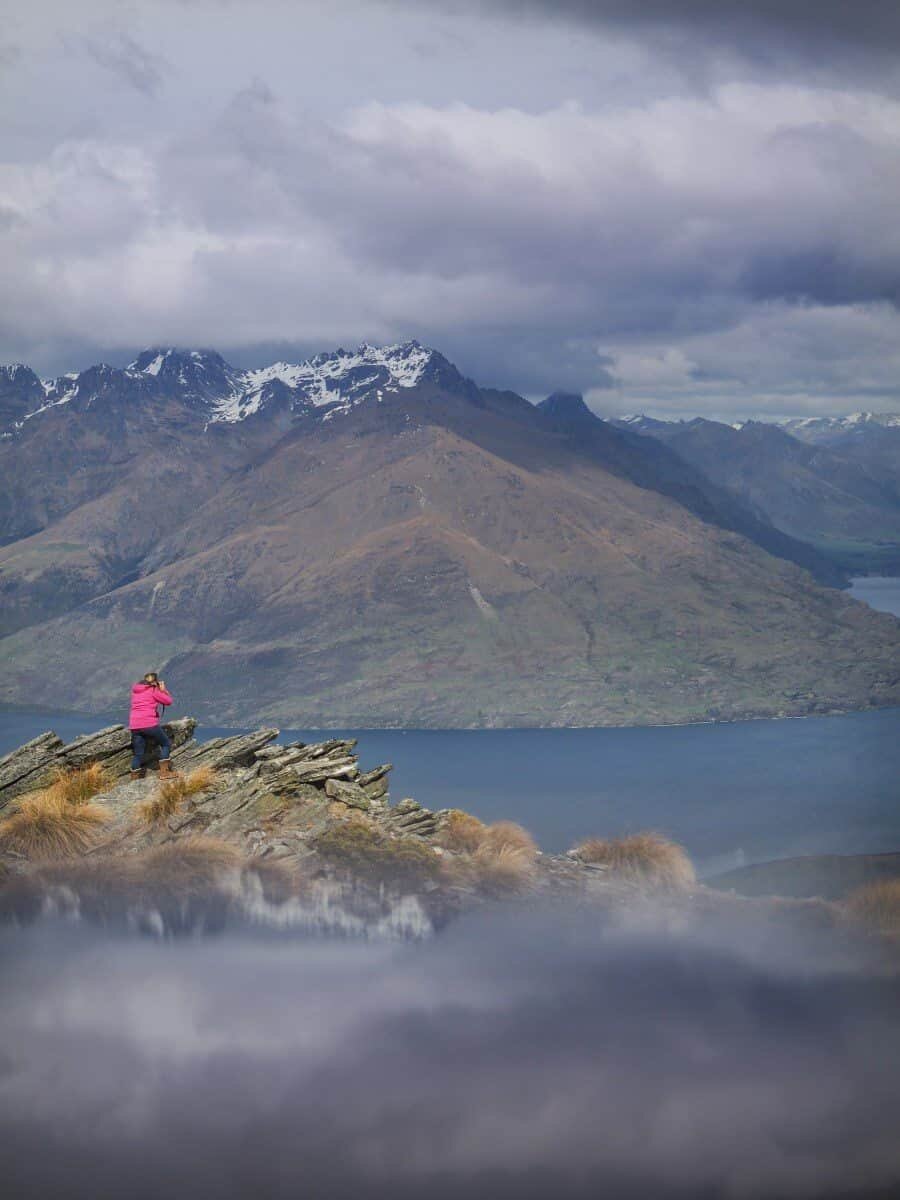
At the top you’ll find two look outs, both worth a stop to capture some landscape images.
Once you’re over the range on the way back down towards Queenstown you’ll come across the second look out which has a smaller carpark. Pull over here and take the little ladder over the fence to be rewarded with views down into the valley and a small track that’s ideal for portraits.
Photo Tip: Use the track at the second look out to creative perspective with someone standing in the distance. Having a subject will help to showcase just how incredibly huge the landscape really is!
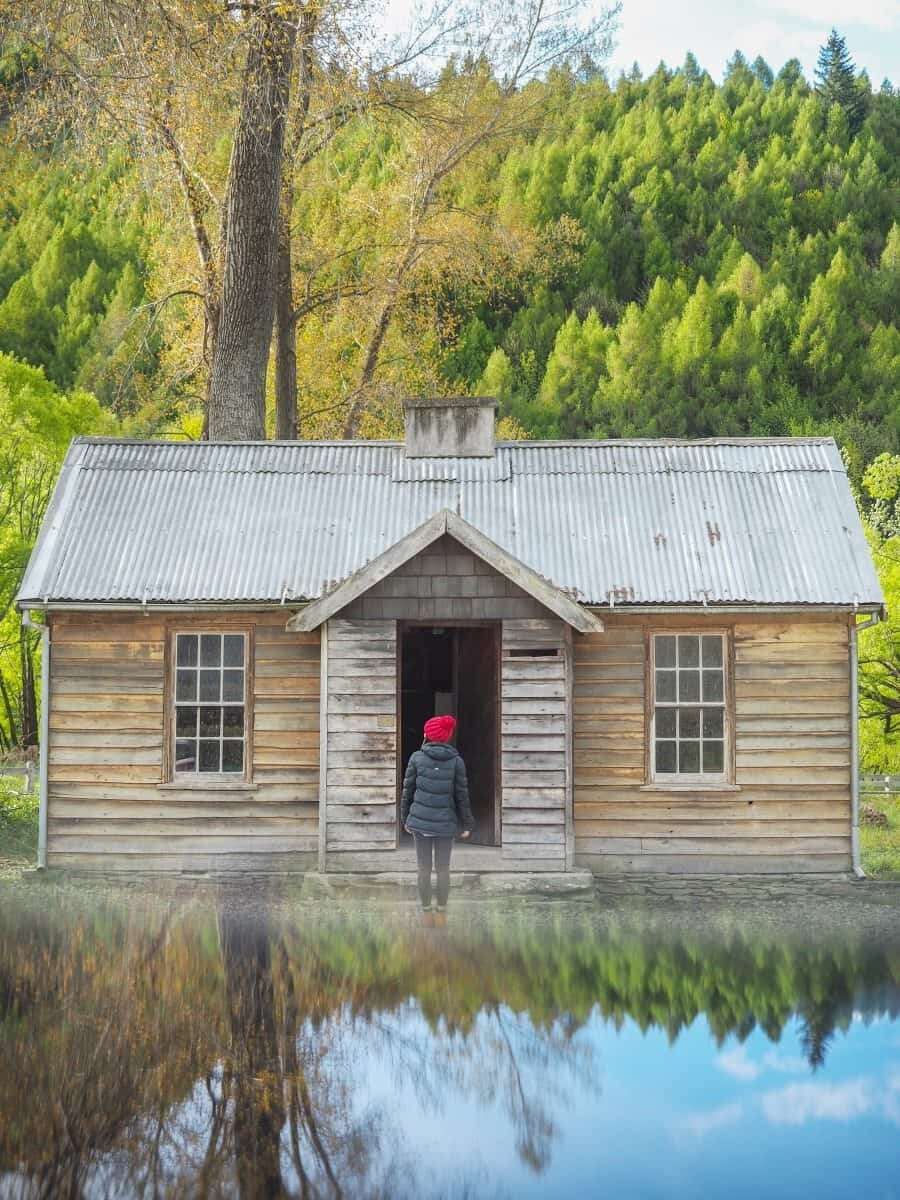
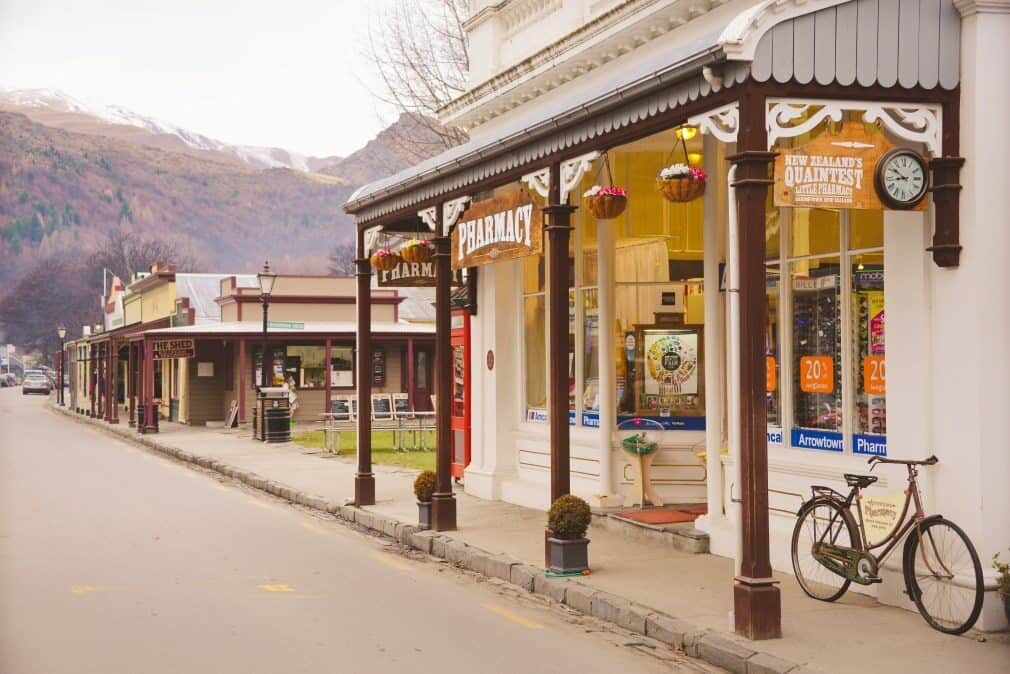
6pm Arrowtown
If you’ve read The Wandering Lens before you may have noticed that I love Arrowtown. It’s quaint, it’s historic and it’s bordered by natural beauty that changes with every season.
Arrowtown is only a 20-30minute drive from Queenstown and is one place I ALWAYS recommend people visit to capture some beautiful images.
The main street of Arrowtown still looks like there could be a Gold Rush tomorrow, while the Arrow River and its alpine streams and mini rapids are ideal for landscape lovers.
One of the most popular locations for photographers is a wooden cabin that’s positioned right in the middle of the carpark by the reserve. As part of the historic Chinese Gold Mining Settlement, the cabin is a regular feature across Instagram and provided no one has parked right beside it, makes for a great shot.
Photo Tip: Explore Arrowtown from all angles. There’s so much to capture here so take a wander, relax and keep your camera ready! If you’re keen, it’s worth having a pair of gumboots (or Wellingtons in NZ) so you can wade through the shallow waters of the chilly Arrow River.

Also, a little tip…on the drive from Arrowtown back to Queenstown you’ll pass A LOT of fields filled with horses and sheep. Keep your eyes peeled for little lambies during Spring!
Day Two –
9am to 12pm
Queenstown to Glenorchy Road Trip.
A drive out to Glenorchy is an essential part of any trip to Queenstown. With so many photography locations along the route, you’ll be easily able to spend a few hours or even an entire day just on this road alone.
Within just a few minutes from central Queenstown you’ll witness Cecil Peak and Walter Peak across Lake Wakatipu with vantage points at Sunshine Bay and then continuing alongside the road.
A favourite spot of mine is Wilson’s Bay. With the carpark right beside the lake you’ve got immediate access to the shores of Lake Wakatipu and it’s here that gentle waves lap over the little rocks as the mountains dazzle in the background.
Next up is Bob’s Cove where you can hike through pine forests or further down the road is Bennett’s Bluff for views like no where else. From this look out you can capture the road winding off into the distance as it snakes beside the lake.
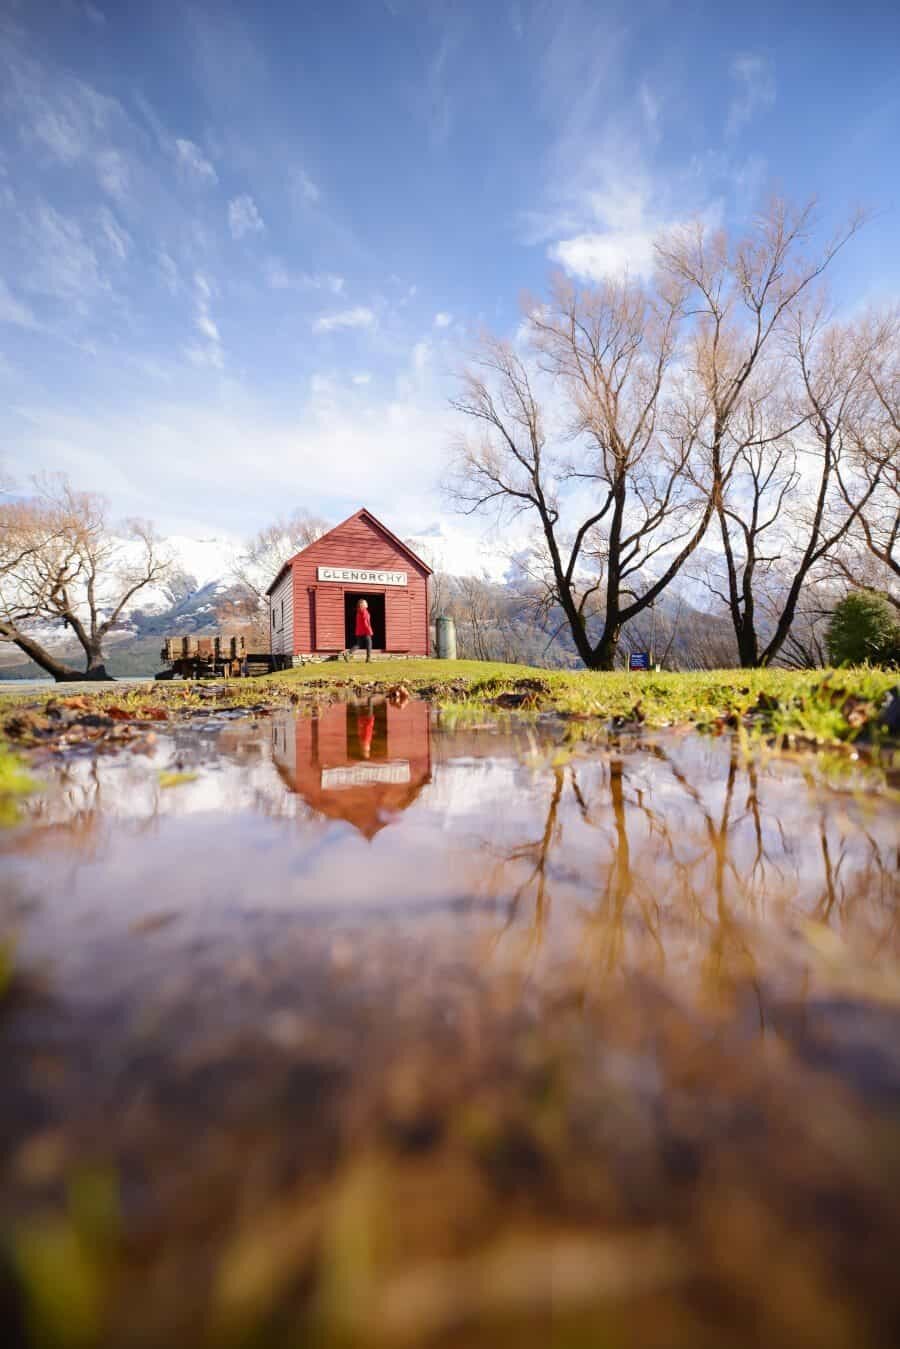
Once you reach Glenorchy most people head straight for one place…the photogenic ruby red Glenorchy boat shed and jetty. Popular for good reason, this wooden shed works really well with capturing portraits and framing someone within the entrance.
Photo Tip: Do a self-drive trip to Glenorchy so you can stop whenever you like! If you’ve got a 4WD you can access other areas along the route such as Moke Lake which is found at the end of an off road track on Moke Lake Road.

So you may have noticed there’s still two hours left in the 48hr itinerary!? Or maybe not…either way, it’s for one reason. Fergburger.
Now I’m not a huge foodie but if you love a good burger and chips, there’s one place in Queenstown that you have to try, if only for the atmosphere! I’ve allowed two hours for this because the line can be crazy long and it’s best enjoyed down by the lake in front of the beautiful and photogenic Queenstown Gardens.
READ MORE:
To read more about photography locations in and around Queenstown take a peek at the following guides I’ve written previously…
Queenstown Photography Locations
Exploring New Zealand – Wanaka + Queenstown
Behind The Lens – The Duck Photo, Queenstown
Destination Wedding: An Elopement on Cecil Peak, Queenstown (some of my wedding work!)
GEAR LINKS:
If you’re keen to check out more information about the Olympus OM-D E-M10 Mark III that I was using on this trip, visit the Olympus Australia website for more details.
Queenstown Photography Locations in 48hrs

Queenstown Photography Locations in 48hrs
Hello! I’m the founder and photographer behind The Wandering Lens.
With 17+yrs experience as a professional travel and landscape photographer, all advice found on this site is from my personal experience on the road. I hope it’s useful for your own travels and would love to hear in the comments about your trips and experiences around the world.
Blog Comments
Sarah
November 26, 2017 at 12:54 am
Your pictures are magnificent! And your post is so helpful. I visited both Arrowtown and Wanaka, and I love experiencing them again through your lens! Your shot of That Wanaka Tree is great – a unique take on that popular shot. And that picture of the wooden cabin in Arrowtown is just remarkable.
Savannah
November 26, 2017 at 4:21 am
Wow your photos are lovely! This is such a great guide with really useful info! I’m heading to New Zealand next year so I’m really excited to use this guide for all these great spots! 🙂
thewanderinglens
December 10, 2017 at 4:03 pm
Hi Savannah, great to hear you’re heading to NZ next year. It’s SO beautiful, definitely worth planning some spots to visit so when you arrive you can hit the ground running 🙂
Peter Thurston
January 6, 2018 at 7:42 pm
Good to hear you are enjoying the Olympus gear, I am thinking of switching to a smaller kit and have been toying between Sony and Olympus for a few months. Do you notice a difference or miss your old camera?
Ingrid
February 16, 2018 at 8:37 am
Queenstown is just the best! I’ve been a few times but am always looking for new places to stay which is how I found your guide.